How to Setting your Spectre Cloudimage.png
1.Click on "Settings"located on top to the Spectre cloud.

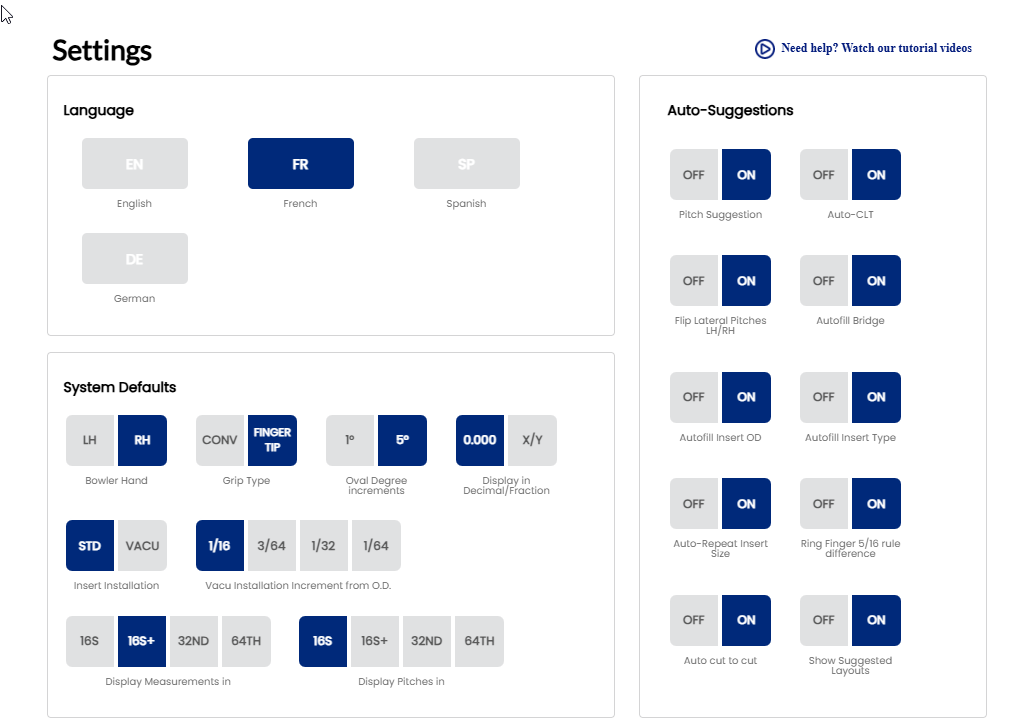
Then you get acces to the menu of "Settings"
2. You can adjust your" Language" , "System defaults" , " Thumb Hole Preferences" , " Drill Press Calibration" , "Layout Preferences" , "Auto-Suggestions"
2. The "Language" can be adjusted at your preference. For example for english version then click "EN" and will fall dark blue . Ex:
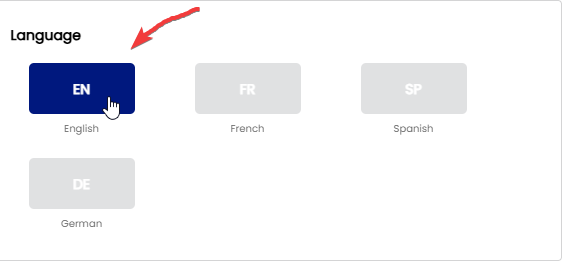
Your Spectre Cloud is now set in English . Ex:
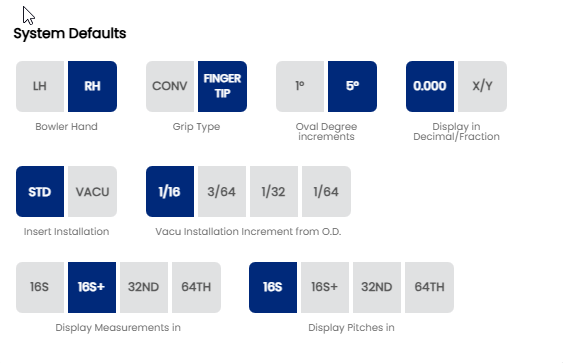
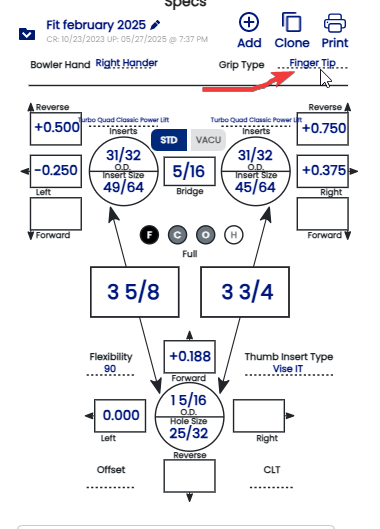
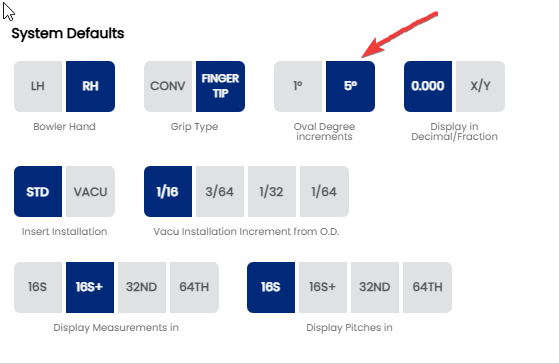
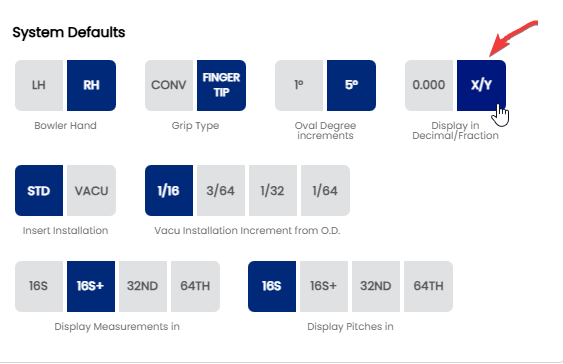
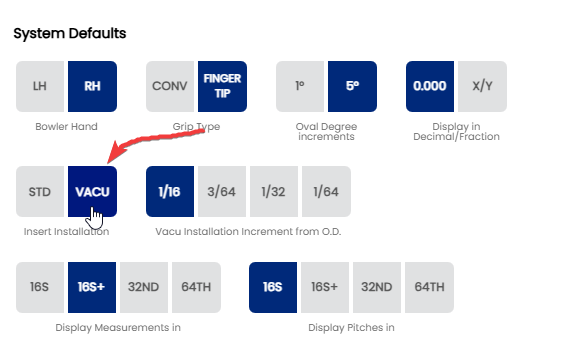
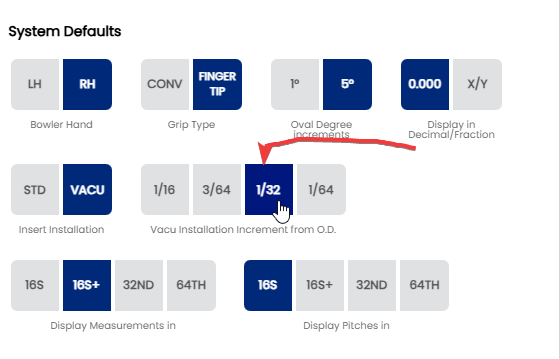
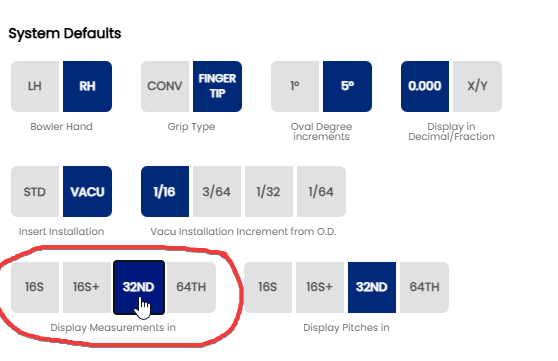
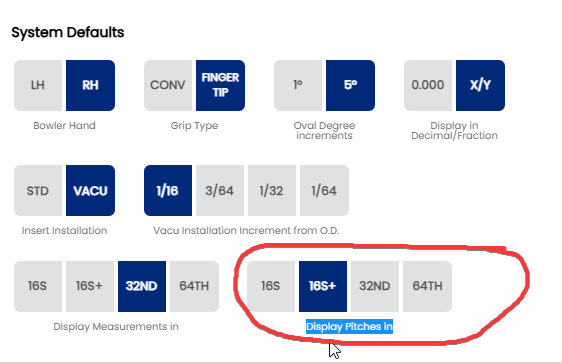
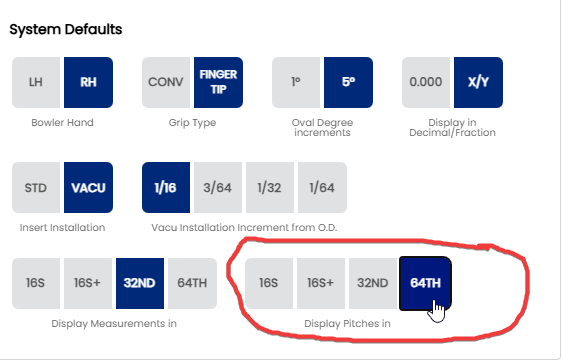
The "System Defaults" is the option where your Spectre is set by defaults . You can change your preference at any time . On this example you can see "Bowler Hand" set for RH ( Right Hander) , Grip Type ( Finger Tip) , "Display in Decimal/Fraction"(0.000) , "Oval Degree increments"(5 degrees) , "Inserts Installation (STD) , " Vacu Installation Increment from O.D." (1/16), " Display Measurements in"(16S+) and "Display Pitches in" (16S).
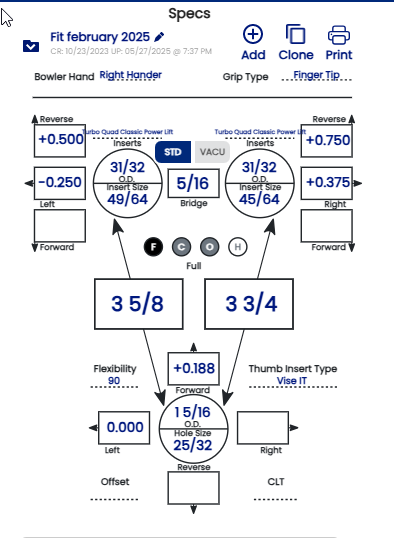
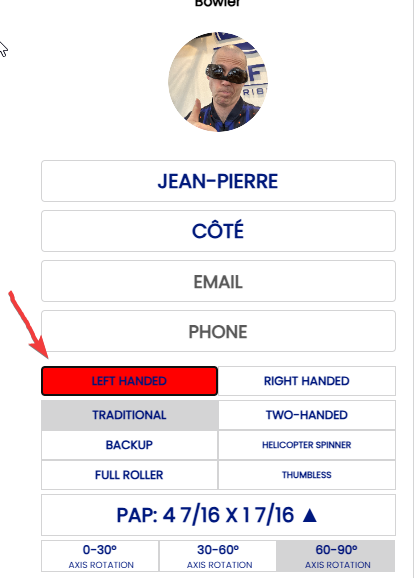
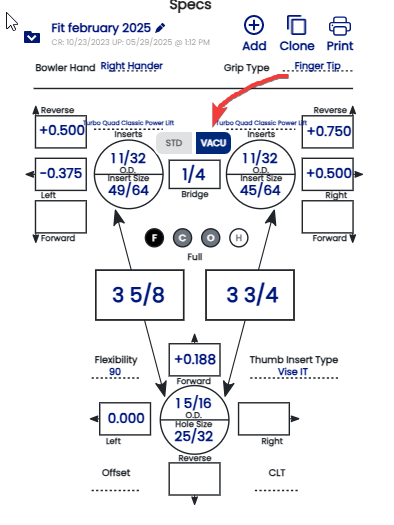
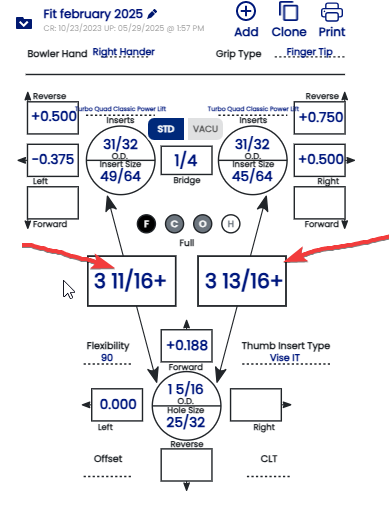
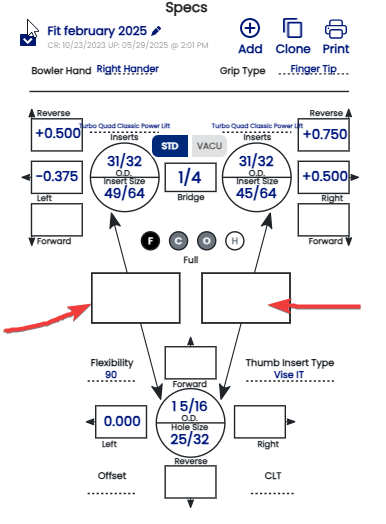
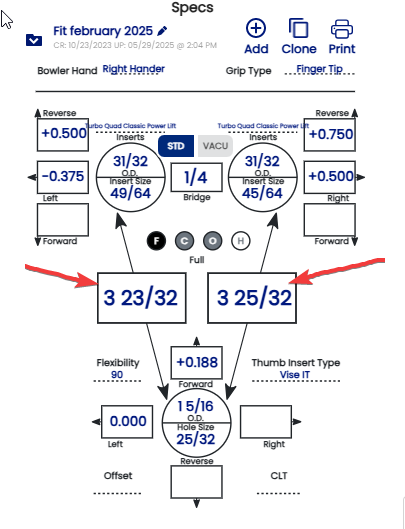
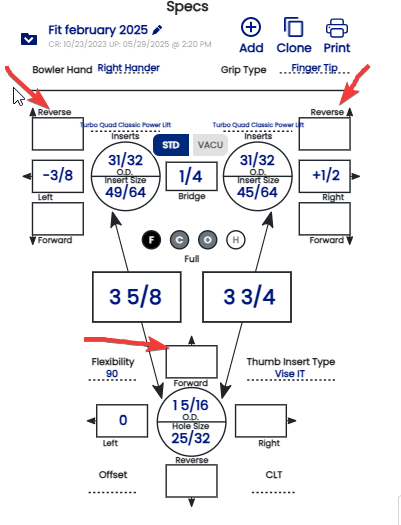
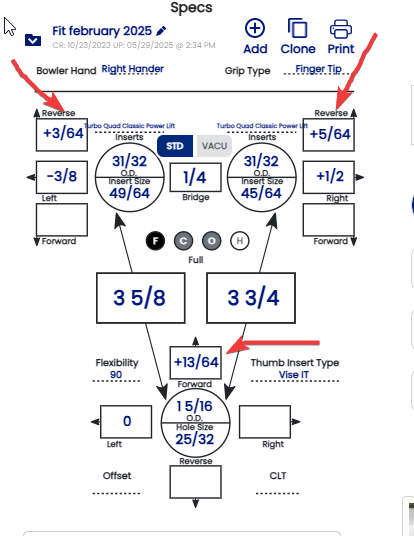
When you open the Spec Sheet it will be show this example :
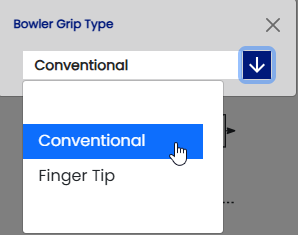
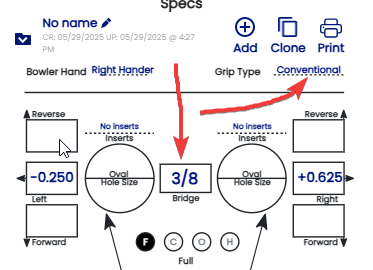
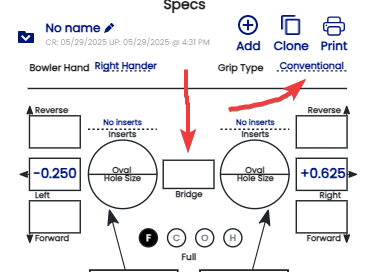
You can change all setting ex: "Grip Type " ( Finger Tip) to conventional see example below:
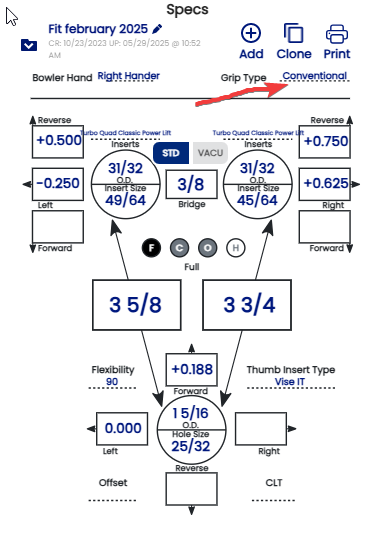
Now the sheet is turned conventional :
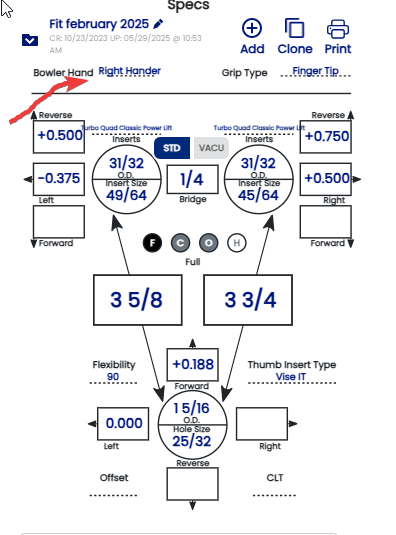
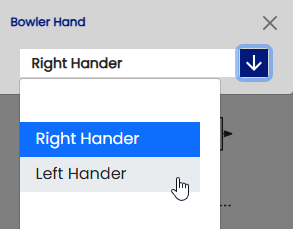
The same process for the "Bowler Hand"


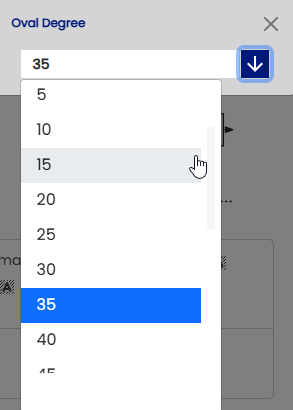
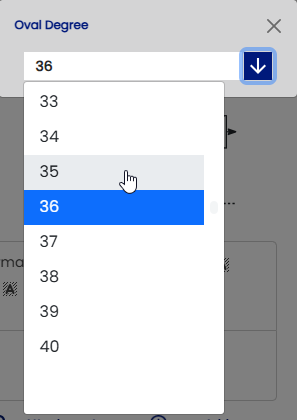
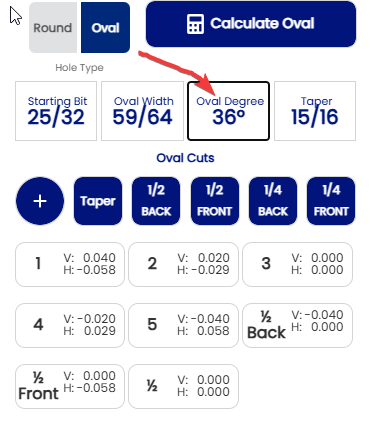
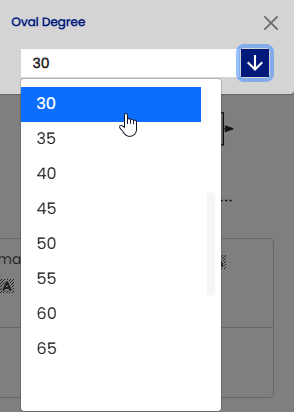
The "Oval Degrees Increments" can be changed at your preference as well . On this example you will see the oval degrees by 5 degrees increments ex:

Bowlers who are more specific in Oval degree can select 1 degree increment see this example :

The "Display/Fraction can be modified . Some drill press work with fraction other with decimal . Let see the example if you work with decimal :

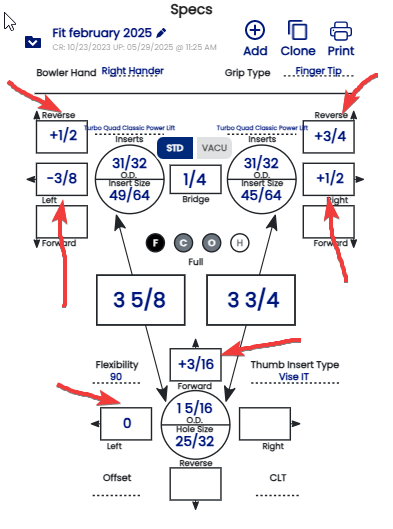
For drill press working with fraction see this example :
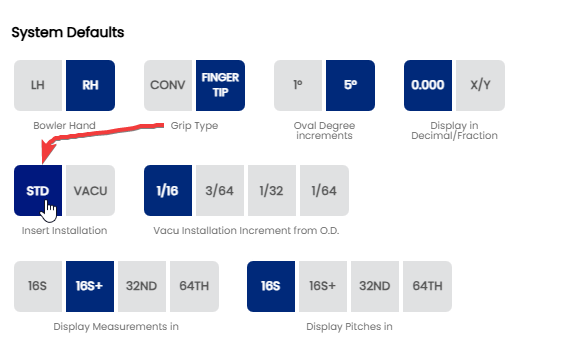
The "Insert Installation" can be changed some bowlers have preference in finger drilling with inserts. The "STD"( standard) grip or "VACU" grip :
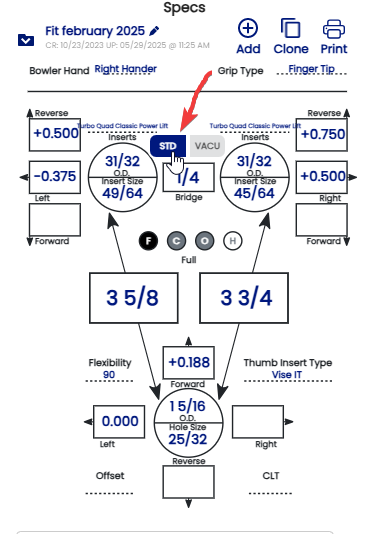
The "STD" (standard) example :
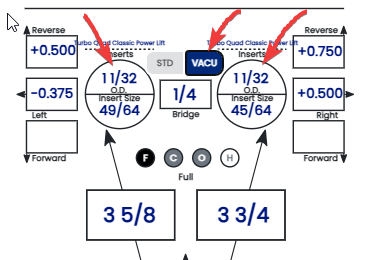
The "VACU" grip example :
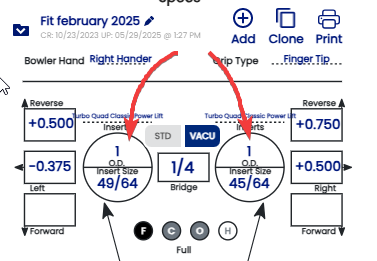
The" Vacu Installation Increment from O.D." can be determined on this section :
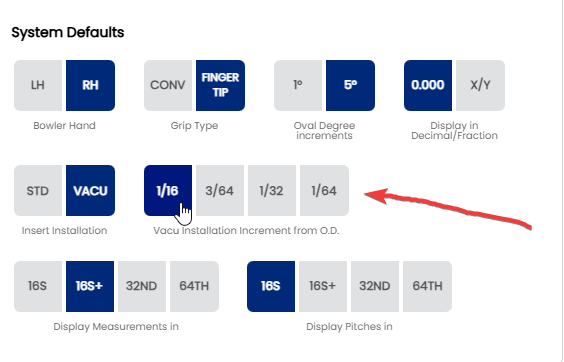
The size selected will be bigger from the standard size , on this exemple using a 31/32 drill bit for standard grip will be 31/32 + 1/16 = 1 1/32 see this exemple below :
Some bowlers are more specific in feeling on "VACU"grip than can use different size . Other example using 1/32 bigger from the standard grip : 31/32 + 1/32 = 1 .. See the example below :
The measurement can be set on "Display Measurements in" section. For this example selected 16S+
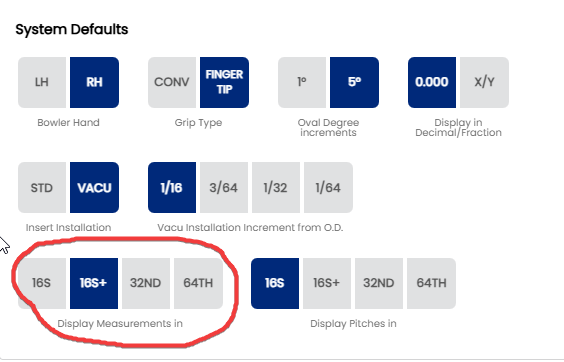

Other example if you work with "32ND"
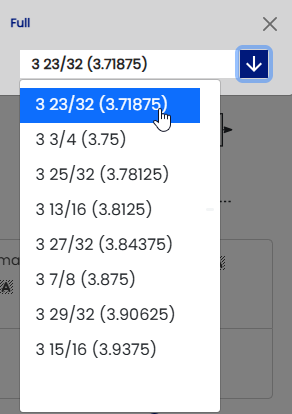
The pitches for thumb and fingers can be set on " Display Pitches in " section . On the 1st example using 16S+

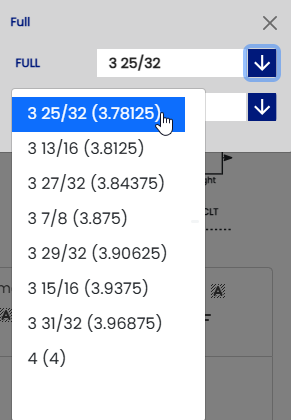
Other exemple using "64Th"

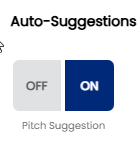
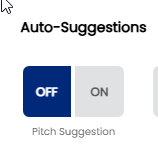
The " Auto-Suggestion " section can be turn "ON" OR "OFF" in your preference . Leaving all "ON" is recommended !
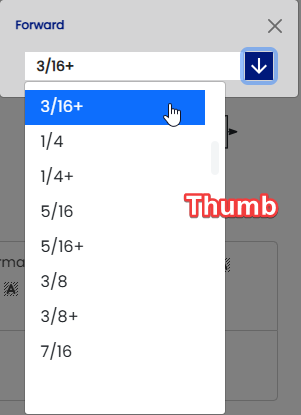
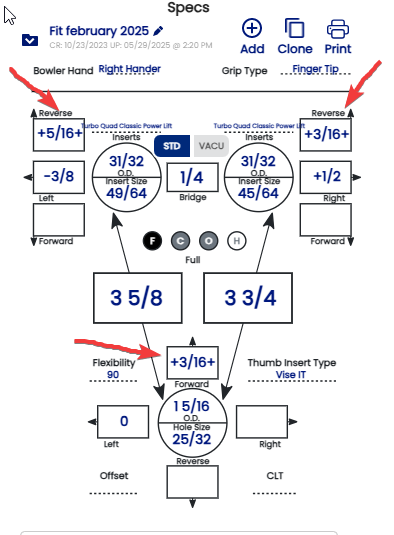
1. "Pitch Suggestion" is automatically suggested based on your flexibility of the hand see that example below by leaving this "ON" you save time of work !!!

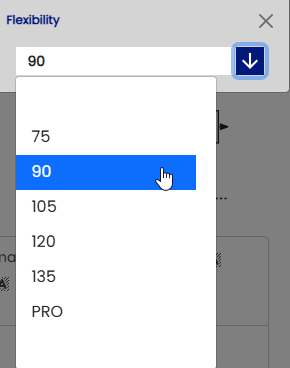
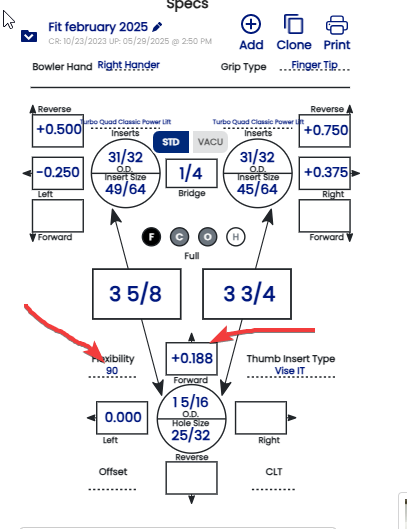
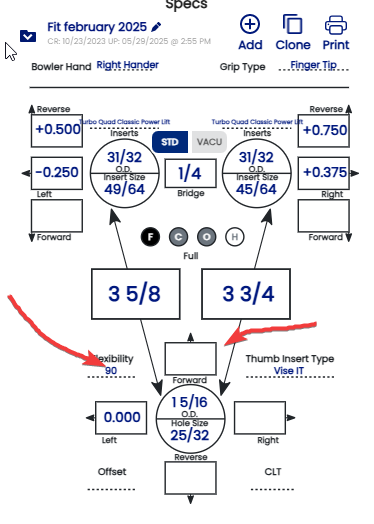
The Pitch suggested for 90 flexibility in relation with the span is 0.188 forward or ( 3/16) from the chart . Turning the pitch suggestion "OFF" will not indicate the suggested pitch and you have to find manually on the chart !!! See the picture below
The "Auto-CLT" is the lateral pitch of fingers suggested based on the chart for people having angle on fingers, Leaving at "ON" will find automatically the lateral pitch suggested from the standard lateral pitch see the picture below :

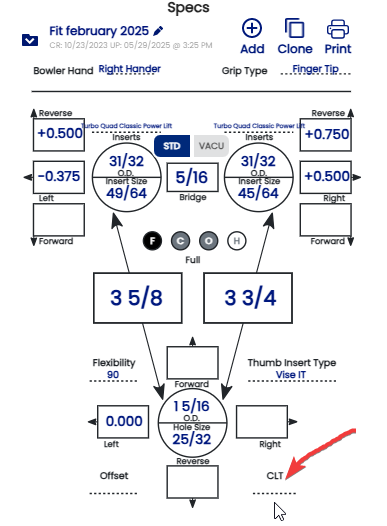
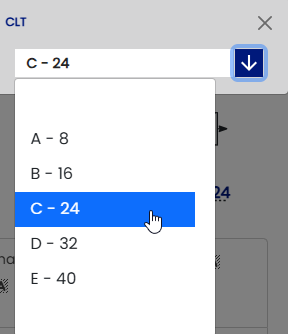
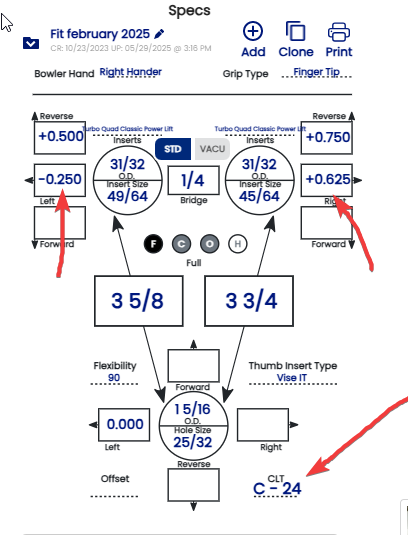
By using 24 degree CLT the pitch fall automatically 1/4 left for the middle finger and 5/8 for the ring finger based on the CLT chart.
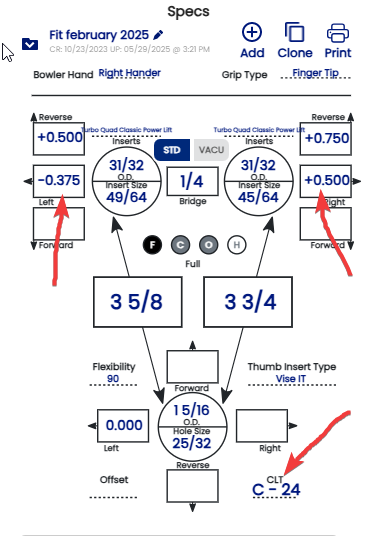
Turning the Auto-CLT "OFF" will not find the automatically suggested lateral pitch see the picture below:
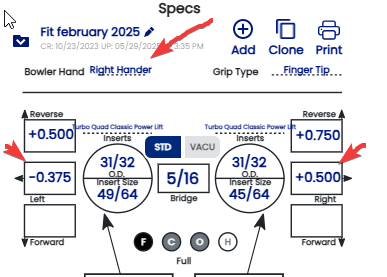
The "Flip Lateral Pitches RH/LH will automatically inverted the lateral pitches of fingers by changing the Bowler Hand .
See the example below when the stetting is "ON"
Actually :
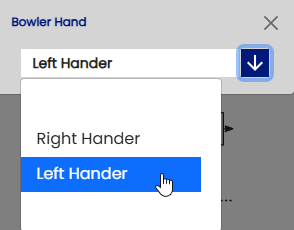
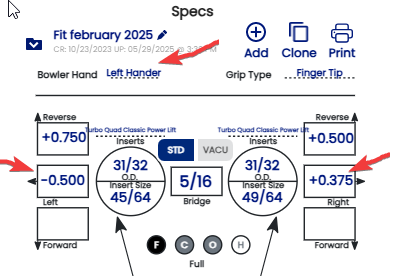
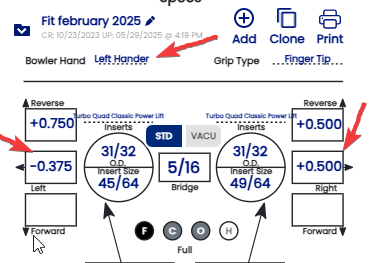
After selected Left Hander the lateral pitches are automatically inverted !!!!
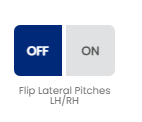
By leaving this option "OFF" that will not automatically inverted the lateral pitches see the picture below:
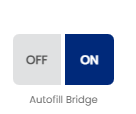
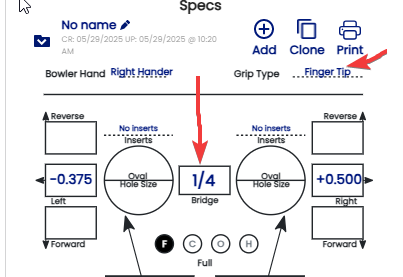
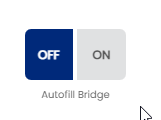
The "Autofill Bridge"will you automatically the standard length of the bridge in relation if the drill is finger tip (1/4) or conventional (3/8) .You can adjust the bridge if necessary .
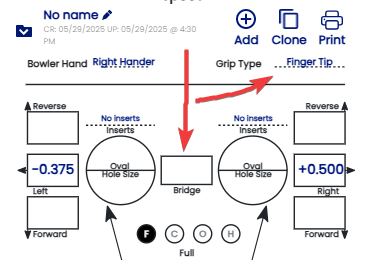
Example when the option is "ON"
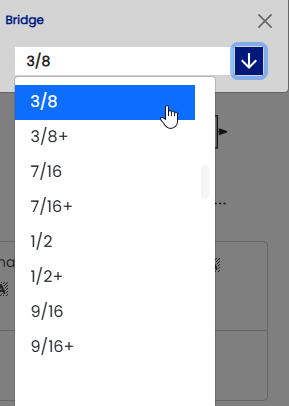
By turning the option "OFF" they will leave the section "bridge blank" and you have to select manually the size of the bridge see the picture below :
Select the size of the bridge on the" Bridge"section
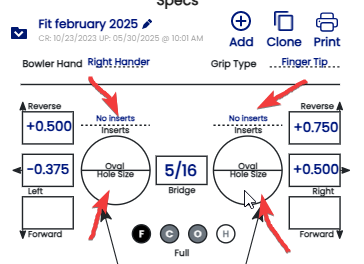
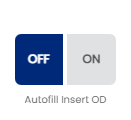
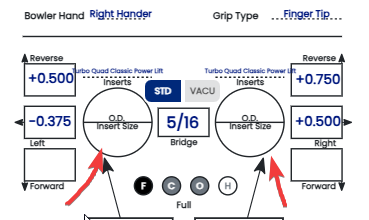
The "Autofill Insert OD" is the option who give automatically the size of the drill bit in relation of the type of grip selected . It can be different depending of the size , the type of the grip , "VACU" or"STD " grip ! See the example when you leaving the option "ON" :


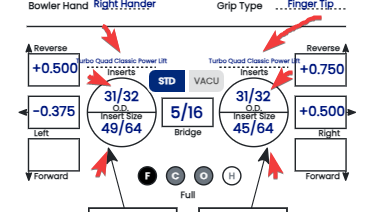
If you turn the option "OFF" that will not give the size of the drill bit automatically see the example below :
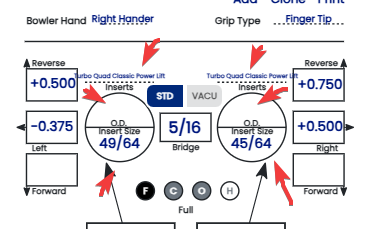
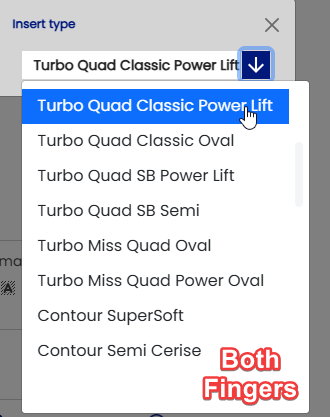
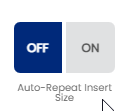
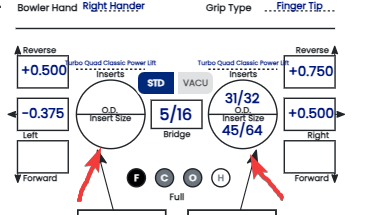
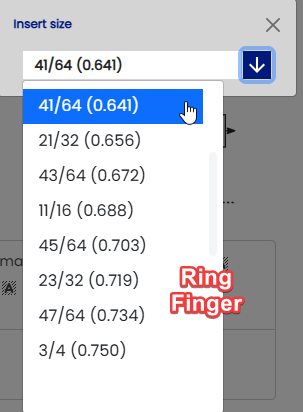
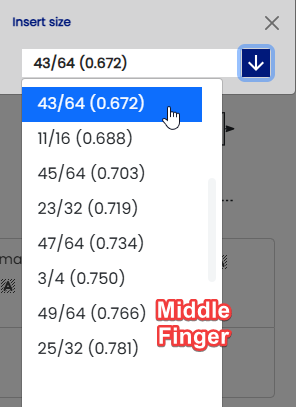
The "Auto-Repeat Inserts Size" will give you automatically the same size when you select the size of the ring or middle finger . See the example when the option is "ON".
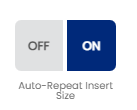

You can change the size of the middle finger depending on which size you find from your bowlers. By leaving the option "OFF" that will not give you the same size of the other finger see example :
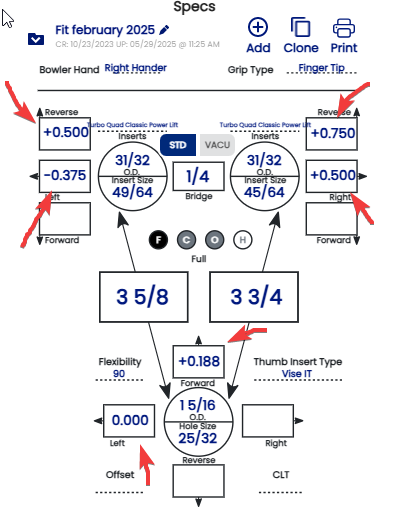
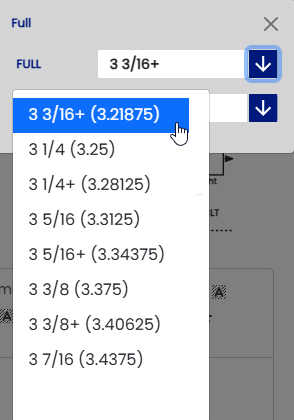
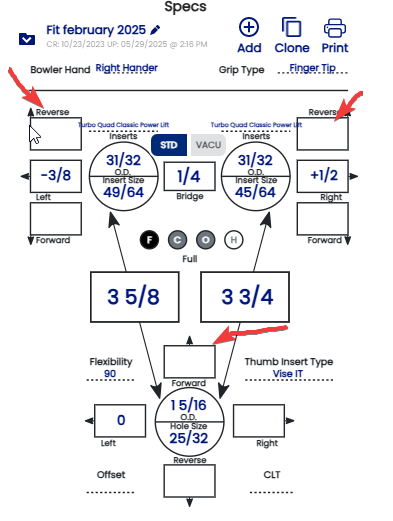
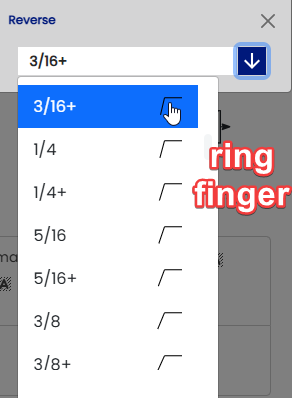
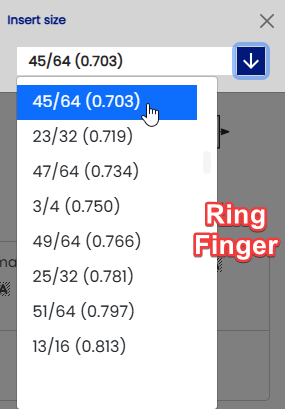
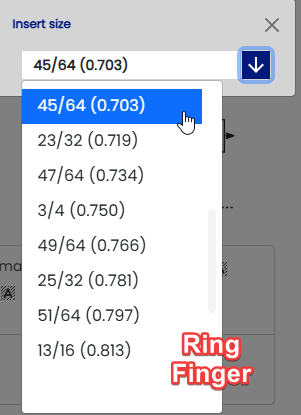
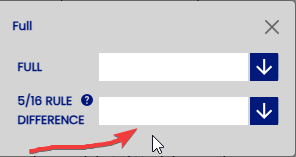
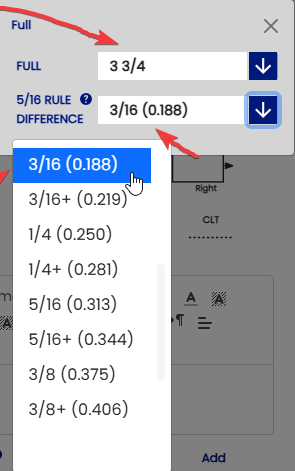
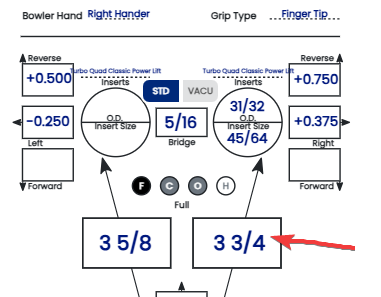
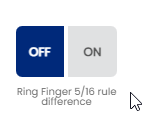
The " Ring Finger 5/16 rule difference "is the option who give you automatically the span distance from your ring finger based on the 5/16 rule from the chart. See the example when the option is "ON"
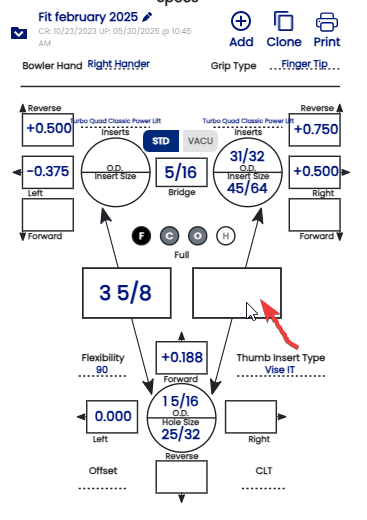
On this example if you measuring 3/16 then you will have 3 3/4 span distance !!
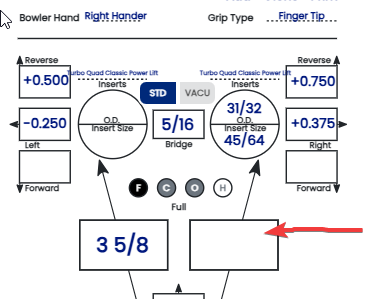
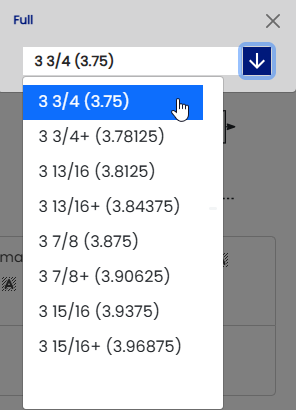
By turning the option" OFF" the 5/16 option will not figure and you have to calculate manually the distance !! see the example : ( 5/16 - 3/16 = +1/8 )
Then 3 5/8 + 1/8 = 3 3/4
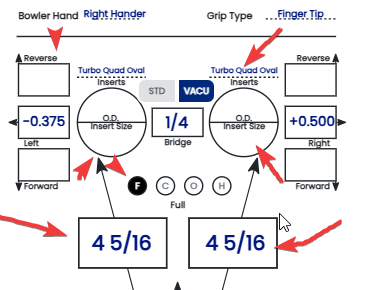
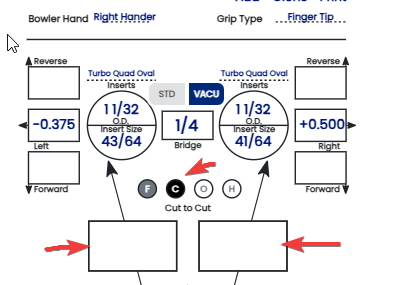
The " Auto cut to cut " is the option that give you automatically the "Cut to Cut measurement" based on type and size of inserts selected or no inserts. See the example below :
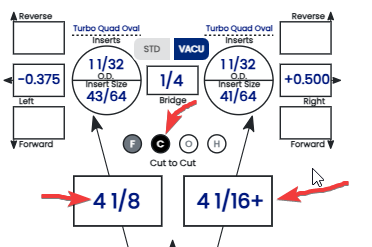
Turning this option"OFF" will not give you automatically the "Cut to Cut" distance !!

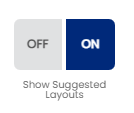
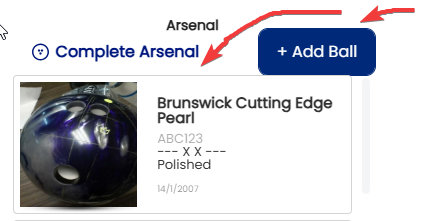
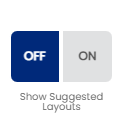
The " Show Suggested Layouts " is the option who suggest a type of layout depending what kind of reaction you looking for. All based on your axis rotation , pap, axis tilt , ball speed, and rev rate !! It's recommended to leave that option "ON" if you are not sure about layout !!! Here an exemple where is located the option is on "Arsenal "section
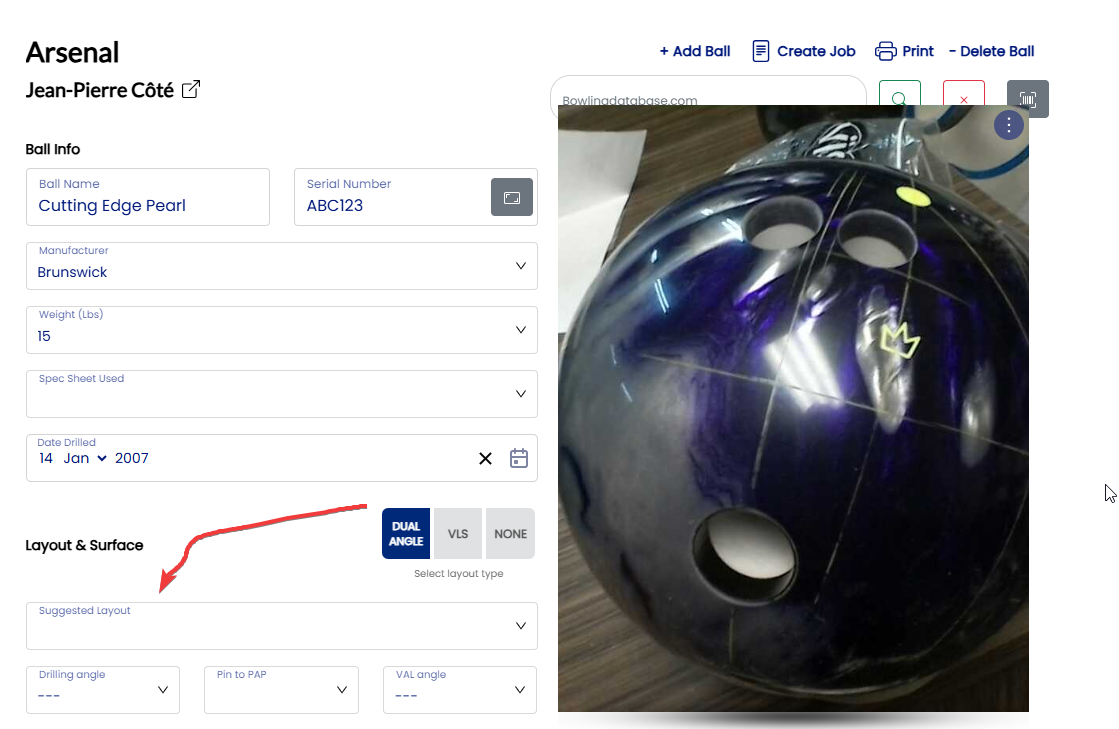
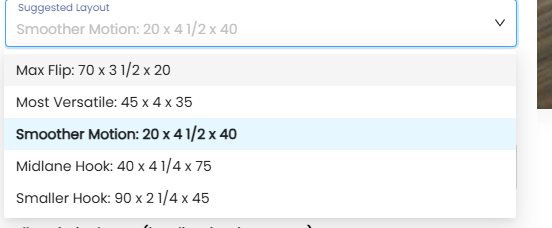
For example we use a Smooth Motion ball reaction then the layout will be finalized here
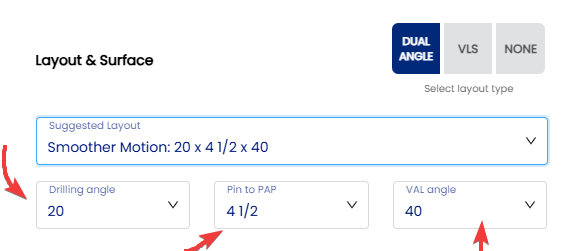
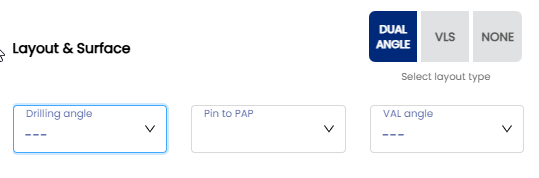
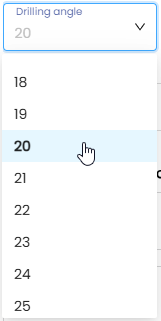
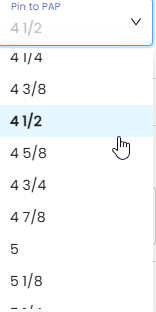
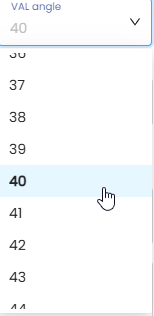
By turning the option "OFF" the "Suggestion Layout" section will not be there and you have to decide the layout manually by register the " Driiling angle " " Pin to PAP" " VAL angle on those section :

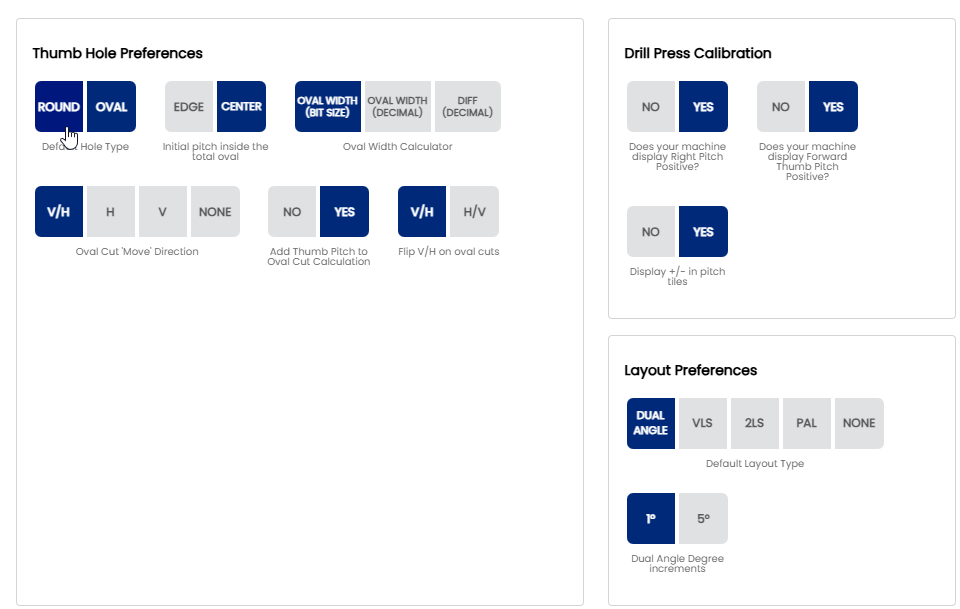
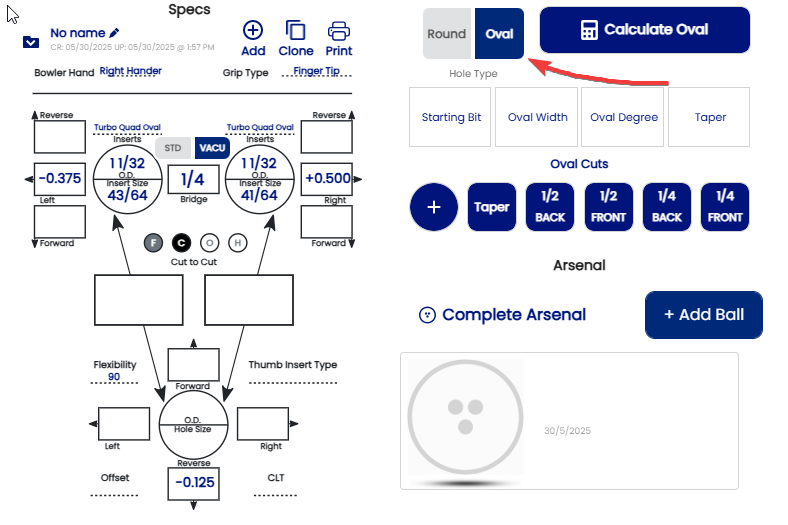
You can setup your "Thumb Hole" preference with 6 options:
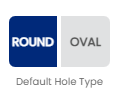
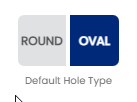
- 1. The "Default Hole Type" is in 2 options : "Round" or "OVAL".
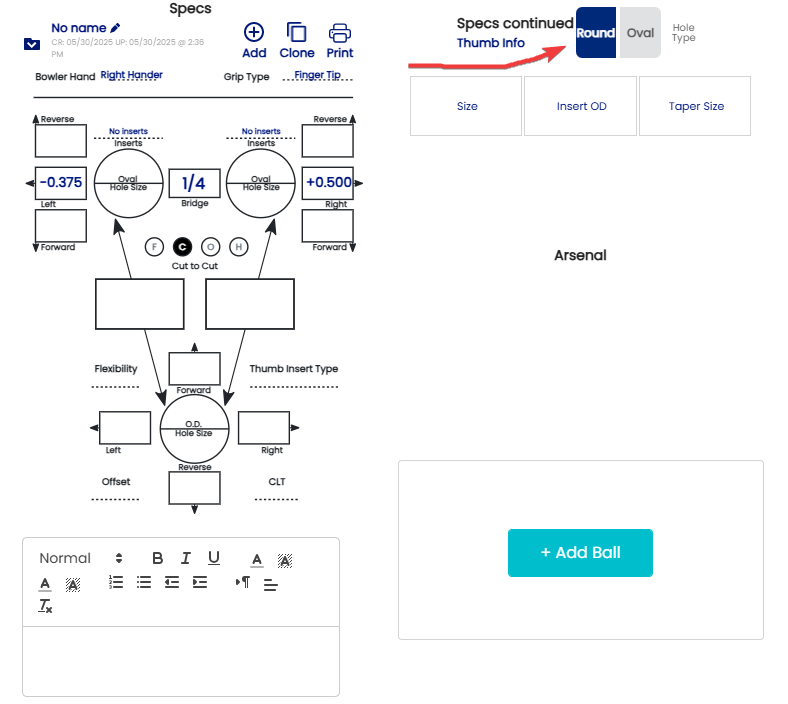
- For those drilling Round thumb the section here the example :

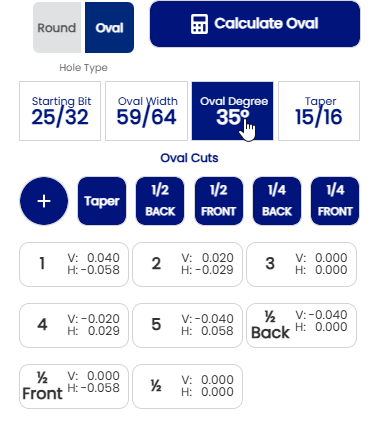
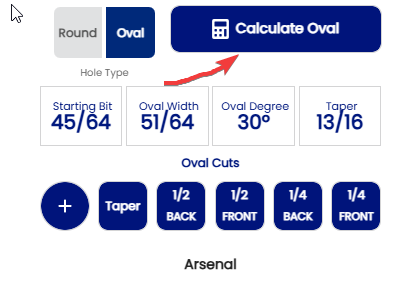
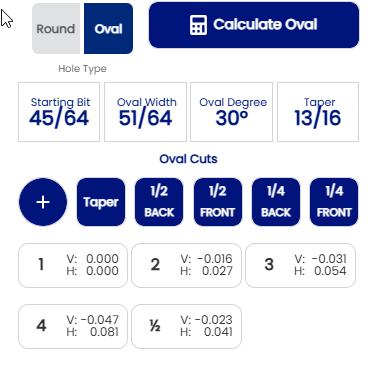
- For those drilling oval thumb here the example:

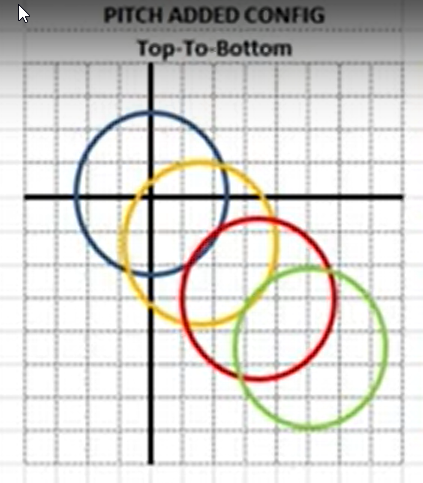
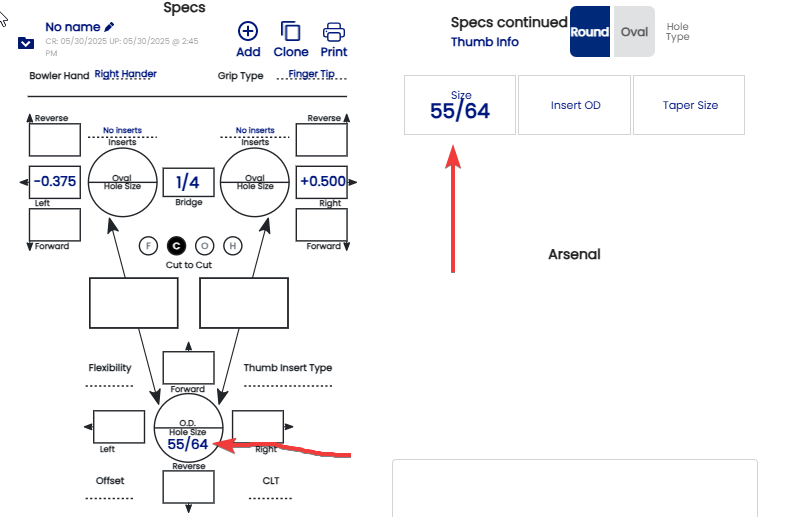
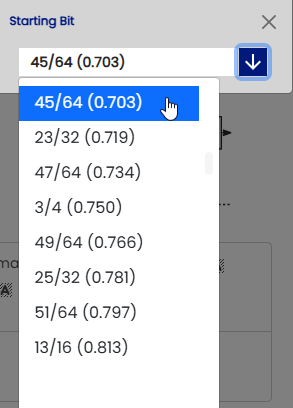
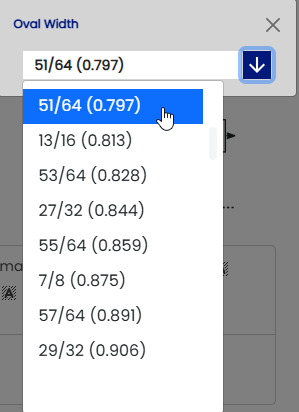
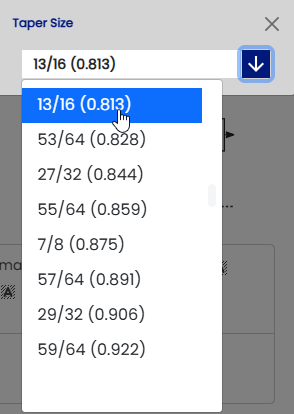
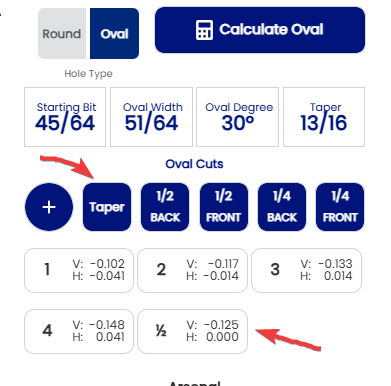
- After you selected the " Starting Bit","Oval Width","Oval Degree" and "Taper" that will calculate your cut to do see example below:


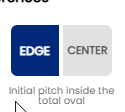
2. The " Initial pitch inside the total oval" come in 2 option ( EDGE & CENTER ) This is an example using 0 pitch
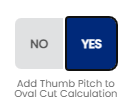
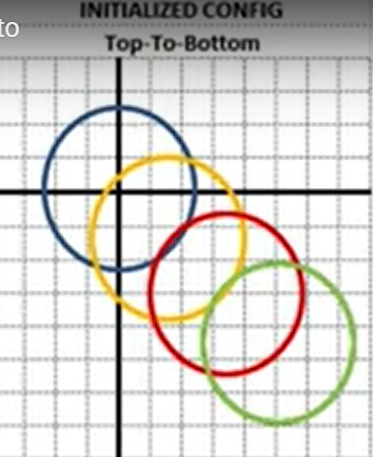
Using the"EDGE" (Initialized configuration ) ( No Add Pitch thumb )
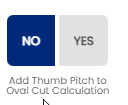

Using "EDGE" ( With add Pitch Thumb ):