Conventional Fitting
Anatomy of a Conventional Fit
Key principles
- Fingers are inserted into the second joint
- Thumb is seeded all the way into the bowling ball, up to the base of the thumb
- Good beginning grip
- Lower revolution rate at point of release
- Ball reaction is smaller and allows the bowler to focus on other aspects of their physical game
Step-by-step guide
Following these steps will ensure a proper fit
- Warm up the hand, massage/bowl
- Measure the MIDDLE FINGER
- Measure the THUMB FLEXIBILITY
- Measure FINGER and THUMB hole sizes
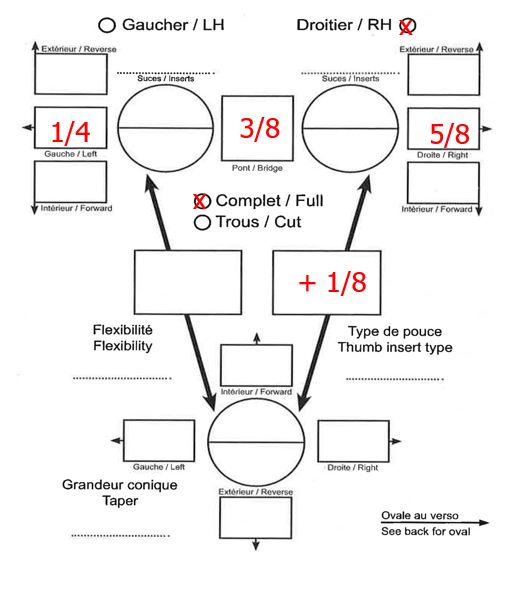
Constants to fill out on the spec sheet
- Before starting the measurement, you can already write down some data on your spec sheet.
- Bowler Hand (Left or Right)
- Bridge of 3/8
- Lateral Pitches of 1/4 (middle) and 5/8 (ring)
- Ring Finger measurement will always be +1/8 from the span measured on the next step.
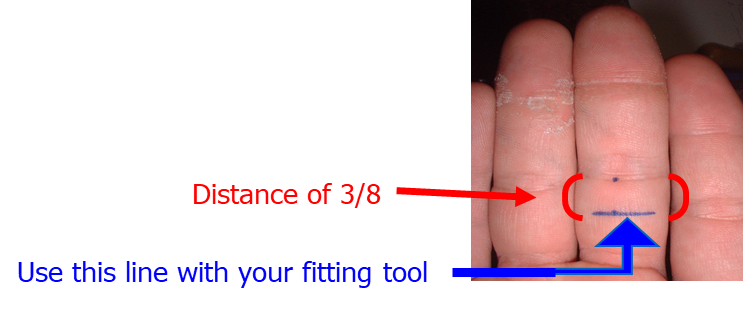
Mark the bowler's hand with a pen
- Mark the MIDDLE FINGER
- Find and mark the bending point of the SECOND joint.
- Measure 3/8 under the joint, draw a line.
- Use this line for your measurement.
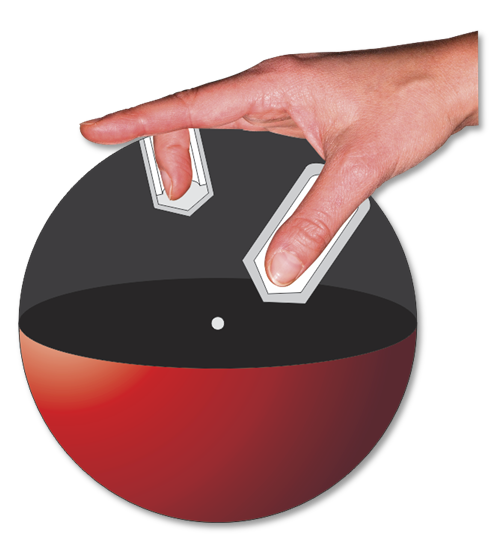
Using the fitting tools
- BT Ball Fitter
- Innovative Fitting Ball Prendre un photo avec le bal fitter pour montrer where to measure ??
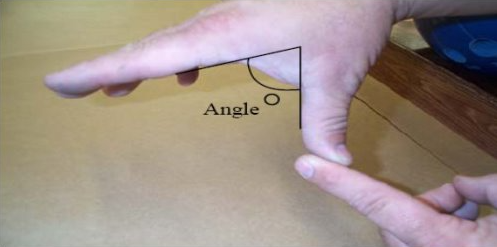
Evaluate the flexibility of the thumb.
The bowler's hand must be relaxed.
- Pull back on the thumb to measure flexibility.
- Follow the chart provided for the correct pitch based on span/flexibility
give a link to the chart ??
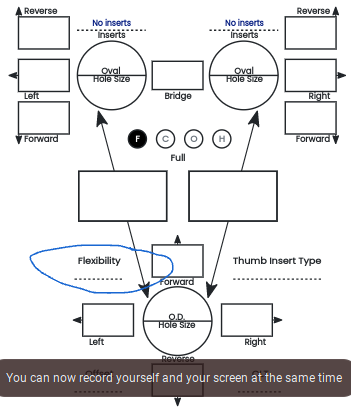
Complete your Fitting Sheet
- Finger Pitches
- Use the same pitches as what's in the thumb. Ex: Span: 3 1/2, flexibility: 120° = 3/8 forward
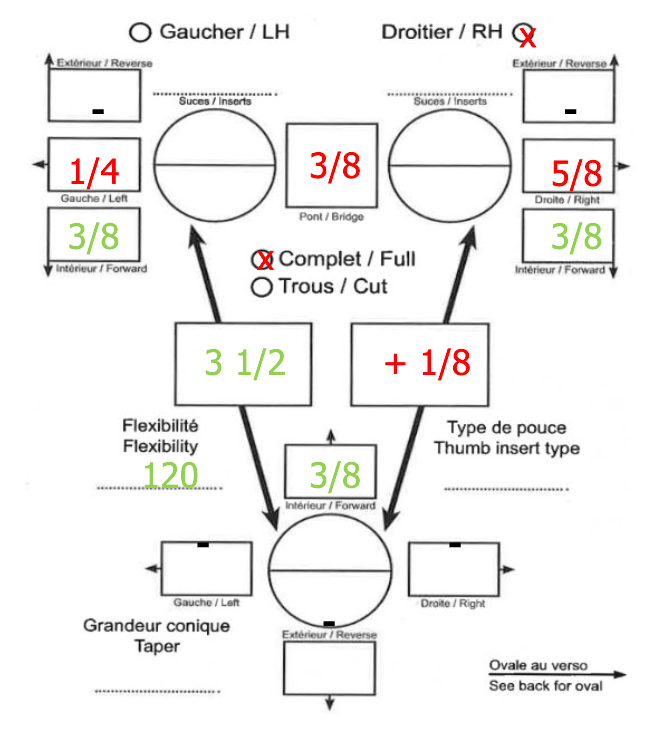
- Hole Sizes
- Select a hole size that... Fingers easily passes through up to but not including second joint même chose pour le pouce ?
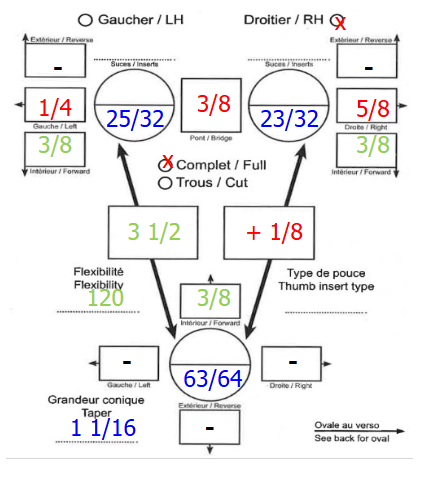
Not sure ? When in doubt, reduce the hole by 1-64 inch. You can always enlarge the holes.