4.4 — Finger Measurements
- 4.4.1 Round finger holes, no inserts
- 4.4.2 Finger inserts
- 4.4.3 STD vs. VACU
- 4.4.4 Oval fingers, no inserts
- 4.4.5 Inputting pitches
- 4.4.6 CLT (Center Line Transformation)
4.4.1 Round finger holes, no inserts
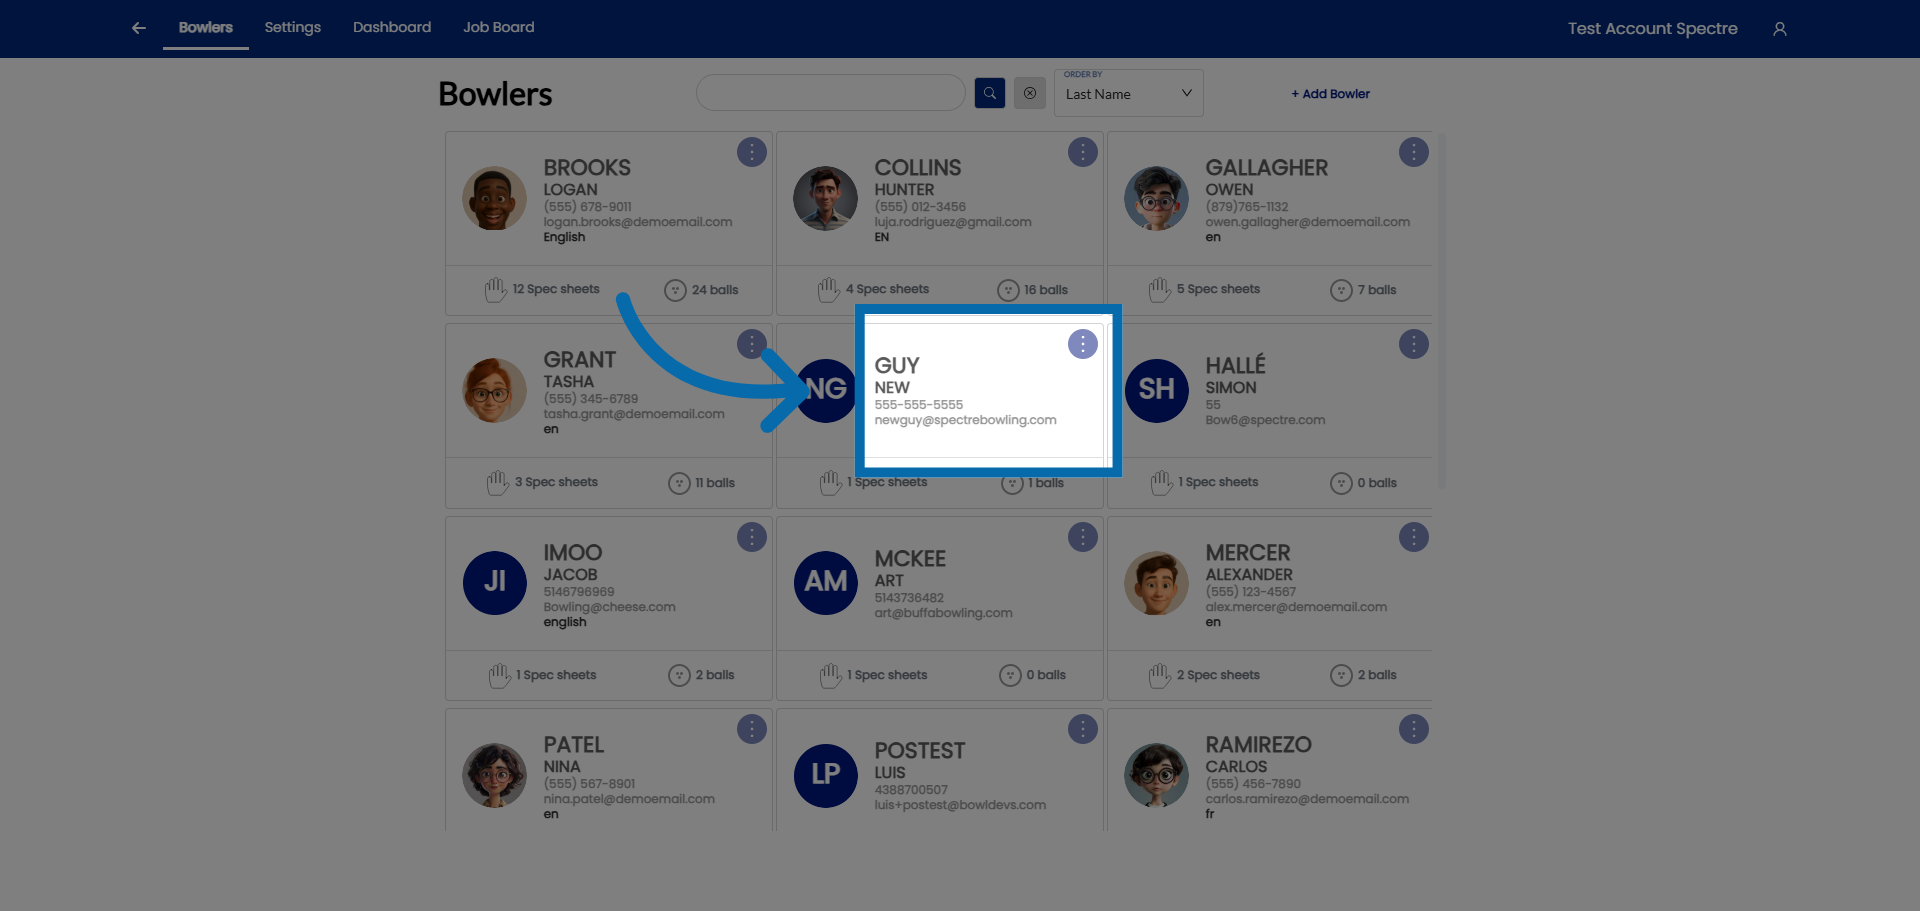
1. Select Customer Account
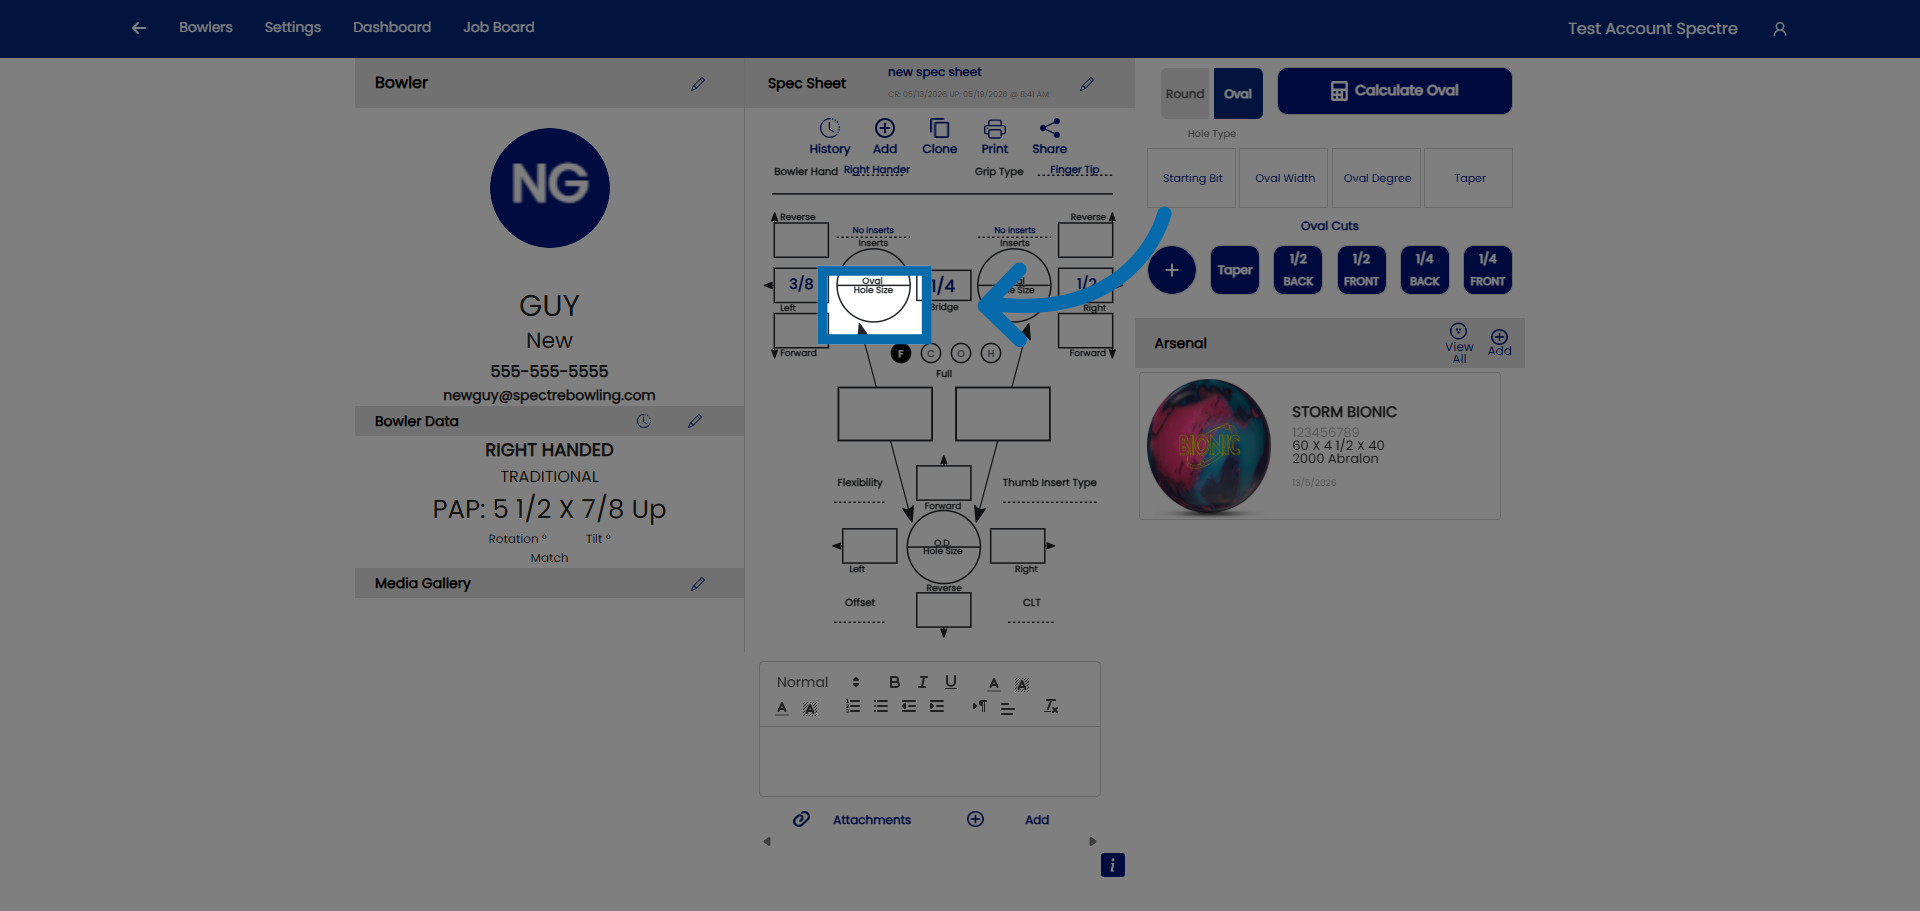
2. Hole size
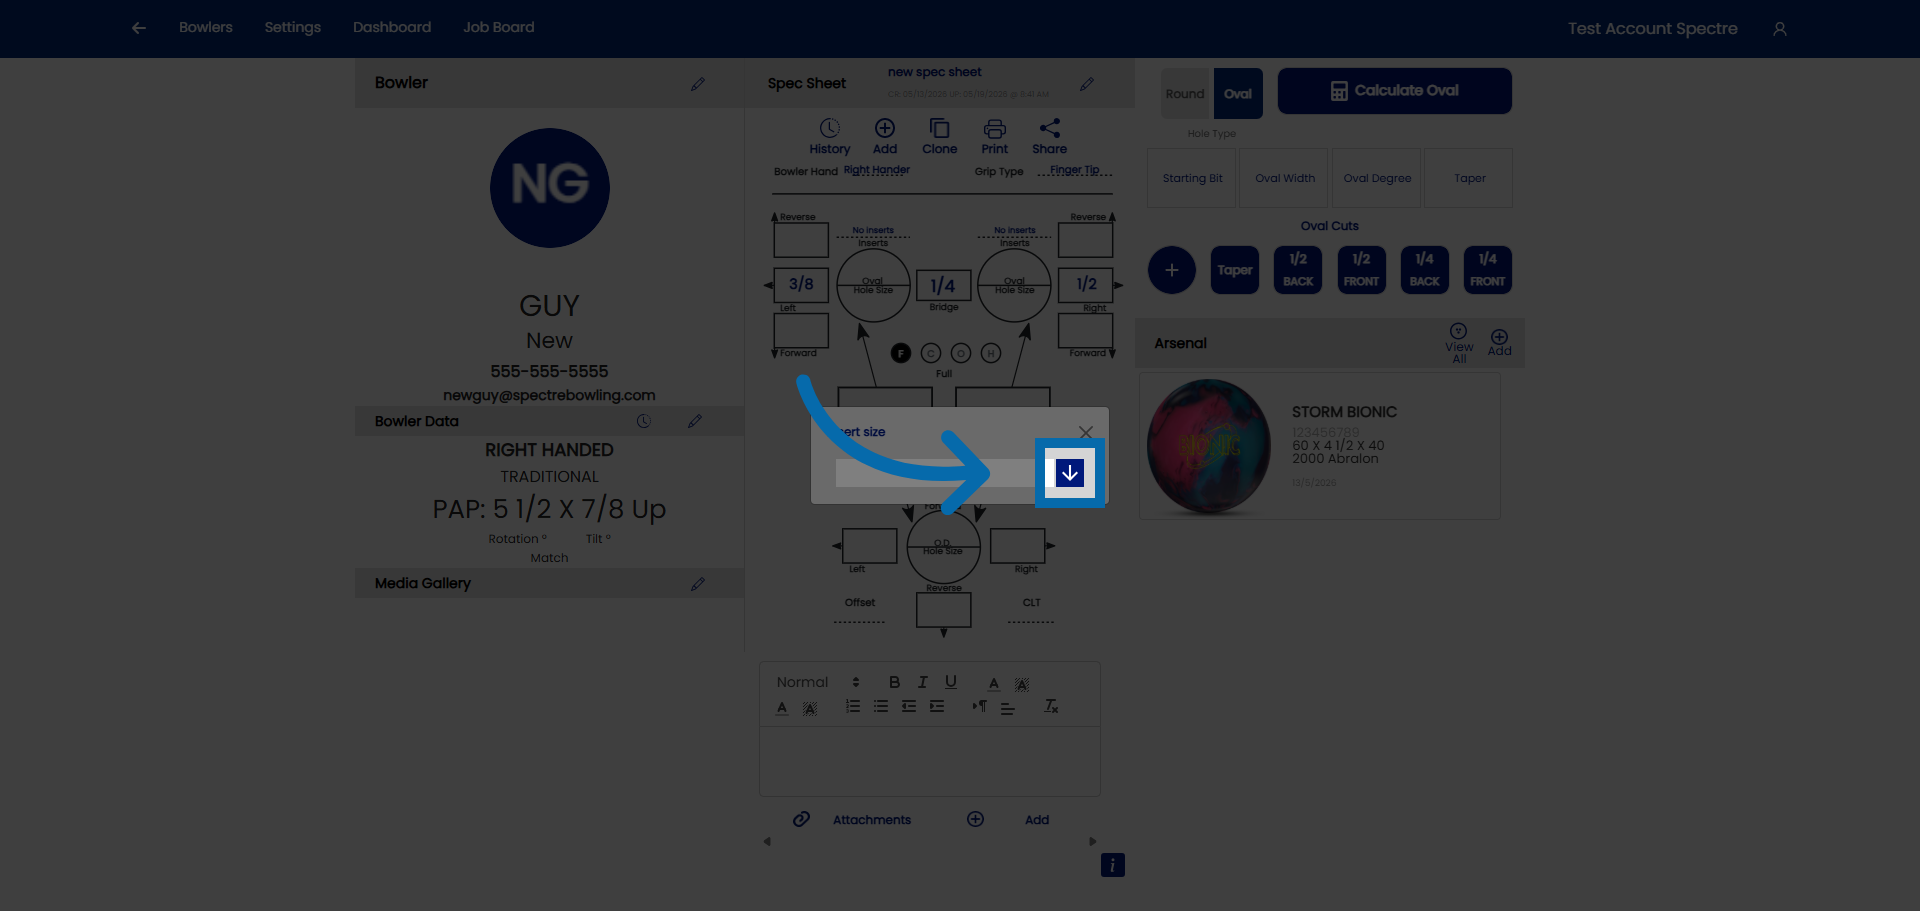
3. Open drop down
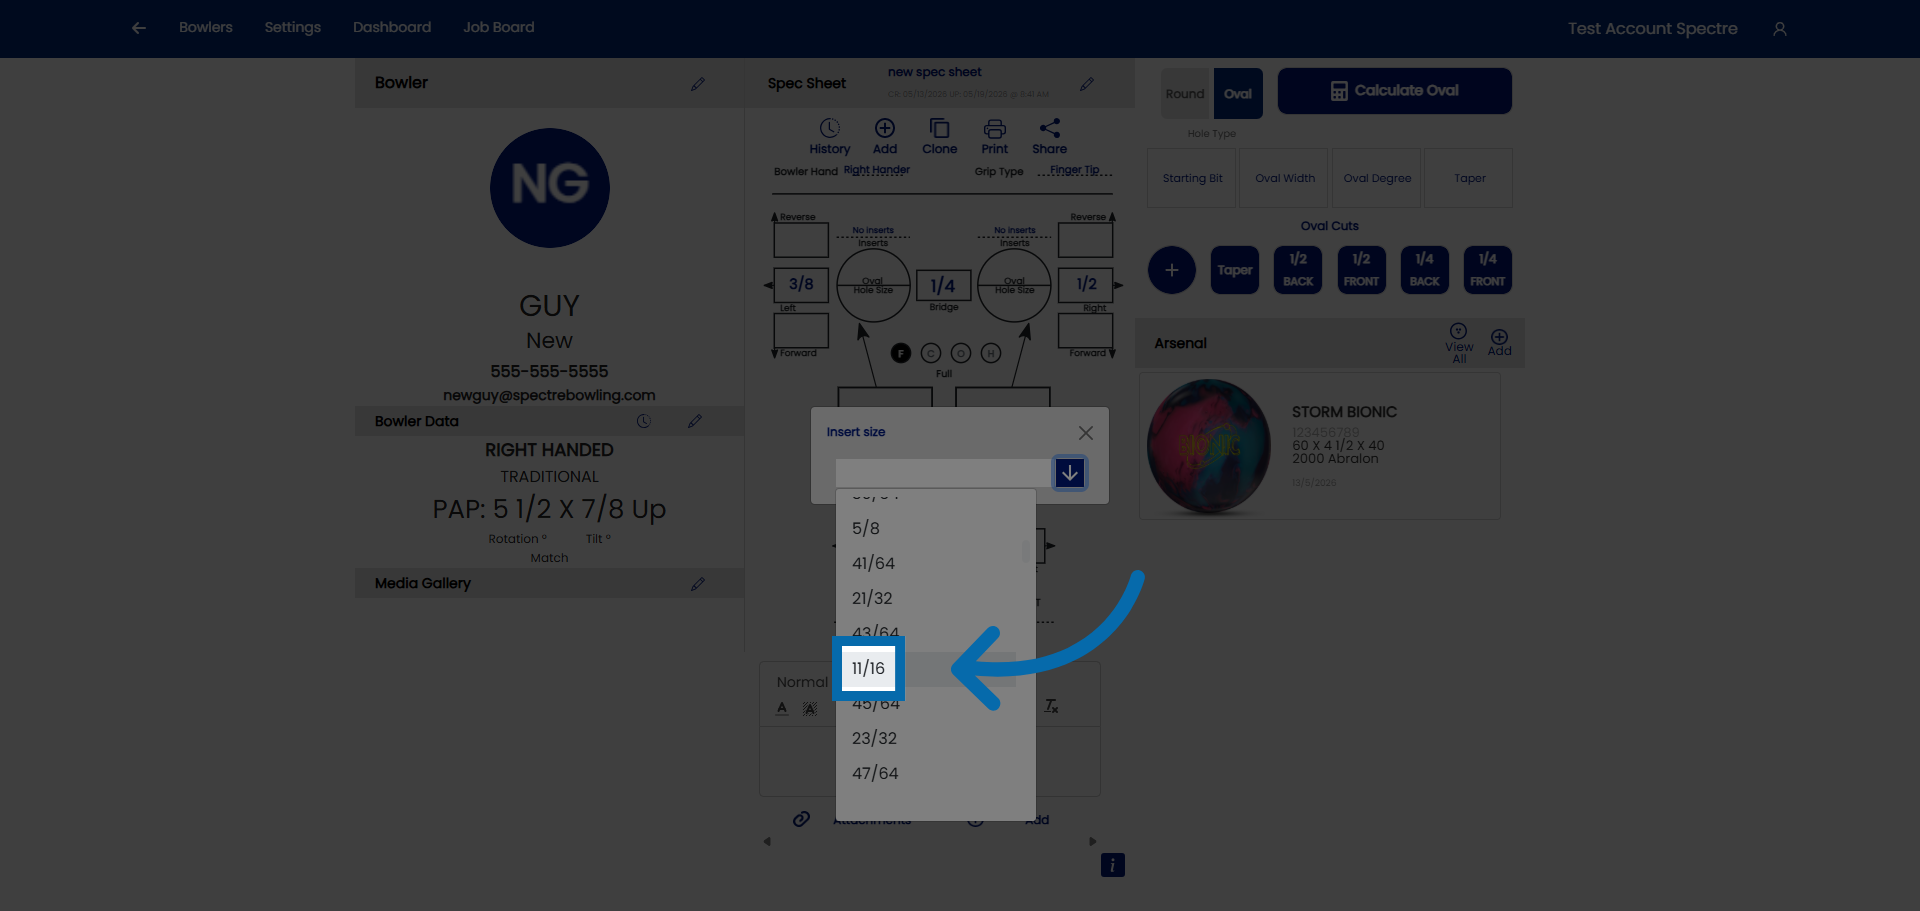
4. Select the size
5. Hole size
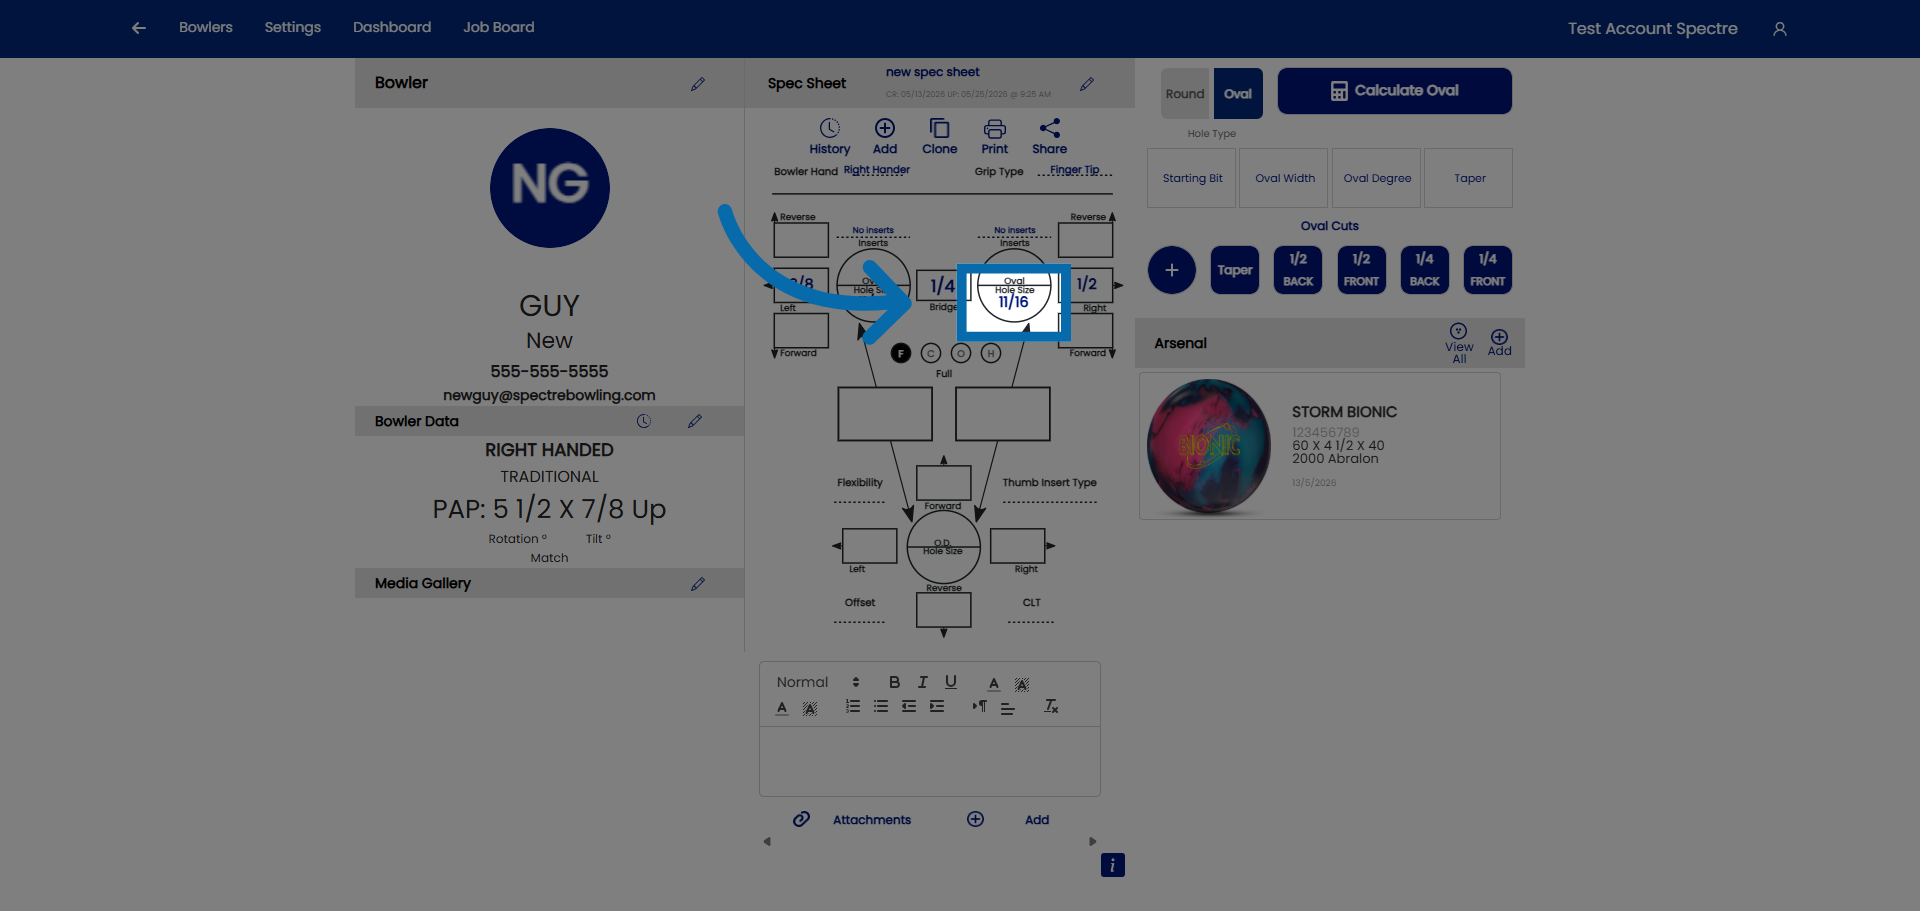
6. Open drop down
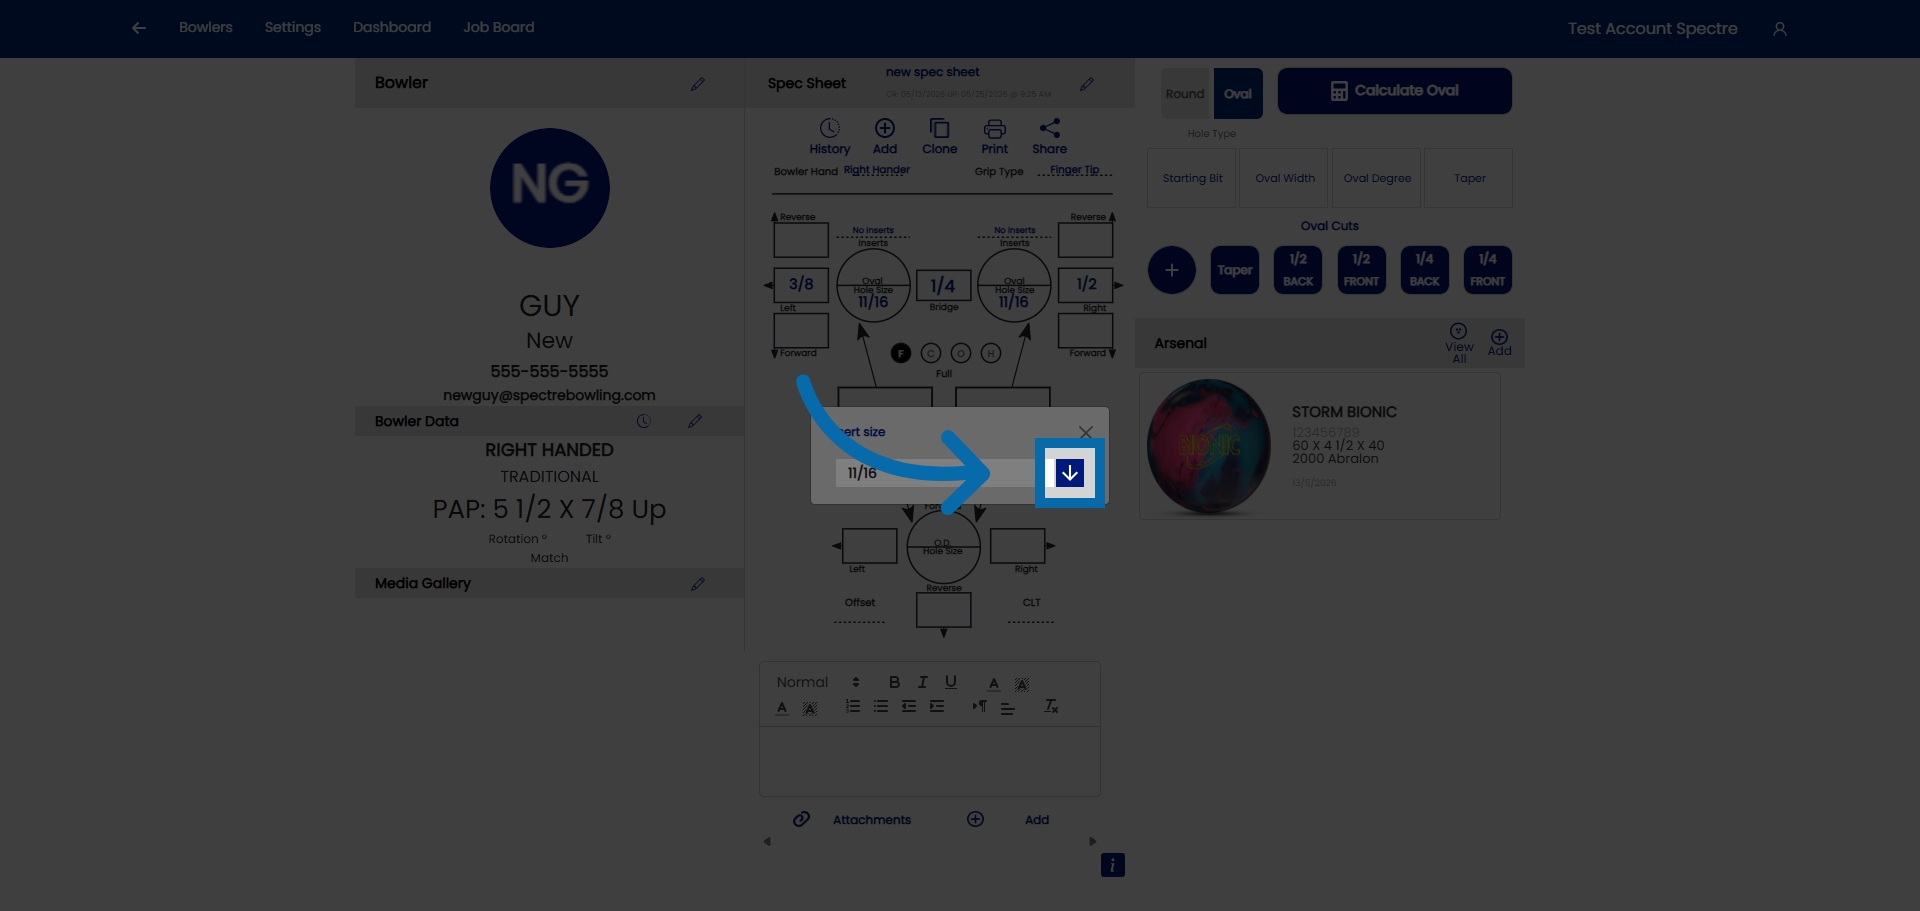
7. Select the size
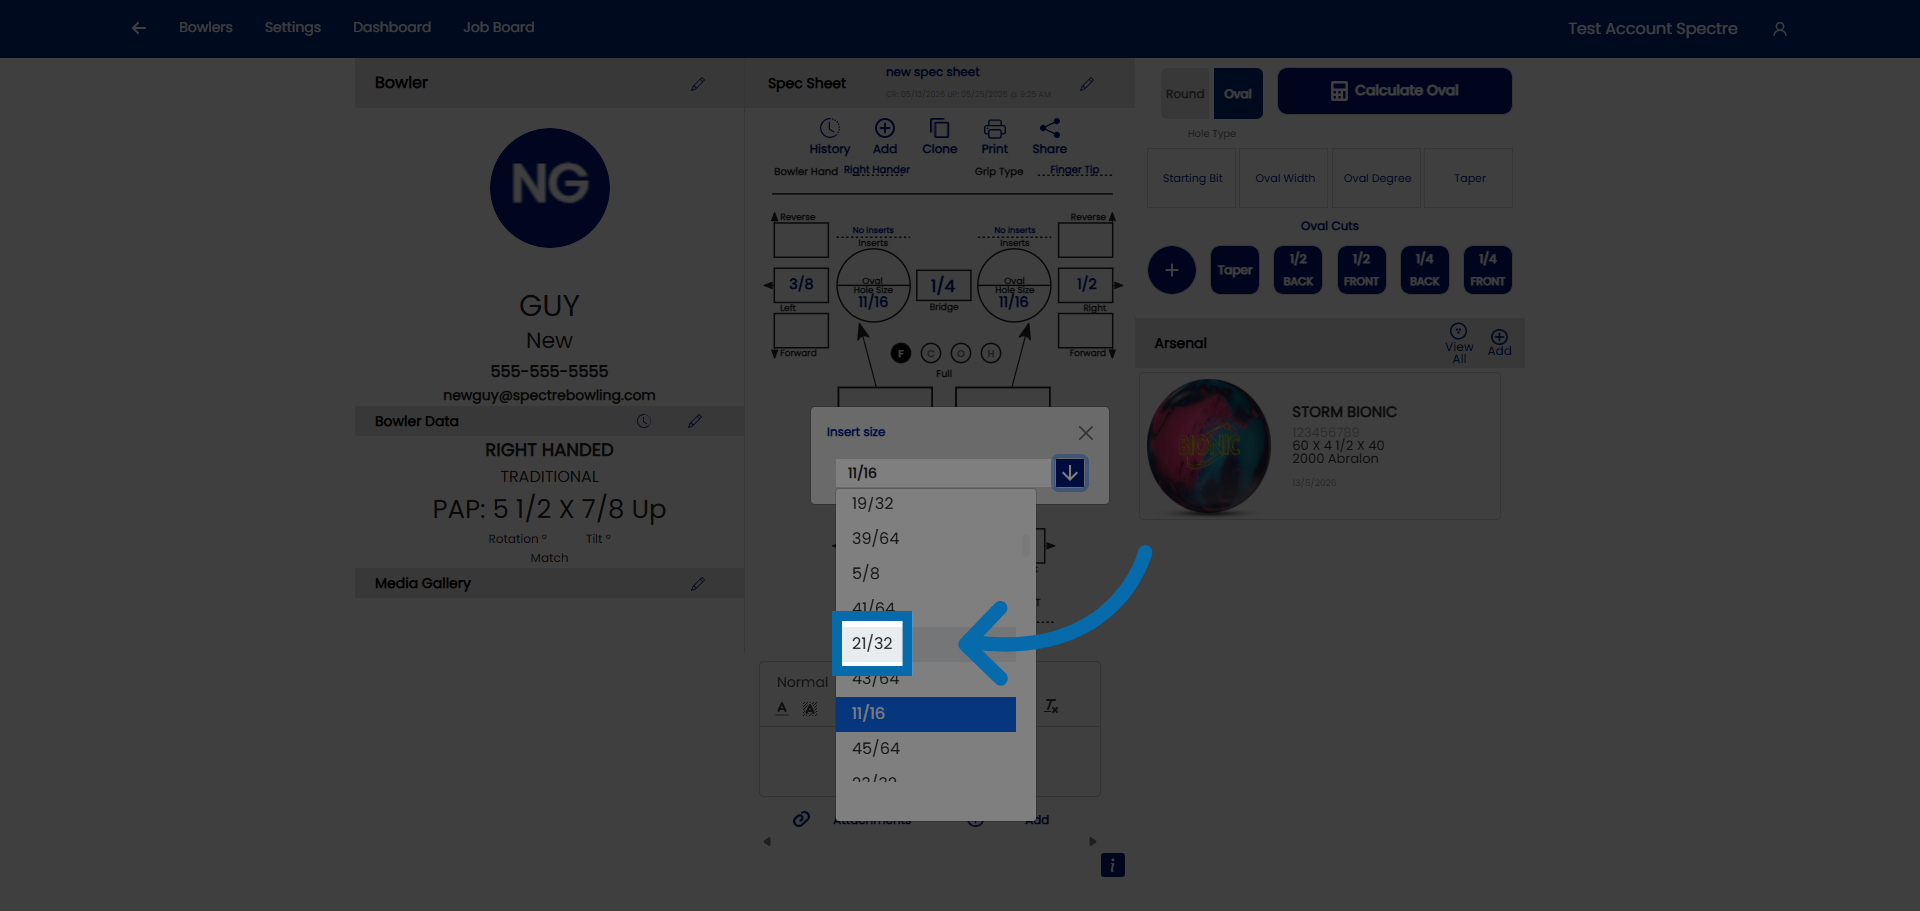
4.4.2 Finger inserts
4.4.2 measurement
When a bowler uses finger inserts, the spec sheet needs the insert type, the insert size (ID), and the drill bit OD for each finger. The order you enter them in matters — enter type and size first and Spectre Cloud's auto-suggestions do the rest. For the STD vs. VACU distinction, see 4.4.3; for the underlying OD concept, see 4.1.6.
🛠️ Recommended Order of Entry
Always enter finger inserts in this order — insert type first, then insert size — and let the auto-suggestions handle the rest:
- ✅ 1. Insert type — select the type first. Spectre Cloud then filters the size drop-down to show only the sizes available for that insert type, so you can't pick a size the insert doesn't come in.
- ✅ 2. Insert size (ID) — choose the size that fits the bowler's finger. The insert size is the inner diameter; Spectre does not track ID as a separate value.
- ✅ 3. Let the auto-suggestions work — with type and size in place, the finger auto-suggestions fill in the rest automatically.
Note: The list of insert types offered in the drop-down can itself be filtered in the Settings section — so you only see the brands and types your shop actually carries, keeping the type list short and relevant.
⚙️ What the Auto-Suggestions Do
Once insert type and size are entered:
- ✅ Autofill Insert OD (2.6.6) — if Auto-OD is turned on, Spectre selects the drill bit OD of the hole automatically based on the insert size, so you don't look it up or calculate it.
- ✅ The filtered size drop-down (from selecting the type first) keeps the choices valid for that specific insert.
Note: This is why order matters. Selecting the type first narrows the size list; entering the size then drives the OD auto-fill. Enter them out of order and you lose the filtering and may have to set the OD by hand.
📋 Entering Finger Inserts in Spectre Cloud
- Select the insert type for the finger (
None,STD, orVACU). Middle and ring are independent. - Select the insert size (ID) from the now-filtered drop-down.
- With Auto-OD on, Spectre fills the OD automatically; otherwise enter it manually.
- Repeat for the other finger.
Related Sections
- 4.4.1 — Round finger holes, no inserts
- 4.4.3 — STD vs. VACU
- 4.4.4 — Oval fingers, no inserts
- 4.1.6 — Insert OD concept: STD vs. VACU, insert size vs. OD
- 2.6.6 — Autofill Insert OD
- 2.6.7 — Auto-Repeat Insert Size: mirror size from ring to middle finger
Tip: Build the habit of type → size → let it fill. Selecting the insert type first is the single step that makes the rest of the finger-insert entry fast and error-free — the size list filters itself and the OD fills itself in.
4.4.3 STD vs. VACU
4.4.3 concept
Finger inserts seat in one of two ways — STD (Standard) or VACU (Vacuum). The insert type you record on the sheet (see 4.4.2) tells Spectre Cloud how the hole is drilled. This page explains the difference. For the OD-sizing concept, see 4.1.6.
📐 STD (Standard)
Standard inserts are press-fit: the hole is drilled to the insert's OD, at full depth, and the insert is pressed in and held by friction against the ball's coverstock.
- ✅ Drill bit size equals the insert's published OD — a direct, one-to-one match, full depth.
- ✅ A correct STD fit presses in with firm hand pressure or a seating tool — it shouldn't drop in freely or need excessive force.
- ❌ Never undersize an STD hole — a too-tight press-fit risks cracking the ball surface.
📐 VACU (Vacuum)
VACU inserts are drilled in two diameters so the insert has room to expand:
- Drill the top portion at the size shown on the spec sheet.
- Drill that top portion
1"deep. - Continue to the insert's actual OD for the rest of the depth.
The oversized top forms a pocket — a void where the insert doesn't touch the surrounding ball wall — giving the insert room to expand.
- ✅ The spec-sheet OD for a VACU insert is the top-portion (pocket) size, not the insert's body OD.
- ✅ The deeper portion is drilled to the insert's actual OD, exactly like a STD hole.
- ❌ Drilling the whole hole at one size removes the pocket entirely and defeats the VACU fit.
📊 STD vs. VACU
| STD (Standard) | VACU (Vacuum) | |
|---|---|---|
| Drilling | Single diameter at the insert OD, full depth | Oversized pocket ~1" deep, then actual OD to depth |
| Spec-sheet OD means | Drill size for the whole hole | Top-portion (pocket) size |
| Why | Friction press-fit | Void lets the insert expand |
Related Sections
- 4.4.2 — Finger inserts (recording type, size, OD)
- 4.1.6 — Insert OD concept: STD vs. VACU, insert size vs. OD
- 2.6.6 — Autofill Insert OD
Tip: The most common VACU error is drilling the whole hole at one size. Remember it's two cuts — the spec-sheet size for the first inch to form the pocket, then the insert's actual OD to depth.
4.4.4 Oval fingers, no inserts
4.4.4 measurement
For a bowler who wants an oval finger hole without inserts, Spectre Cloud replaces the round OD field with an OVAL field. There is no auto-suggestion or calculation here — it's a simple text input you annotate yourself.
🔵 The OVAL Field
- ✅ When you set a finger to oval (no inserts), the round OD field becomes an OVAL text input.
- ✅ You type the move in thousandths of an inch — for example,
0.030. - ✅ That value is a move from the hole size: take the finger's hole size — say
11/16"— and move it0.030"in one direction to create the oval. - ❌ There is no auto-suggestion behind this field — it doesn't calculate anything. It simply records the move you type.
📋 Entering an Oval Finger Hole
- Set the finger's round hole size first (e.g.
11/16"). - Switch the finger to oval — the OD field becomes the OVAL input.
- Type the move in thousandths (e.g.
0.030) for the direction you're cutting. - Repeat for the other finger if needed.
Note: Because nothing is auto-calculated, the value you type is exactly what's recorded. Double-check the amount and the direction before drilling.
Related Sections
- 4.4.1 — Round finger holes, no inserts
- 4.4.2 — Finger inserts
- 4.4.5 — Inputting pitches
- 05 — Oval Calculator (oval derivation and calculation workflow)
Tip: The OVAL field is just a move off the round hole size — note both the round size and the oval move in your records so the fit is reproducible on the next ball.
4.4.5 Inputting pitches
4.4.5 measurement
Finger pitch is entered directly into the pitch tiles surrounding each finger hole on the spec sheet. There's no direction to "select" — the tile you put the value in is the direction. This page covers how to read and enter those tiles for the middle and ring fingers.
🛠️ How the Pitch Tiles Work
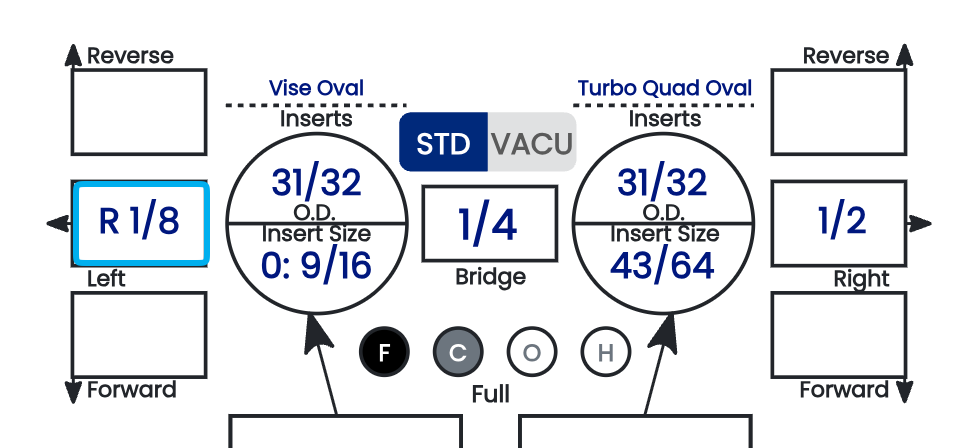
Each finger hole is framed by pitch tiles, and the tile's position on the sheet determines the direction of the pitch:
- ✅ Forward — always points toward the middle of the sheet. Enter your forward pitch in the forward tile.
- ✅ Reverse — always points toward the outer side of the sheet. Enter your reverse pitch in the reverse tile.
- ✅ Lateral — the Left and Right tiles, self-explanatory by position.
You don't set a direction from a dropdown — you enter the value in the tile that corresponds to the direction you want. Forward/reverse and lateral are separate tiles, so a finger can carry both at once.
Note: To apply a pitch against a tile's default direction — for example, Right pitch on the left finger — scroll to the absolute bottom of that tile's drop-down. There you'll find values listed as Rx, where x is the desired pitch. These cross-direction entries live at the very end of the list, below the standard values.
Note: On fingertip fits, it is quite rare to see forward pitches on the fingers — most fingertip finger pitch is zero or reverse. Treat a forward finger pitch on a fingertip sheet as something worth double-checking against your source.
⚙️ Finger Pitch Is Fully Manual
There is no automation for finger pitch. Every finger pitch value — forward, reverse, and lateral, on both fingers — is manual data entry. Spectre Cloud records exactly what you type, with no auto-suggestion and no error validation behind these fields, so accuracy is entirely on the person entering it.
📋 Entering Finger Pitch — Step by Step
- Locate the pitch tiles around the middle finger and ring finger holes.
- For each finger, enter the forward or reverse value in the correct tile — forward points toward the middle of the sheet, reverse toward the outer side.
- Enter the lateral value in the Left or Right tile as needed.
- Repeat for both fingers.
- Review all the finger pitch entries before moving on to thumb pitch.
- For a cross-direction pitch (e.g. Right on the left finger), use the
Rxvalues at the bottom of the drop-down.

Related Sections
- 4.5.3 — Entering vertical and lateral pitch for thumb
- 4.1.4 — Pitch terminology: Forward, Reverse, Lateral, Zero
- 4.2.4 — Identifying grip type from a measurement sheet
- 4.5 — IBPSIA auto-suggestions
Tip: Because forward points to the middle of the sheet and reverse to the outer side, the sheet's own layout tells you the direction — you don't have to remember a sign convention. Enter each value in the tile that matches the direction you measured, and read the finger pitches back before saving, since nothing here is validated for you.
4.4.6 CLT (Center Line Transformation)
4.4.6 measurement
CLT (Center Line Transformation) is a fitting measurement that captures how a bowler's finger centerline relates to the ball's grip center. Spectre Cloud uses it to derive the lateral finger pitch. This page explains the two ways CLT is measured, which one Spectre accepts, and the reference chart used to look it up.
📏 The Two Ways CLT Is Measured
CLT can be expressed two different ways — they describe the same thing, just in different units:
- ✅ In inches — the distance from the CLT to the centerline at the top of the thumb. This is the most common method. A typical value is around
1". - ✅ In degrees — the angle between the normal centerline and the CLT at the fingers. A typical value is around
16°.
Important: Spectre Cloud accepts CLT in degrees only. If you measured in inches, convert to the angular value — the reference chart below maps the two together.
📊 CLT Reference Chart
The chart below maps each CLT line (A–E) to its angle and to the resulting lateral finger pitches. Because the layout mirrors with handedness, the middle and ring values swap between right- and left-handed bowlers.
[Insert CLT reference diagram here] — add the "Diagram #1" CLT chart image (right-hand and left-hand versions). The transcribed values are below for quick reference and searchability.
Right-Handed Bowler
| Line | Angle | Middle Finger | Ring Finger |
|---|---|---|---|
| A | 8° | 3/8" Left | 1/2" Right |
| B | 16° | 5/16" Left | 9/16" Right |
| C | 24° | 1/4" Left | 5/8" Right |
| D | 32° | 3/16" Left | 11/16" Right |
| E | 40° | 1/8" Left | 3/4" Right |
Left-Handed Bowler
| Line | Angle | Middle Finger | Ring Finger |
|---|---|---|---|
| A | 8° | 3/8" Right | 1/2" Left |
| B | 16° | 5/16" Right | 9/16" Left |
| C | 24° | 1/4" Right | 5/8" Left |
| D | 32° | 3/16" Right | 11/16" Left |
| E | 40° | 1/8" Right | 3/4" Left |
🔄 CLT and Auto-CLT
Once a CLT value is entered in degrees, the Auto-CLT setting (2.6.3) uses this chart to apply the corresponding lateral finger pitches automatically — so the lateral pitch is derived from the CLT rather than entered by hand.
- ✅ Enter CLT in degrees; Auto-CLT looks up the lateral finger pitch from the chart.
- ✅ Because the chart is handedness-specific, the correct lateral directions are applied based on the bowler's dominant hand.
- ⚠️ Verify with your Spectre team: confirm exactly how Auto-CLT interacts with a manually entered lateral finger pitch (4.4.3) when both are present on a sheet.
Related Sections
- 4.4.5 — Inputting finger pitch (forward, reverse, lateral)
- 4.5.3 — Entering vertical and lateral pitch for thumb
- 4.1.4 — Pitch terminology: Forward, Reverse, Lateral, Zero
- 2.6.3 — Auto-CLT: lateral pitch of fingers based on the CLT chart
- 4.2.5 — Cloning a spec sheet (CLT carries forward with other measurements)
Tip: Since Spectre only takes CLT in degrees, decide as a shop whether you measure at the thumb (inches) or at the fingers (degrees). If your fitting habit is the 1" thumb-based measurement, keep this chart handy to translate it to the angular value Spectre expects before you enter it.