# 4.2 — Creating a Spec Sheet
# 4.2.1 Creating a blank spec sheet for a bowler
# Creating a blank spec sheet for a bowler
### 1. Access Bowler Profiles
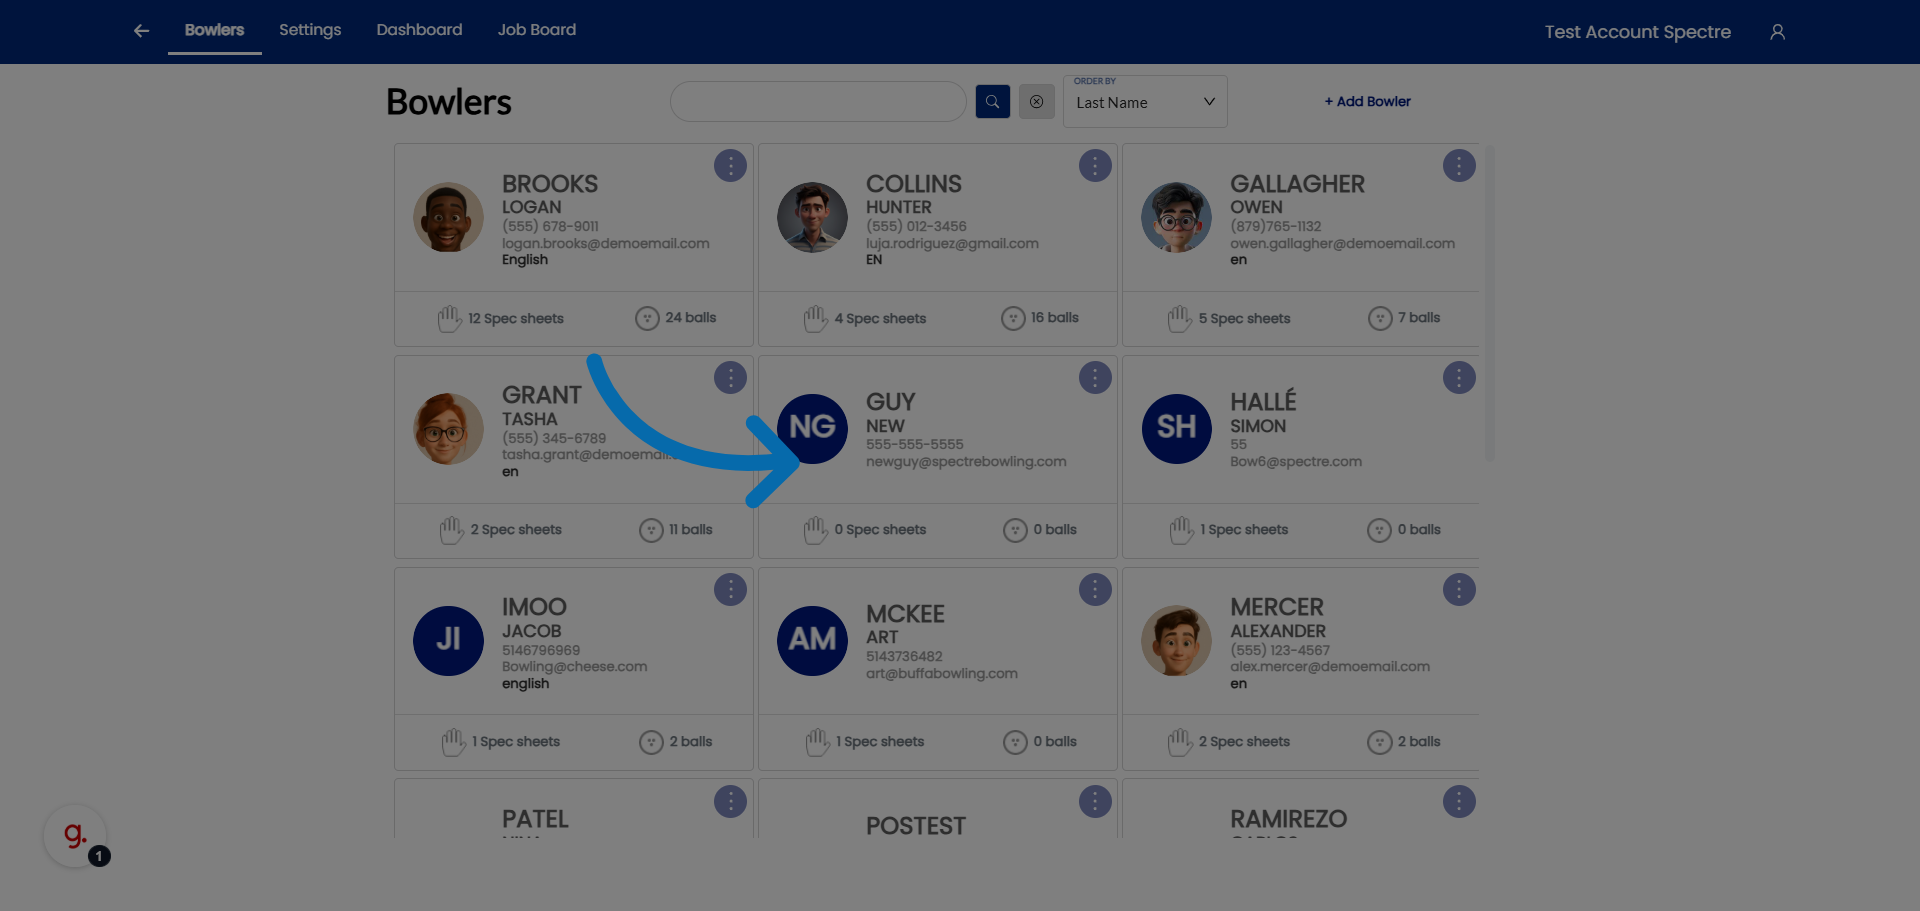
Click "Bowlers" to open the list of bowler profiles in Spectre Proshop .
Select the bowler to view the specific bowler's profile details.
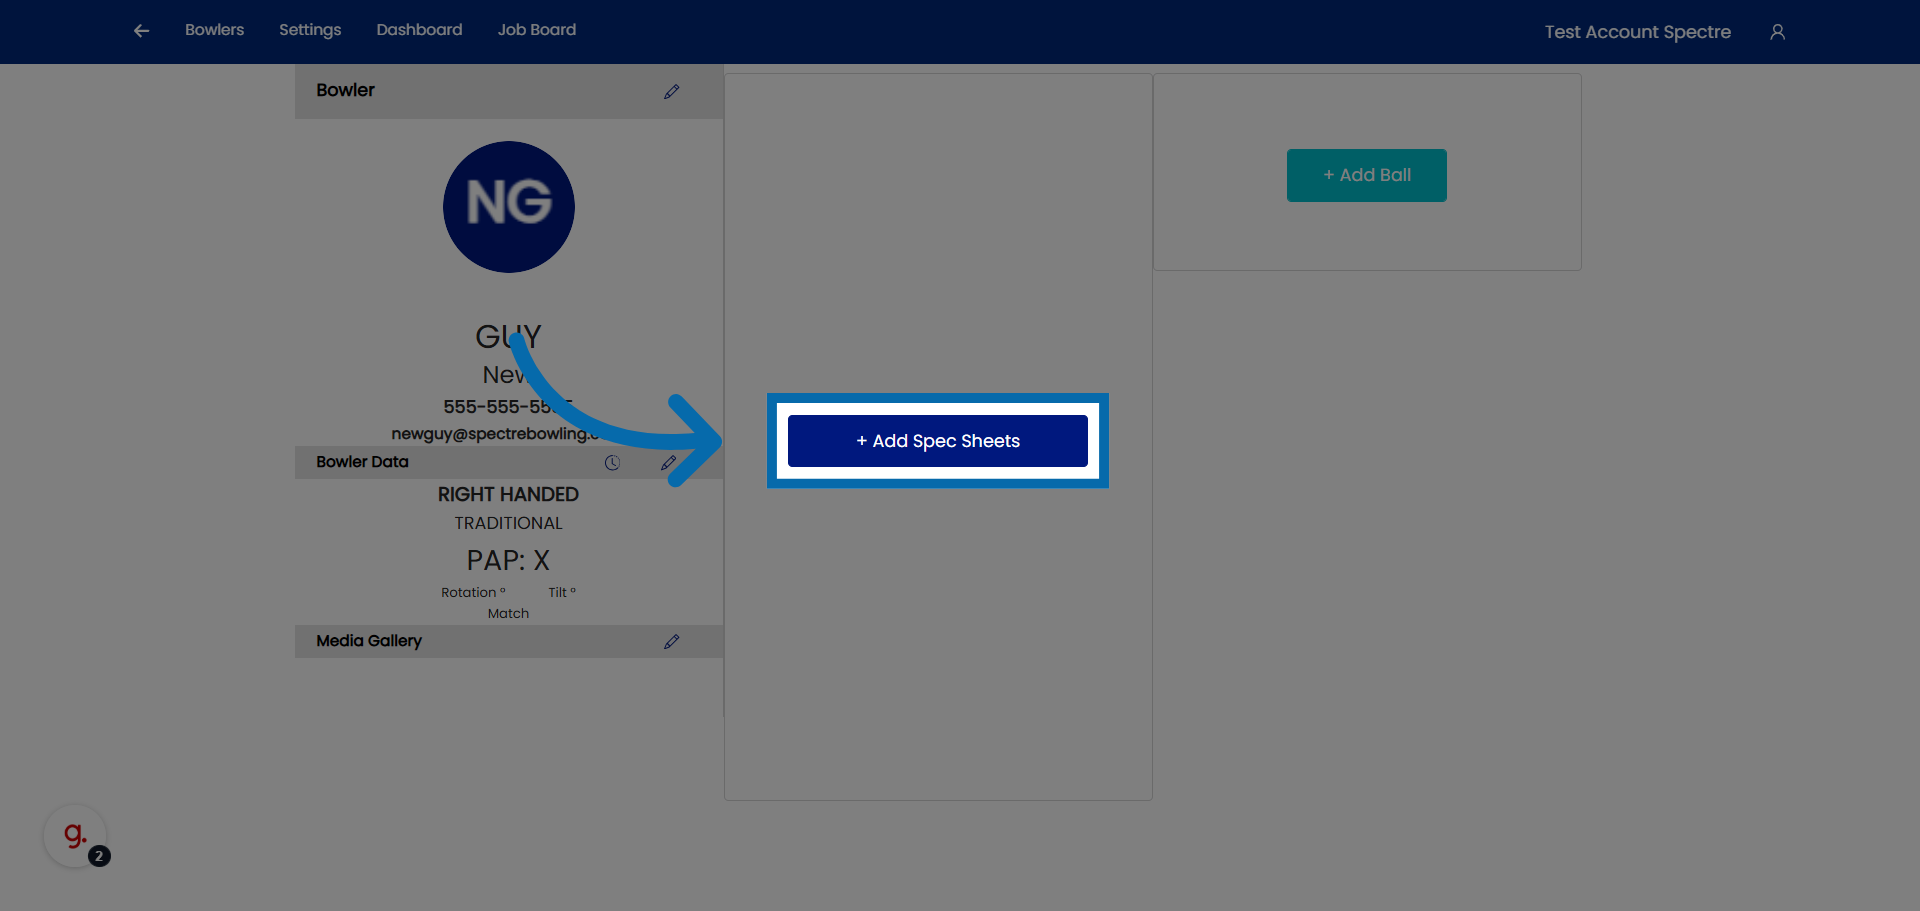
### 3. Open Spec Sheets Addition
Click "Add Spec Sheets" to begin adding a new spec sheets for the selected bowler.
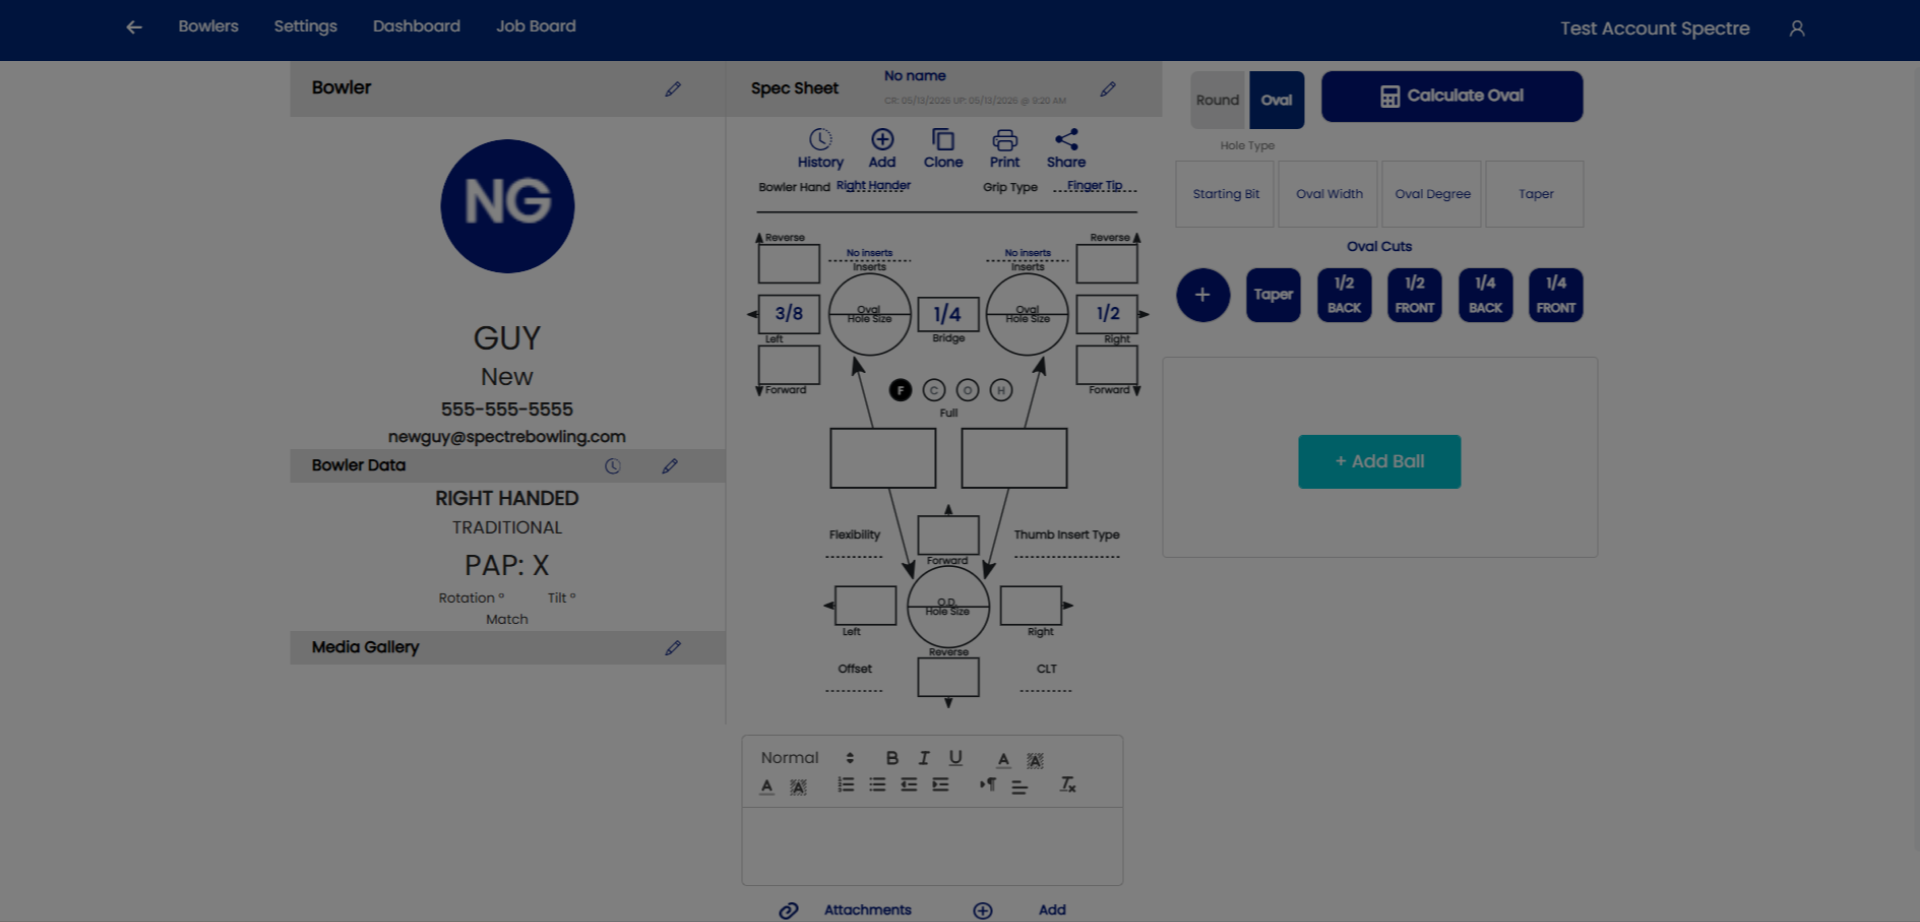
### 4. Lets create a new spec sheet for an already existing profile.
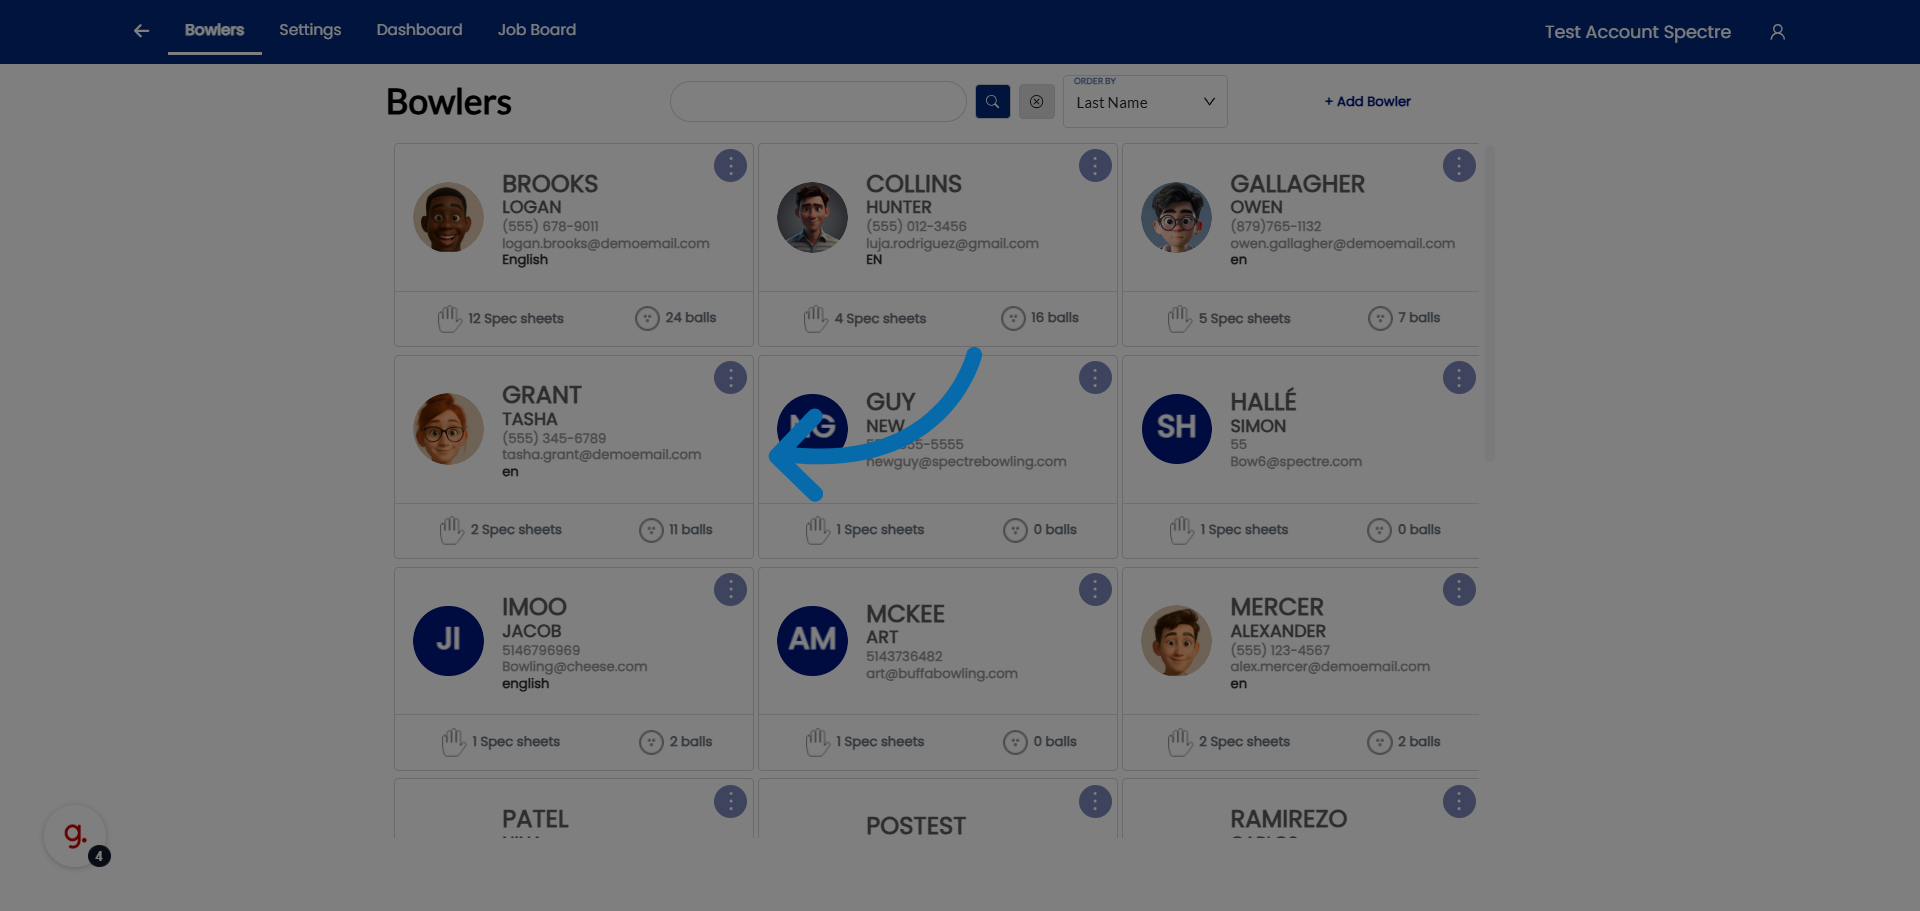
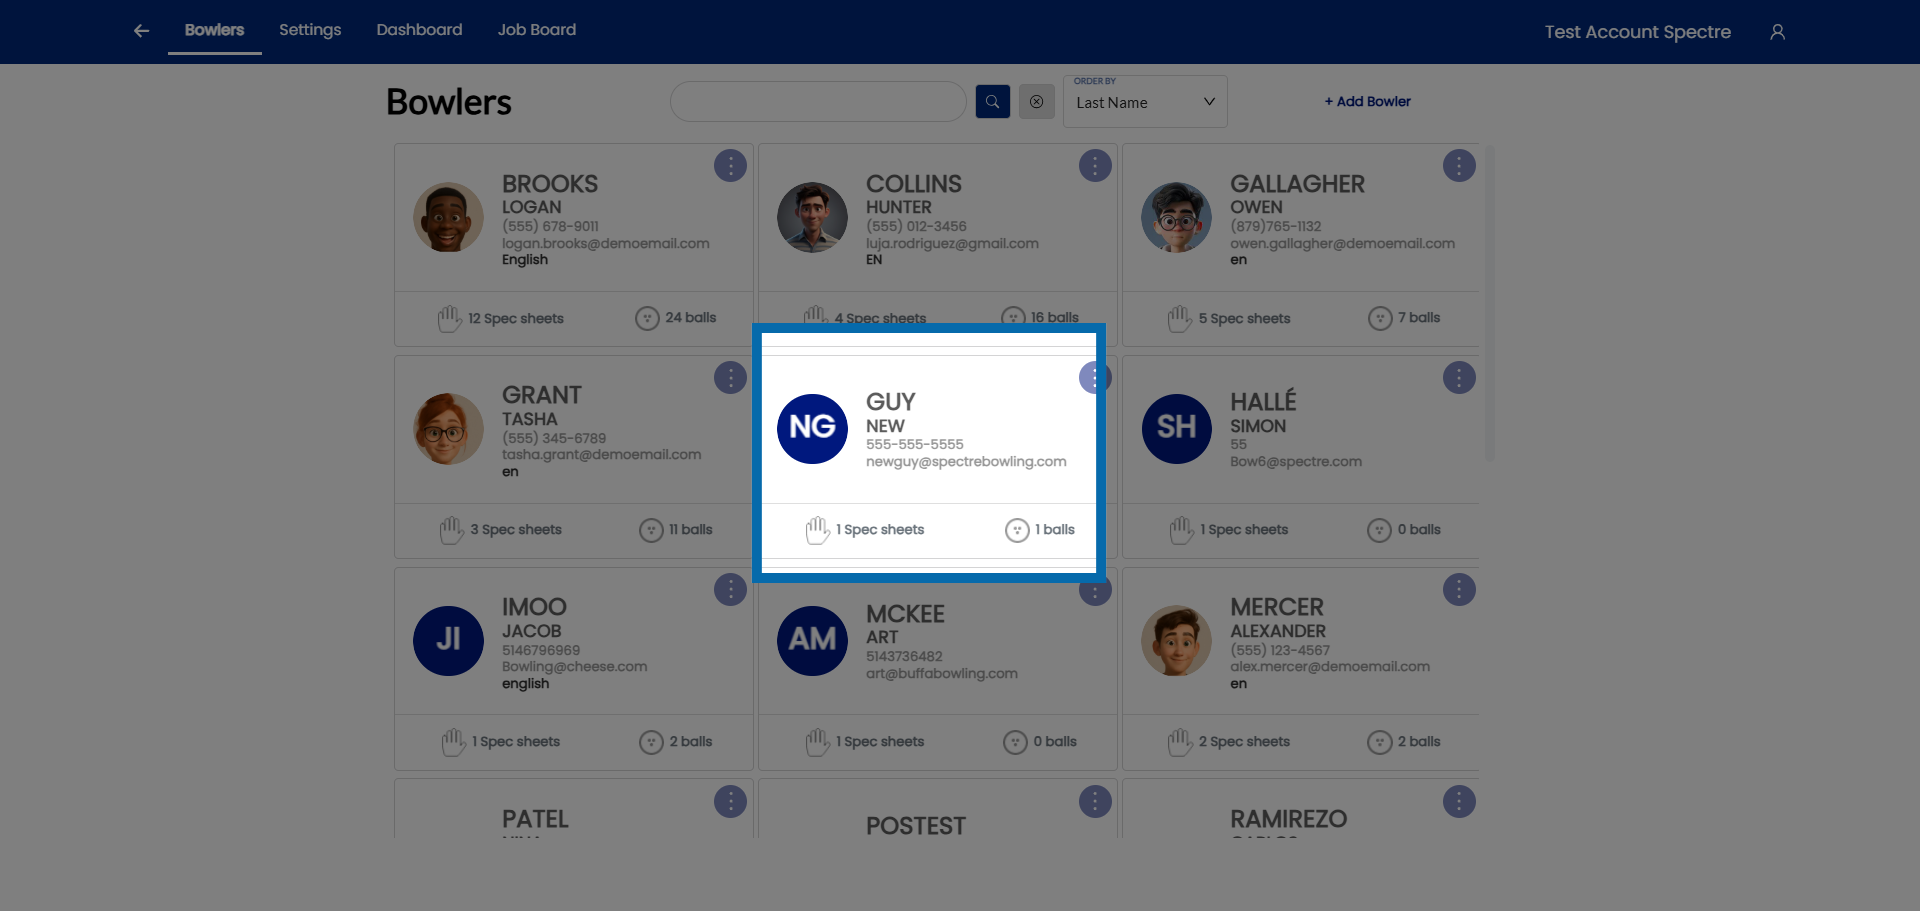
### 5. Select a bowler
Select your already existing bowlers profile.
### 6. Open Additional Options
Click here to add a new spec sheet to the bowler.
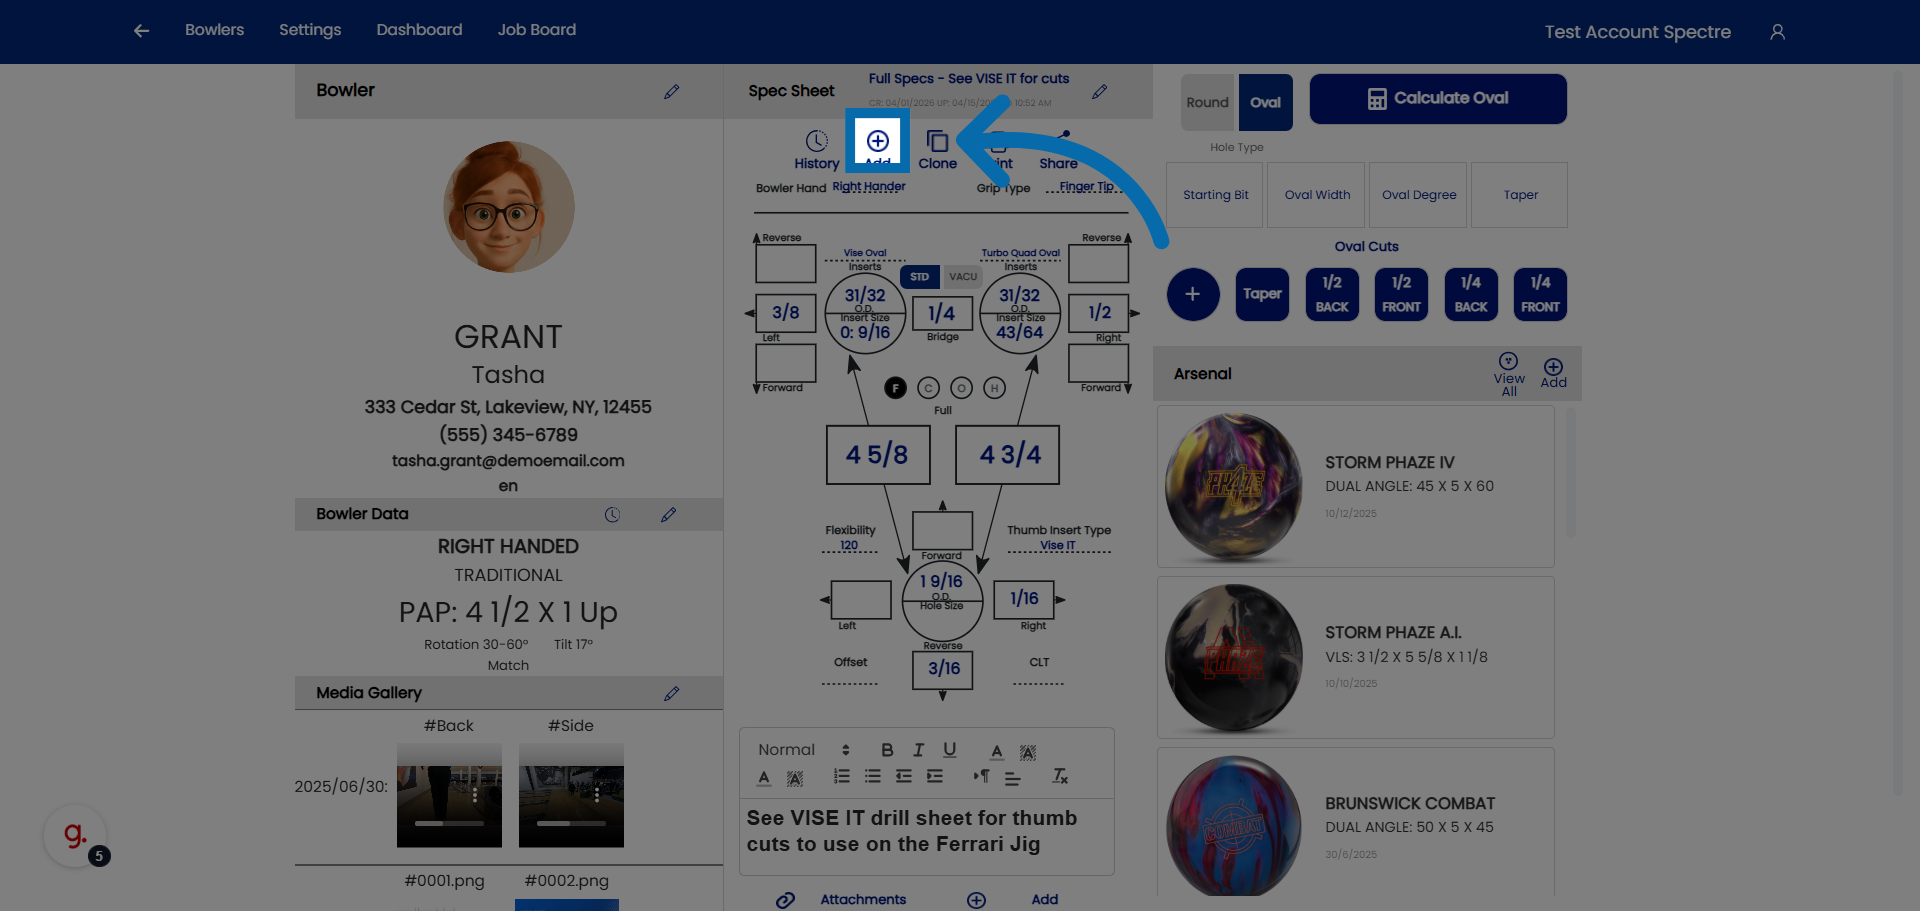
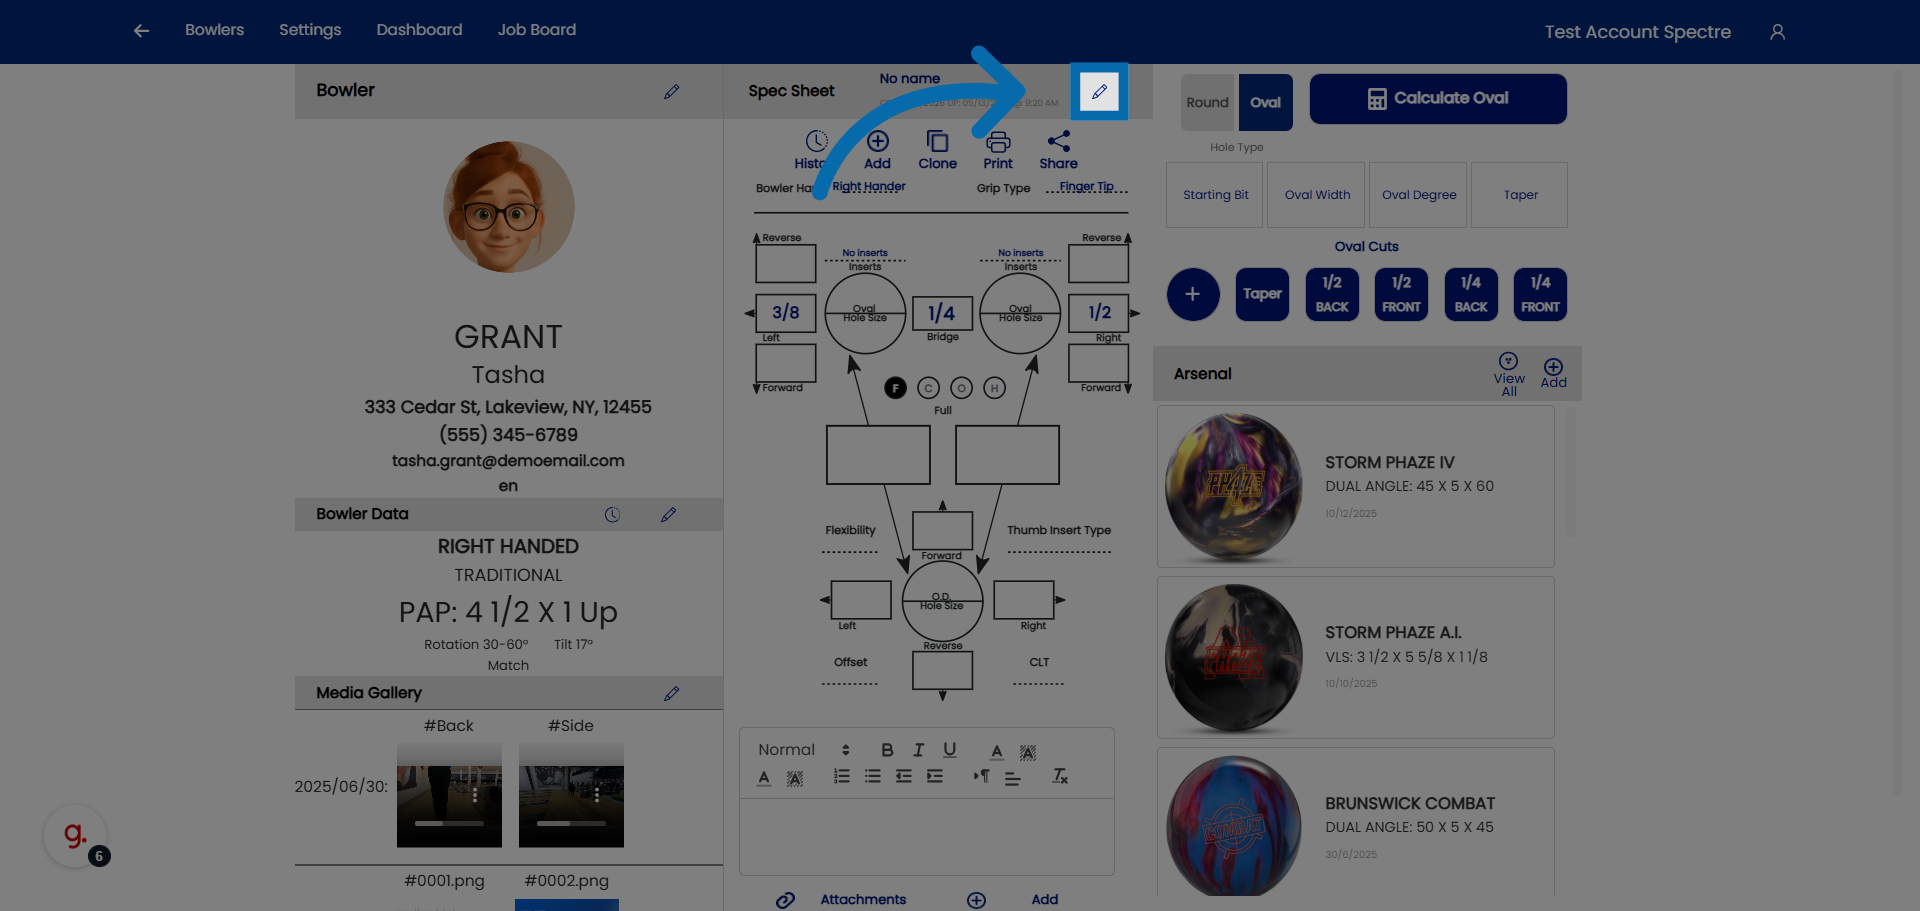
### 7. Access Further Spec Sheet Settings
Click here to modify the name of the spec sheet
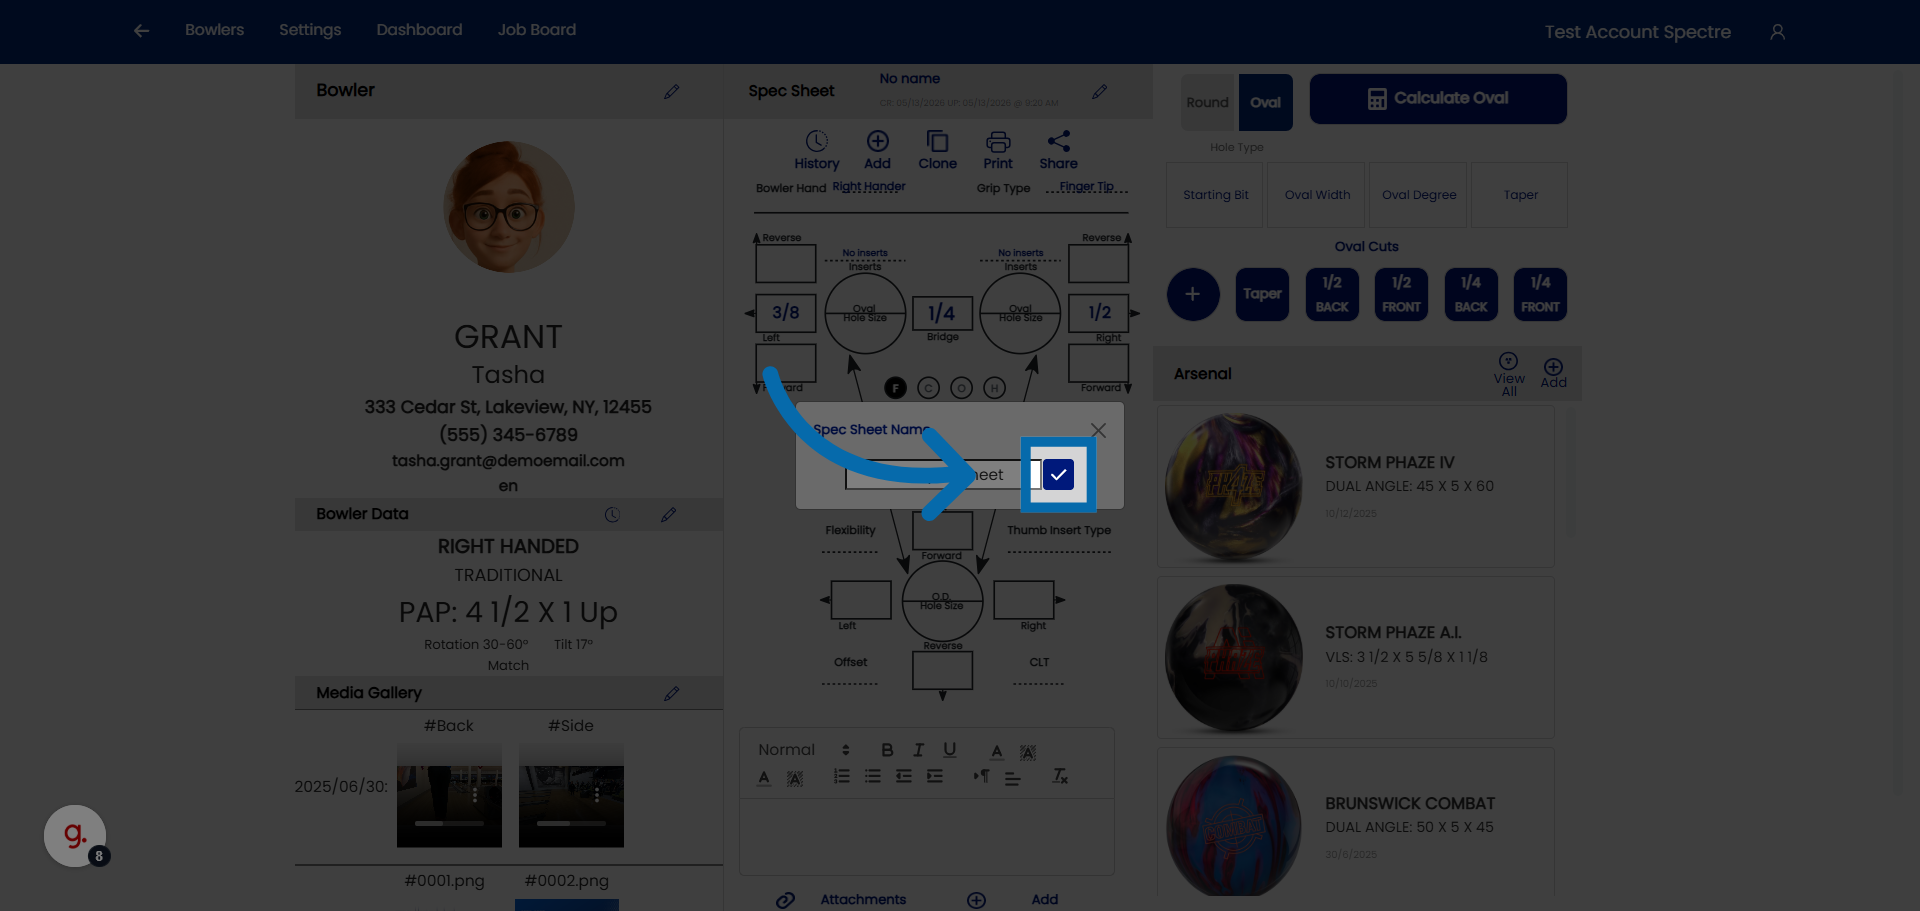
### 8. Select Spec Sheet Name Field
Click "Spec Sheet Name" to edit the name of the spec sheet.
Click here to finalize and save the new spec sheet.
# 4.2.2 Naming a spec sheet (ball name, date, notes)
# Naming a spec sheet (ball name, date, notes)
4.2.2step-by-step
When you create a new spec sheet, Spectre Cloud asks you to identify the ball and add any relevant context before drilling details are entered. The three fields — **ball name**, **date**, and **notes** — form the spec sheet's identity and make it easy to find, review, and compare records later.
## 🎳 Ball Name
The **Ball Name** field is the primary label for the spec sheet. It appears in the bowler's spec sheet list, in their arsenal, and on any printed or exported records.
- ✅ Enter the full ball name as it appears on the ball or packaging — for example, `Storm Phaze II` or `Hammer Black Widow 2.0`.
- ✅ Be consistent with naming across clients so searches and comparisons are easier.
- ✅ If the bowler has more than one of the same ball model, consider adding a distinguishing suffix — for example, `Storm Phaze II (spare)` or `Storm Phaze II #2`.
- ❌ Avoid abbreviations or shorthand that only make sense to you — other staff members accessing the record should immediately understand which ball is being described.
**Arsenal Plus tip:** If the **Arsenal Plus** plugin is active, you can also link a spec sheet to a ball in the bowler's arsenal using barcode scanning or the `bowlingdatabase.com` integration, which can pre-fill ball details automatically. See *Arsenal Plus — Linking Spec Sheets to Arsenal Balls* for details.
## 🗓️ Date
The **Date** field records when the ball was drilled or when the spec sheet was created. Spectre Cloud defaults this to today's date, but you can change it to reflect the actual drill date if you are entering a record retroactively.
- ✅ The date is displayed in the spec sheet list, making it easy to identify the most recent drilling for a given ball.
- ✅ Accurate dates are especially useful when a bowler has multiple spec sheets for the same ball model drilled at different times.
- ✅ When reviewing a bowler's history, spec sheets are sorted chronologically — a correct date keeps the timeline accurate.
- ❌ Leaving a retroactive entry with today's date can cause confusion when reviewing a bowler's drilling history over time.
## 📋 Notes
The **Notes** field is a free-text area for any additional context about this spec sheet that does not belong in the drilling fields themselves.
### Common uses for Notes
- ✅ Recording why a layout was chosen — for example: `Switched to stronger layout for heavier oil at regional tournament.`
- ✅ Logging any post-drill adjustments, such as surface changes or weight hole additions.
- ✅ Flagging follow-up items — for example: `Bowler wants to try this layout on a different core next season.`
- ✅ Noting the staff member who performed the drilling if your shop tracks this outside of a formal job board workflow.
- ✅ Adding context for a cloned spec sheet — for example: `Cloned from Blue Hammer, adjusted for asymmetric core.`
**Tip:** The Notes field is plain text — keep entries concise and scannable. If your shop uses the **Job Board** plugin, detailed service history per ball lives there instead, and Notes can stay brief.
## 📌 How These Fields Appear in Spectre Cloud
Field
Where it appears
Editable after saving?
**Ball Name**
Spec sheet list, arsenal view, print/export
✅ Yes
**Date**
Spec sheet list, drilling history timeline
✅ Yes
**Notes**
Spec sheet detail view
✅ Yes
**Note:** All three fields can be updated at any time by opening the spec sheet and editing the header section. Changes are saved to the cloud immediately and sync across all devices. *Verify with Spectre team: confirm whether editing the date or ball name on a spec sheet linked to an arsenal ball updates the arsenal entry as well.*
### Related Sections
- 4.2.1 — Creating a new spec sheet
- 4.2.3 — Selecting span type (F, C, O)
- 4.3 — Cloning a spec sheet
- 7.1 — Arsenal overview (linking balls to spec sheets)
```
# 4.2.3 Selecting grip type on the spec sheet
# Selecting grip type on the bowler's spec sheet
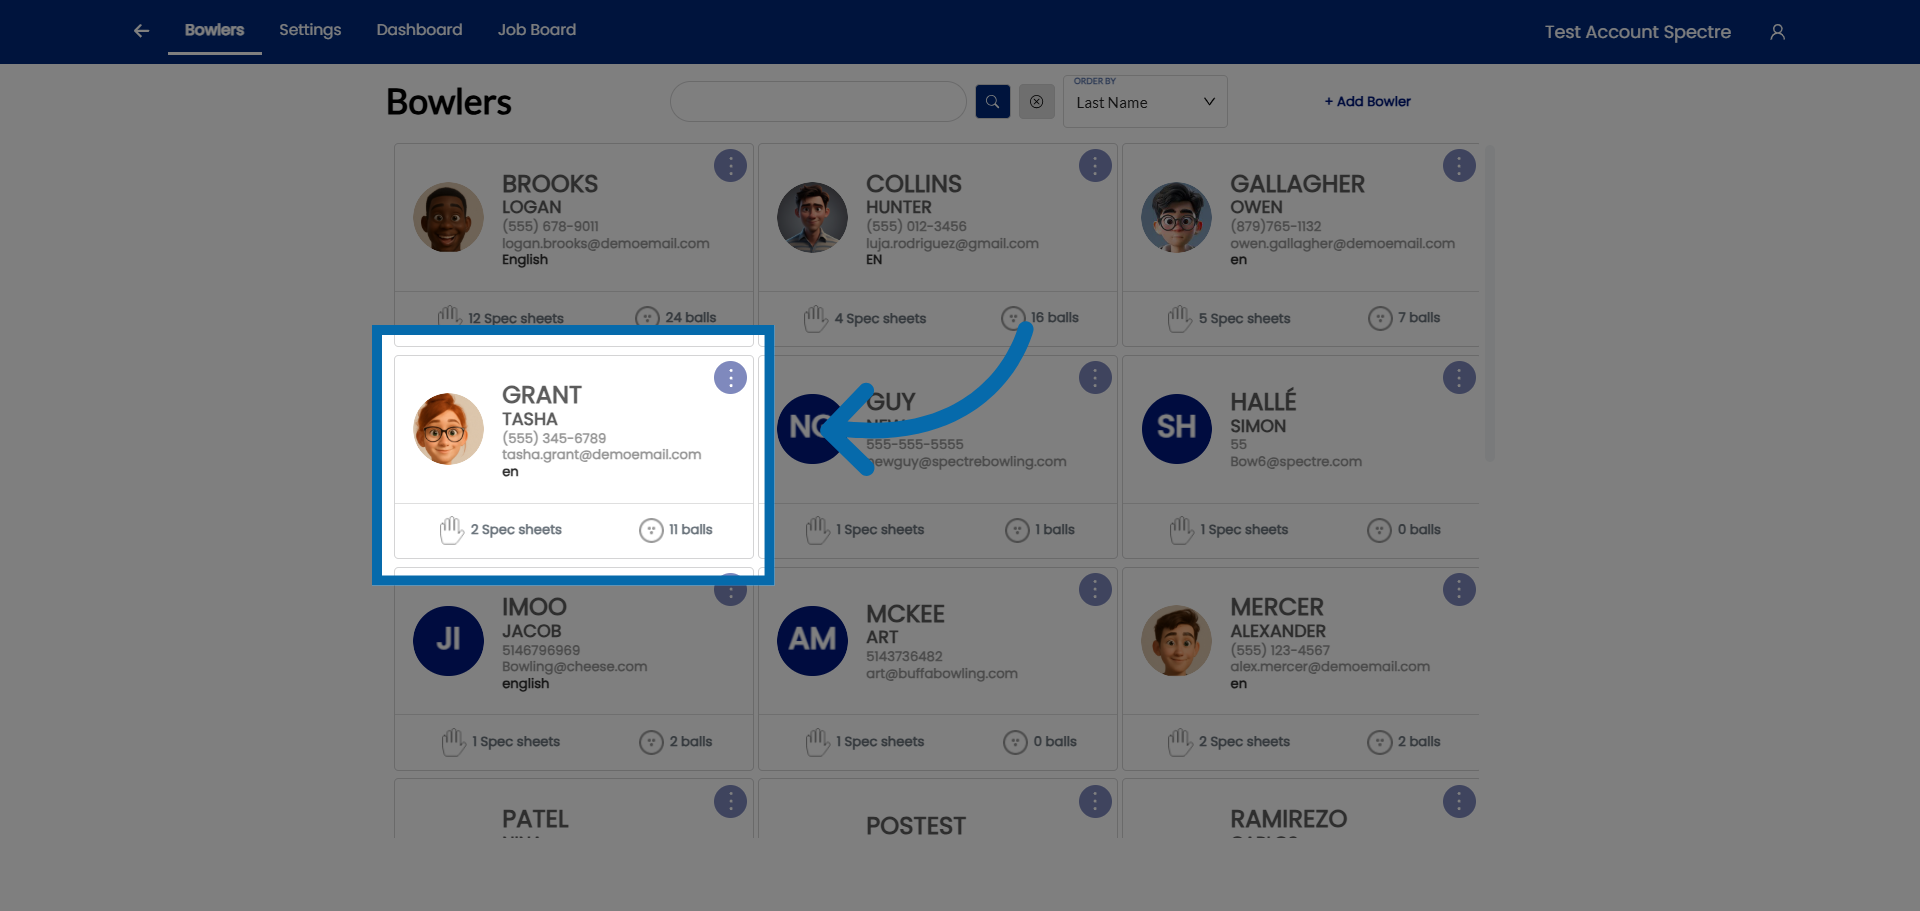
### 1. Access Bowler Section
Click "Bowlers" to open the bowler management section in Spectre Proshop Management.
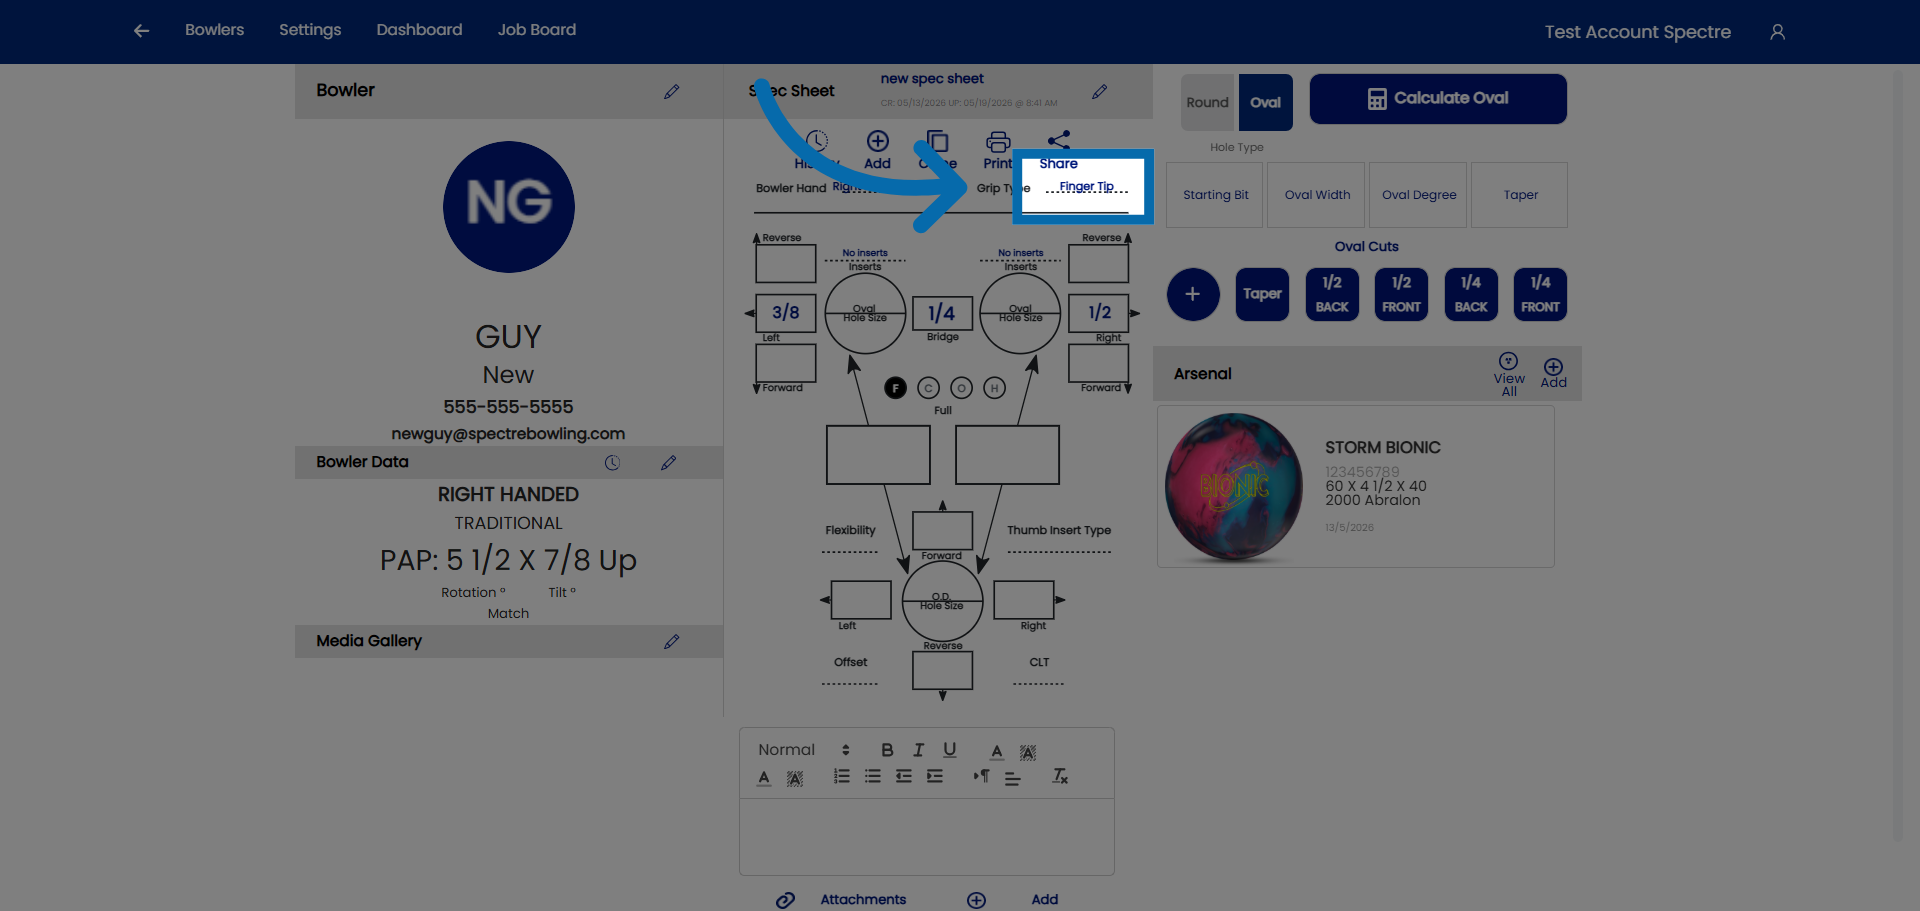
### 3. Click on grip type
Click here to access the grip type.
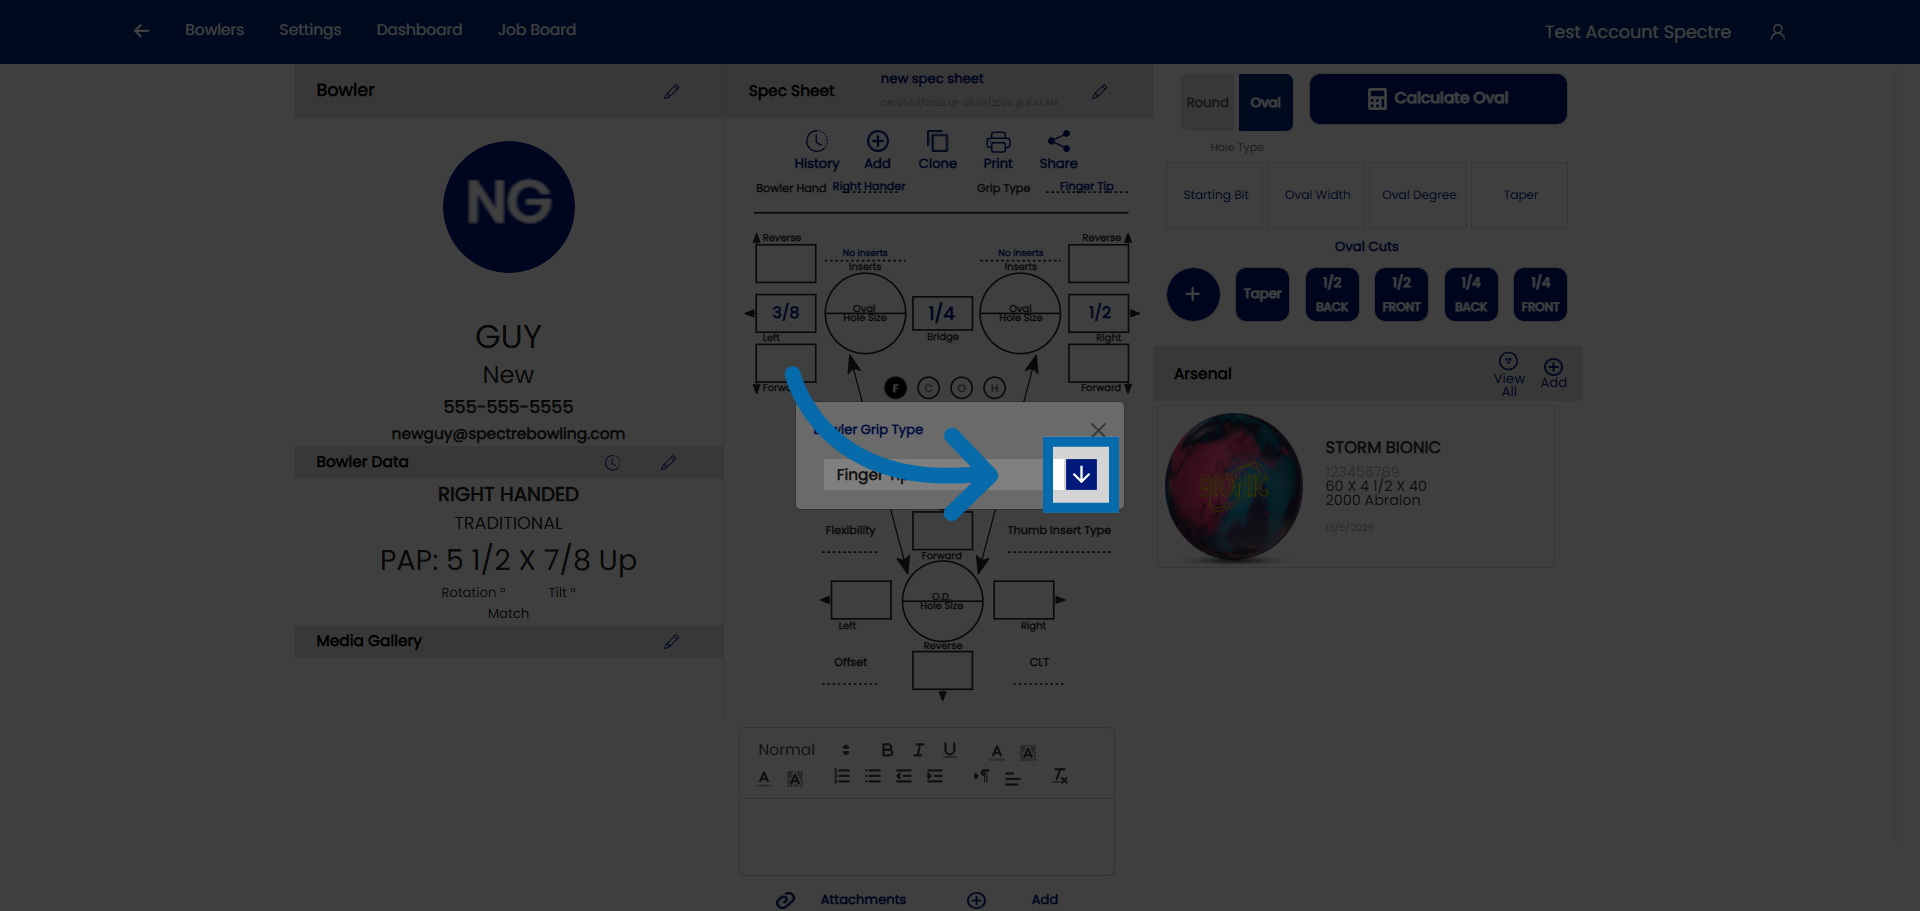
### 4. Click on the drop down
Click here to access the drop down.
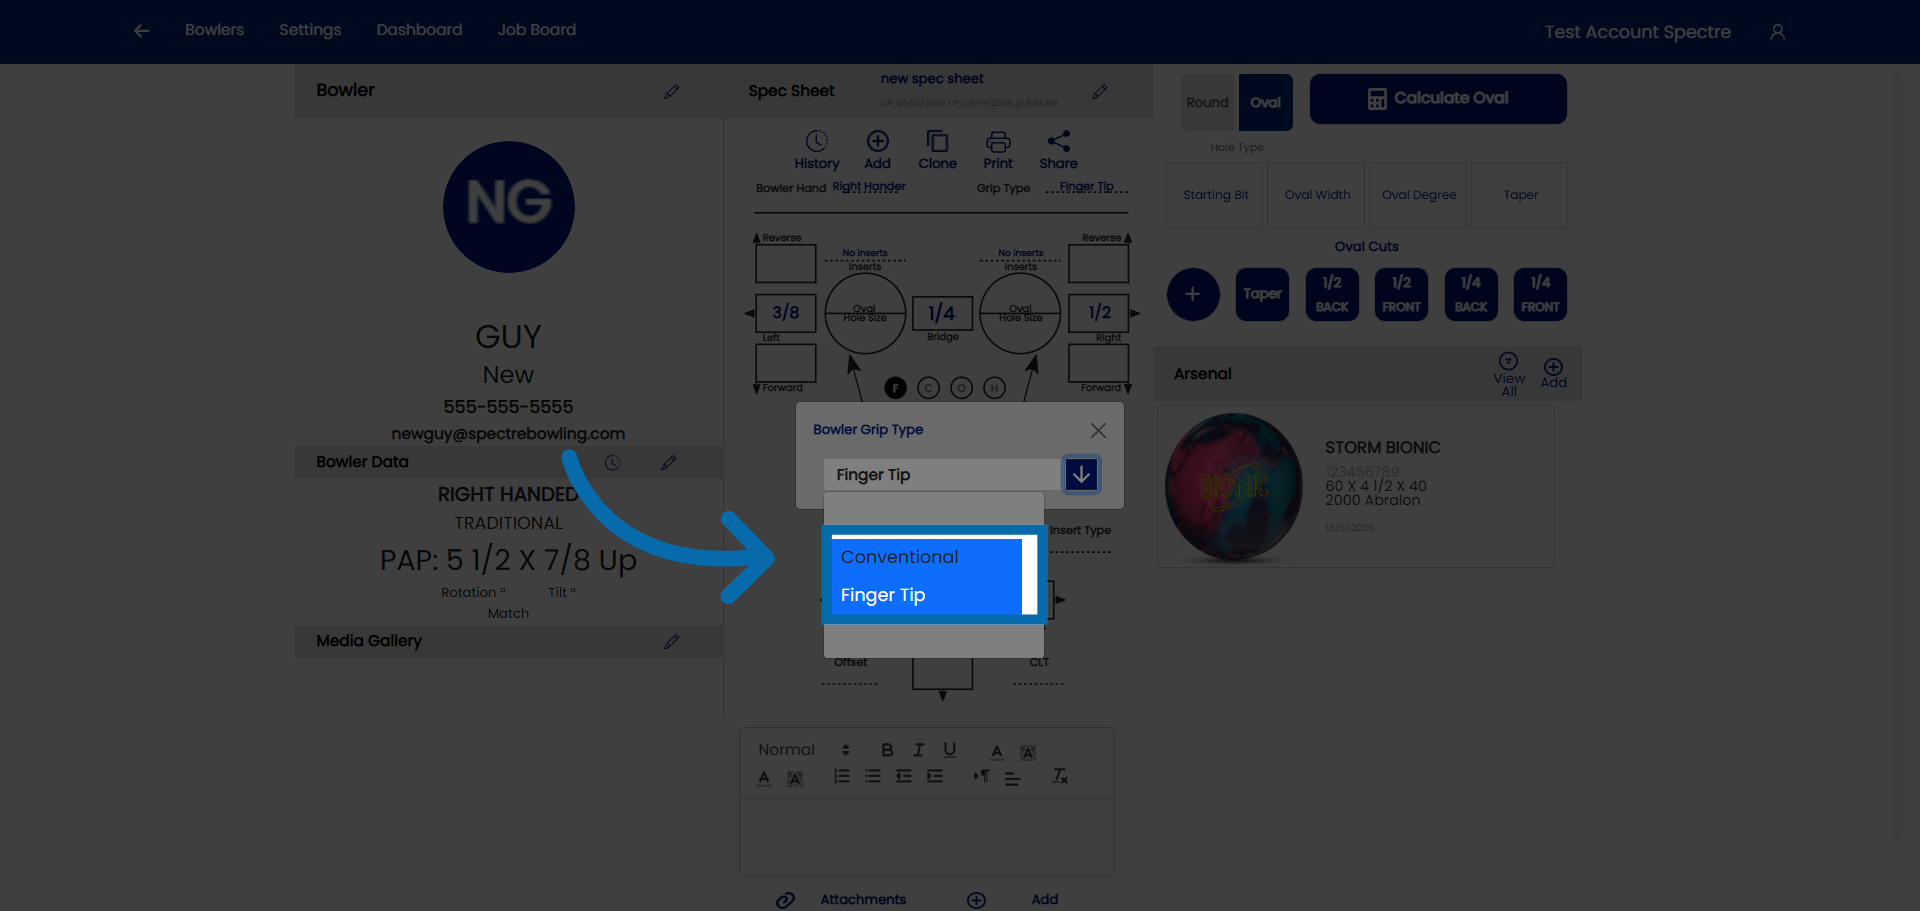
### 5. Select grip type
Select the grip type you would like.
# 4.2.4 How to identify the type of grip from measurement sheet
# How to identify the type of grip from measurement sheet
4.2.4step-by-step
Before entering span and pitch measurements into a spec sheet, you need to identify which **grip type** the bowler uses. The grip type determines how the fingers sit in the ball and directly affects which measurements are relevant. Most fitting sheets — whether handwritten, printed, or from a previous software system — record grip type either explicitly or implicitly through the measurements themselves.
## 🎳 The Three Standard Grip Types
Spectre Cloud supports the three IBPSIA-standard grip types. Understanding how each is defined helps you read any fitting sheet accurately.
Grip Type
Finger insertion depth
Typical bowler profile
**Conventional**
Fingers inserted to the second knuckle (middle joint)
Beginners, recreational bowlers, seniors, youth
**Fingertip**
Fingers inserted to the first knuckle (tip joint only)
Most competitive and league bowlers; the most common adult grip
**Semi-Fingertip**
Fingers inserted between the first and second knuckle
Transitioning bowlers; less common
**Note:** The overwhelming majority of adult league and competitive bowlers use a **fingertip grip**. If a fitting sheet does not explicitly state a grip type, fingertip is the most likely default for an adult bowler — but always confirm with the bowler directly.
## 📋 How to Read Grip Type from a Fitting Sheet
### 🔍 When grip type is stated explicitly
Many printed and digital fitting sheets include a dedicated **Grip Type** or **Style** field. Look for labels such as:
- ✅ `Grip: Fingertip` / `FT` / `F/T`
- ✅ `Grip: Conventional` / `Conv` / `C`
- ✅ `Grip: Semi-Fingertip` / `Semi` / `S/F`
When you see any of these, select the matching grip type in Spectre Cloud before entering span measurements.
### 🔍 When grip type is implied by span measurement style
Older or simpler fitting sheets may not label the grip type, but you can often infer it from **how the span is recorded**:
- ✅ A sheet with a single **span measurement** (e.g., `Middle: 4⅛"`, `Ring: 3⅞"`) and no further qualifiers typically indicates a **conventional grip** — the span is measured to the second knuckle.
- ✅ A sheet with span measurements labeled as **Full Span** (`F`) or with a separate **Cut-to-Cut** (`C`) or **Oval** (`O`) notation indicates a **fingertip grip** — these are the three span sub-types used exclusively for fingertip drilling.
- ✅ A sheet with inserts noted (e.g., `finger inserts: yes` or a specific insert size listed) almost always indicates a **fingertip grip**, since inserts are standard practice for fingertip bowlers.
- ❌ Semi-fingertip is rarely recorded on older sheets — if the span measurements seem unusually long for fingertip but short for conventional, flag it and confirm with the bowler.
### 🔍 When grip type is implied by pitch notation
Pitch values can also hint at grip type. **Conventional grips** typically record fewer pitch measurements or use zero/reverse pitches throughout. **Fingertip grips** commonly include forward pitch on the fingers (e.g., `¼" forward` or `½" forward`) to accommodate the shallower insertion depth.
**Tip:** Pitch alone is not a reliable indicator — many conventional bowlers use forward pitch and many fingertip bowlers use zero pitch. Use pitch only as a supporting clue, not a primary identifier.
## 🛠️ Selecting Grip Type in Spectre Cloud
1. Open the spec sheet you are creating or editing.
2. Locate the **Grip Type** selector in the spec sheet header or measurement section.
3. Choose `Conventional`, `Fingertip`, or `Semi-Fingertip` based on your reading of the fitting sheet.
4. Spectre Cloud will adjust the available span fields and IBPSIA auto-suggestion logic to match the selected grip type.
**Important:** Selecting the wrong grip type will cause span fields to mismatch the bowler's actual measurements and may produce incorrect IBPSIA auto-suggestions. If you are unsure, choose **Fingertip** as the default for adults and verify with the bowler at their next visit. *Verify with Spectre team: confirm the exact UI label and location of the grip type selector within the spec sheet form.*
## ✨ Tips for Transferring Legacy Fitting Sheets
- ✅ When importing data from handwritten cards or Ebonite ProShop Coordinator records, review grip type field by field — legacy systems used inconsistent abbreviations.
- ✅ If a bowler is getting a new ball drilled at the same time you are entering their history, confirm their grip type in person rather than relying solely on the old sheet.
- ✅ For youth bowlers whose hands have grown since their last fitting, treat all old grip and span data as a starting reference only — re-measure before drilling.
### Related Sections
- 4.2.3 — Selecting span type (F, C, O)
- 4.2.5 — Entering span measurements
- 4.2.6 — Entering pitch values
- 4.5 — IBPSIA auto-suggestions
**Tip:** Not sure which grip type a new walk-in bowler uses? Ask them to hold their hand flat and look at where their fingers naturally curl — fingertip bowlers typically have calluses or grooving at the first knuckle from years of fingertip use.
```
# 4.2.5 Cloning a spec sheet to preserve old measurements
# Cloning a spec sheet to preserve old measurements
4.2.5TIPstep-by-step
When a bowler returns to have a new ball drilled with the same layout and measurements as a previous ball, **cloning a spec sheet** saves time and prevents transcription errors. Instead of re-entering every measurement from scratch, you duplicate an existing spec sheet and then make only the changes needed for the new ball. The original spec sheet is never altered.
## 🔄 What Cloning Does
- ✅ Creates a complete copy of the selected spec sheet — including span, pitch, grip type, layout, and notes.
- ✅ Assigns today's date to the new sheet by default (editable before saving).
- ✅ Leaves the **Ball Name** field blank or pre-filled with the original name so you can update it for the new ball.
- ✅ Saves the clone as a separate, independent record — changes to the clone never affect the original.
- ❌ Does *not* automatically link the clone to an arsenal ball — that step is done separately if you use the Arsenal or Arsenal Plus features.
**Tip:** Cloning is also useful when drilling the same layout on two different balls for the same bowler simultaneously — clone first, then adjust only the ball name and any minor layout differences on each copy. *Verify with Spectre team: confirm whether the clone pre-fills the ball name or leaves it blank.*
## 🛠️ How to Clone a Spec Sheet
1. Open the bowler's profile by selecting them from the **Bowlers** list.
2. Navigate to the **Spec Sheets** tab for that bowler.
3. Find the spec sheet you want to clone. Use the date and ball name to confirm you have the right record.
4. Open the spec sheet, then select the **Clone** option — look for the clone or duplicate icon in the spec sheet action menu.
5. Spectre Cloud creates a copy and opens it for editing.
6. Update the **Ball Name** to reflect the new ball.
7. Update the **Date** if needed (defaults to today).
8. Edit any measurements, pitches, or layout details that differ from the original.
9. Save the cloned spec sheet.
**Note:** The clone action is available from both the spec sheet list view and the individual spec sheet detail view. *Verify with Spectre team: confirm exact label and location of the clone action (e.g., whether it is a button, a dropdown menu item, or a context menu icon).*
## 📋 What to Review After Cloning
Even when a bowler wants the "exact same" drilling, it is good practice to review every field before saving the clone. Measurements that worked well on a previous ball may need minor adjustments due to differences in the new ball's core, coverstock, or surface finish.
Field
Typical action after cloning
**Ball Name**
Always update — this is the primary identifier for the new record.
**Date**
Update if drilling on a different day than today.
**Span measurements**
Keep unless the bowler's hand has changed or a different span type is being used.
**Pitch values**
Keep unless adjusting for a different ball weight or finger insert change.
**Layout / drilling angles**
Update if the new ball has a different core that requires a layout adjustment.
**Notes**
Update to reflect the reason for the new drilling — e.g., `Cloned from Storm Phaze II. Adjusted VAL angle for asymmetric core.`
## ☁️ Cloning Across Devices
Because Spectre Cloud syncs in real time, a spec sheet cloned on one device is immediately available on all other logged-in devices. If you start a clone on a desktop workstation and then move to a tablet at the drill press, the record will be waiting for you without any manual transfer.
## ✨ Why Cloning Preserves Your History
One of the most common mistakes when re-drilling a bowler is accidentally overwriting or editing the old spec sheet instead of creating a new one. Cloning prevents this by design — the original record is **read-only from the perspective of the clone operation**. Your complete drilling history for each bowler remains intact, which is valuable for:
- ✅ Reviewing what layouts have worked for a bowler over time.
- ✅ Explaining past decisions to a bowler who wants to understand their history.
- ✅ Reverting to a previous layout if a newer drilling is not performing as expected.
- ✅ Providing accurate records if a bowler transitions to another pro shop and requests their fitting history.
### Related Sections
- 4.2.2 — Naming a spec sheet (ball name, date, notes)
- 4.2.1 — Creating a new spec sheet
- 4.4 — Viewing spec sheet history for a bowler
- 7.1 — Arsenal overview (linking cloned spec sheets to arsenal balls)
**Tip:** Get into the habit of updating the **Notes** field on every cloned sheet with a brief reason for the new drilling. Over time, these notes become a valuable record of a bowler's equipment evolution and make it much easier to have informed conversations about future ball choices.
```
# 4.2.6 Printing a spec sheet
# Printing a spec sheet
Once a spec sheet is complete, you can print it directly from Spectre Cloud to use at the drill press, hand to a colleague, or file for your records. Spectre Cloud generates a clean, formatted printout that includes all measurements, layout details, and notes for the selected spec sheet.
## 🖥️ How to Print a Spec Sheet — Desktop
1. Open the bowler's profile and navigate to their **Spec Sheets** tab.
2. Open the spec sheet you want to print.
3. Select the **Print** option — look for the print icon or button in the spec sheet action menu.
4. Spectre Cloud opens a print-ready view of the spec sheet in your browser.
5. Your browser's standard print dialog will open. Select your printer, adjust page size if needed, and confirm.
**Tip:** For best results, use **portrait orientation** on standard letter (`8.5" × 11"`) or A4 paper. If the layout looks crowded, check that your browser's print scale is set to `100%` or **Fit to page**. *Verify with Spectre team: confirm recommended paper size and whether a specific scale setting is advised.*
## 📱 How to Print a Spec Sheet — Mobile / Tablet
1. Open the bowler's profile and navigate to their **Spec Sheets** tab.
2. Open the spec sheet you want to print.
3. Tap the **Print** icon in the spec sheet action menu.
4. Your device's share or print dialog will open. Select a printer connected to your network, or choose **Save as PDF** to create a digital copy.
**Note:** Printing from a smartphone is most reliable when the device is connected to a **network-enabled printer** (AirPrint on iOS/iPadOS, or a compatible printer on Android). A minimum **8" screen** is recommended for comfortable use of Spectre Cloud — for printing workflows, a tablet is preferable to a phone. *Verify with Spectre team: confirm whether the mobile print action triggers the browser's native print dialog or a Spectre-specific share flow.*
## 📋 What Appears on the Printout
The printed spec sheet includes all the information entered in Spectre Cloud for that record. Typical fields on the printout include:
- ✅ Bowler name and contact reference
- ✅ Ball name and drill date
- ✅ Grip type and span type (F, C, or O)
- ✅ Span measurements for middle and ring fingers
- ✅ Pitch values (forward, reverse, lateral) per finger and thumb
- ✅ Layout / drilling angles
- ✅ Oval measurements (if applicable)
- ✅ Notes field content
- ✅ Pro shop name (pulled from your **Profile** settings)
*Verify with Spectre team: confirm the exact fields included on the printed output, and whether the pro shop logo (if uploaded) appears on the printout.*
## 💾 Saving as a PDF Instead of Printing
If you do not need a paper copy, saving the spec sheet as a PDF is a clean way to archive it, email it to a bowler, or store it alongside a digital job record.
- ✅ On **Windows**: in the browser print dialog, select `Microsoft Print to PDF` or `Save as PDF` as the destination.
- ✅ On **macOS**: in the print dialog, click the **PDF** dropdown in the bottom-left corner and choose `Save as PDF`.
- ✅ On **iOS/iPadOS**: tap **Share** → **Print**, then pinch out on the preview to open it as a PDF in the Files app.
- ✅ On **Android**: select `Save as PDF` from the printer list in the print dialog.
## 🔌 Printing and the Job Board Plugin
If your shop uses the **Job Board** plugin, spec sheet printing integrates with your workshop workflow — you can print a spec sheet directly from an open job card without navigating back to the bowler's profile. This keeps the drill press queue moving without switching between sections of the app. *Verify with Spectre team: confirm whether Job Board has its own print trigger on the job card view.*
## ✨ Tips for a Clean Printout
- ✅ Make sure the spec sheet is **fully saved** before printing — unsaved changes will not appear on the printout.
- ✅ If your browser is adding unwanted headers or footers (URL, date, page number), disable them in your browser's **More settings** or **Headers and footers** option in the print dialog.
- ✅ For shops that print frequently, consider bookmarking the bowler list or keeping a dedicated browser tab open to speed up the print workflow.
- ✅ Chrome and Edge generally produce the most consistent print output across platforms — if a printout looks misformatted in another browser, try printing from Chrome.
### Related Sections
- 4.2.2 — Naming a spec sheet (ball name, date, notes)
- 4.2.5 — Cloning a spec sheet to preserve old measurements
- 4.4 — Viewing spec sheet history for a bowler
- 8.1 — Profile settings (pro shop name and logo)
- Book 07 — Job Board plugin
**Tip:** Saving spec sheets as PDFs and storing them in a shared folder (Google Drive, Dropbox, or a network drive) gives your whole team instant access to drilling records even when Spectre Cloud is not open in front of them.
```
# 4.2.7 Cloning an existing spec sheet
###
### 1. Open Bowler Profile
Select a bowler you would like to clone their spec sheet
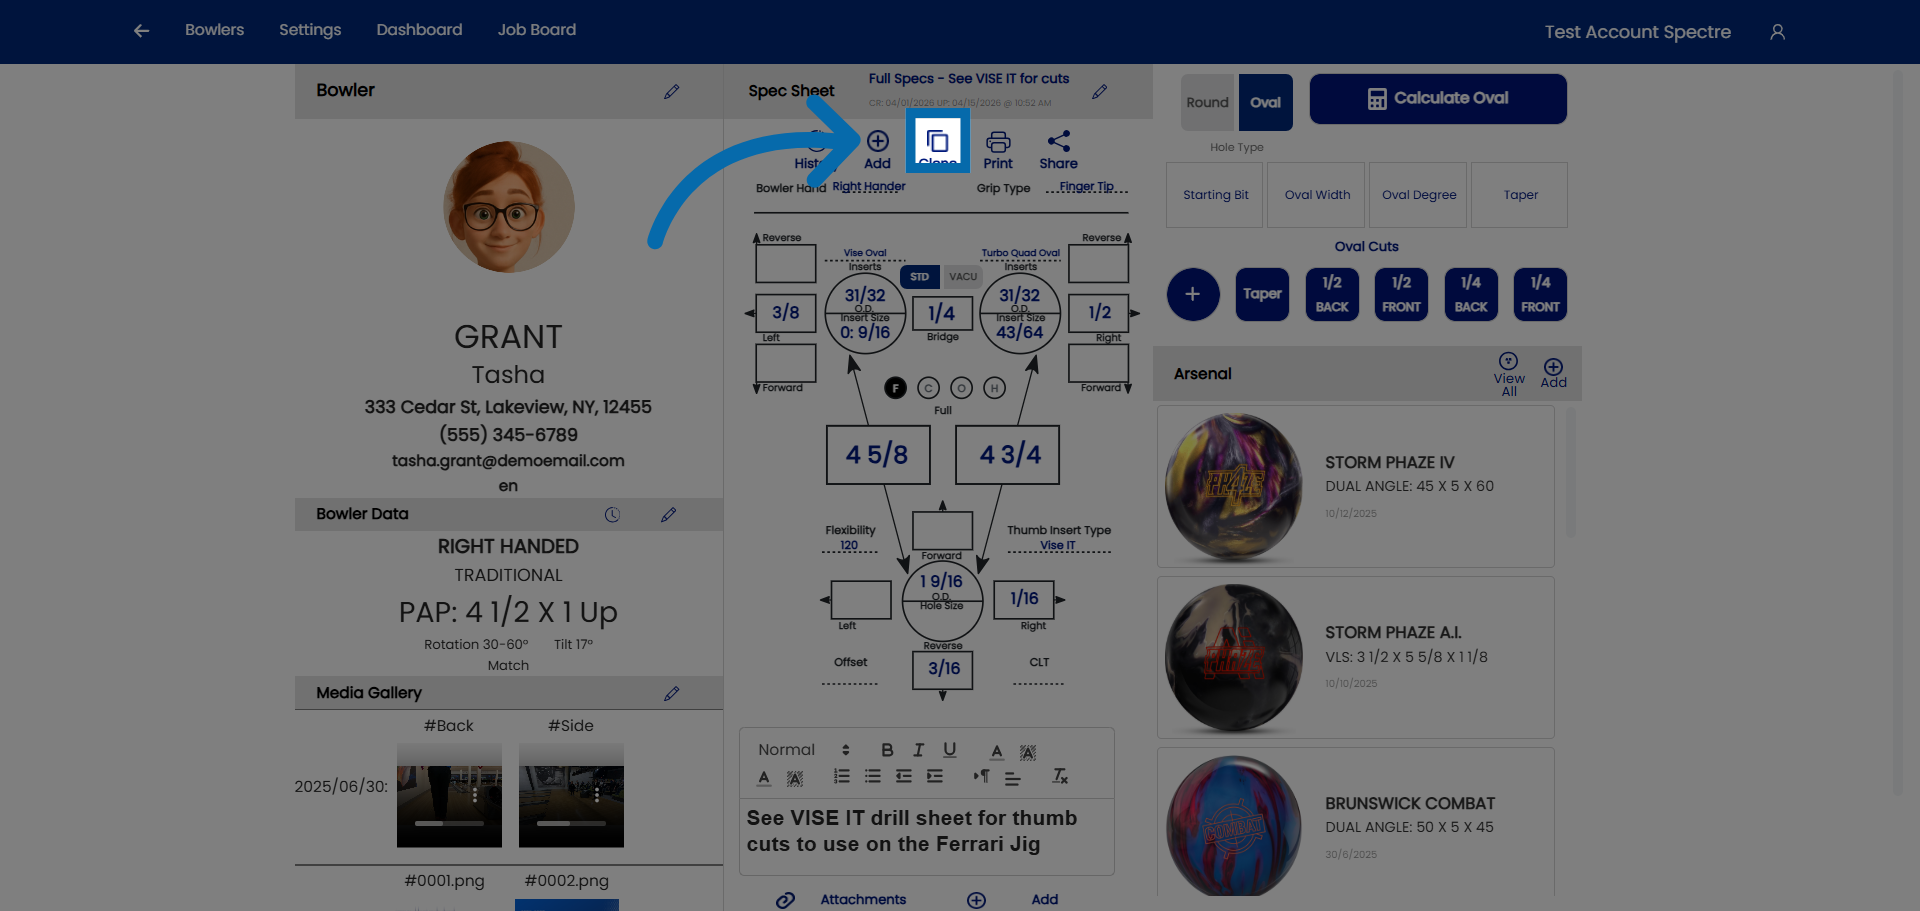
### 2. Hit the CLONE button
Click here to create a clone of the default spec sheet.
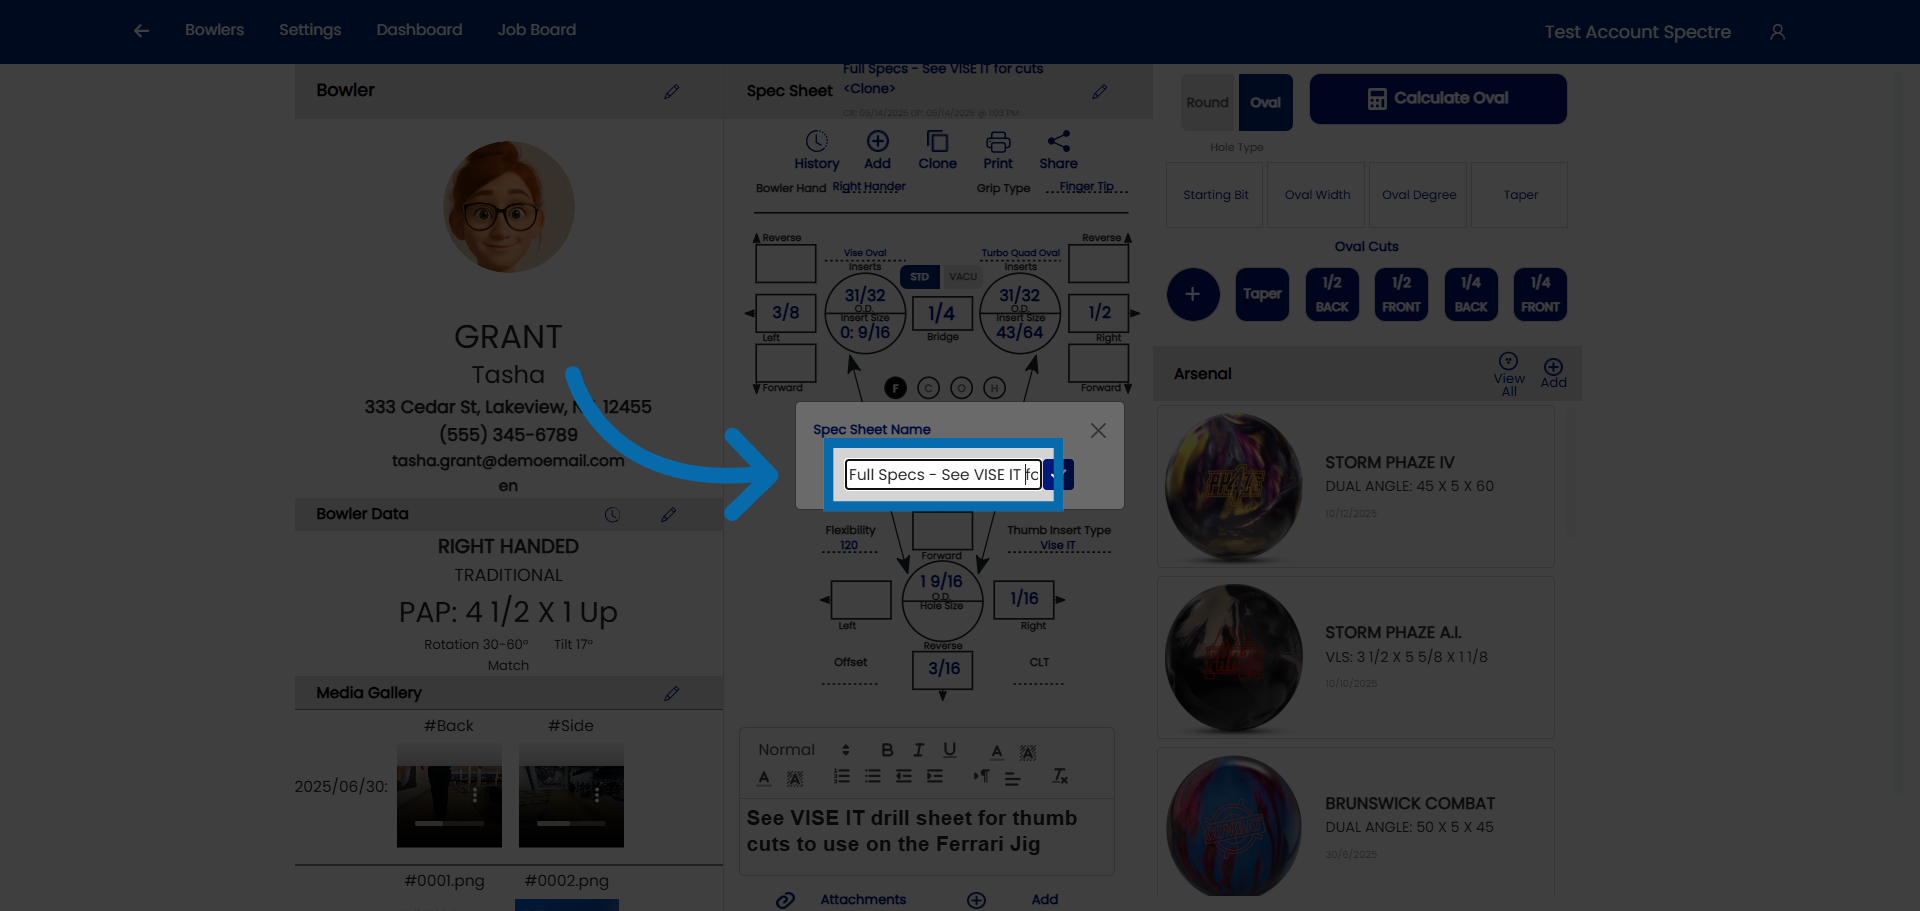
### 3. Give the cloned sheet a specific name
Click "Spec Sheet Name" to name the clone of the spec sheet.
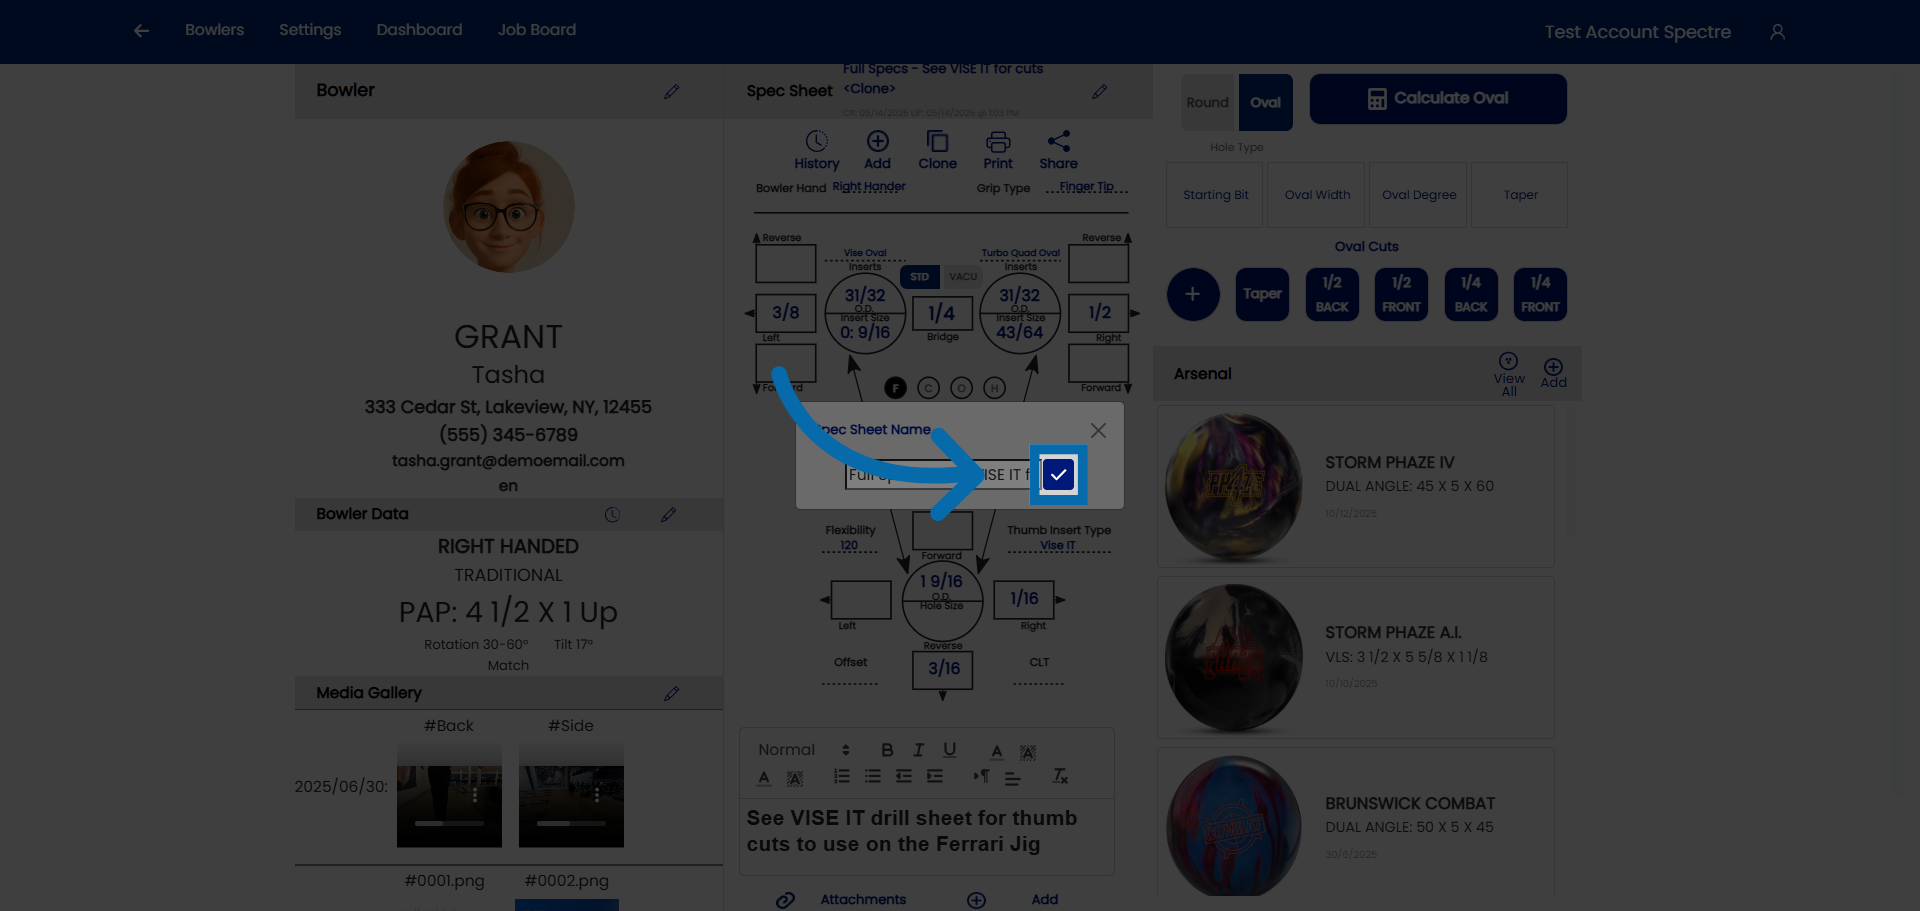
### 4. Confirm name
Once you have renamed the spec sheet, click here to confirm.
### 4. Modify the necessary fields
You can now proceed to make modifications to the bowler's specs.
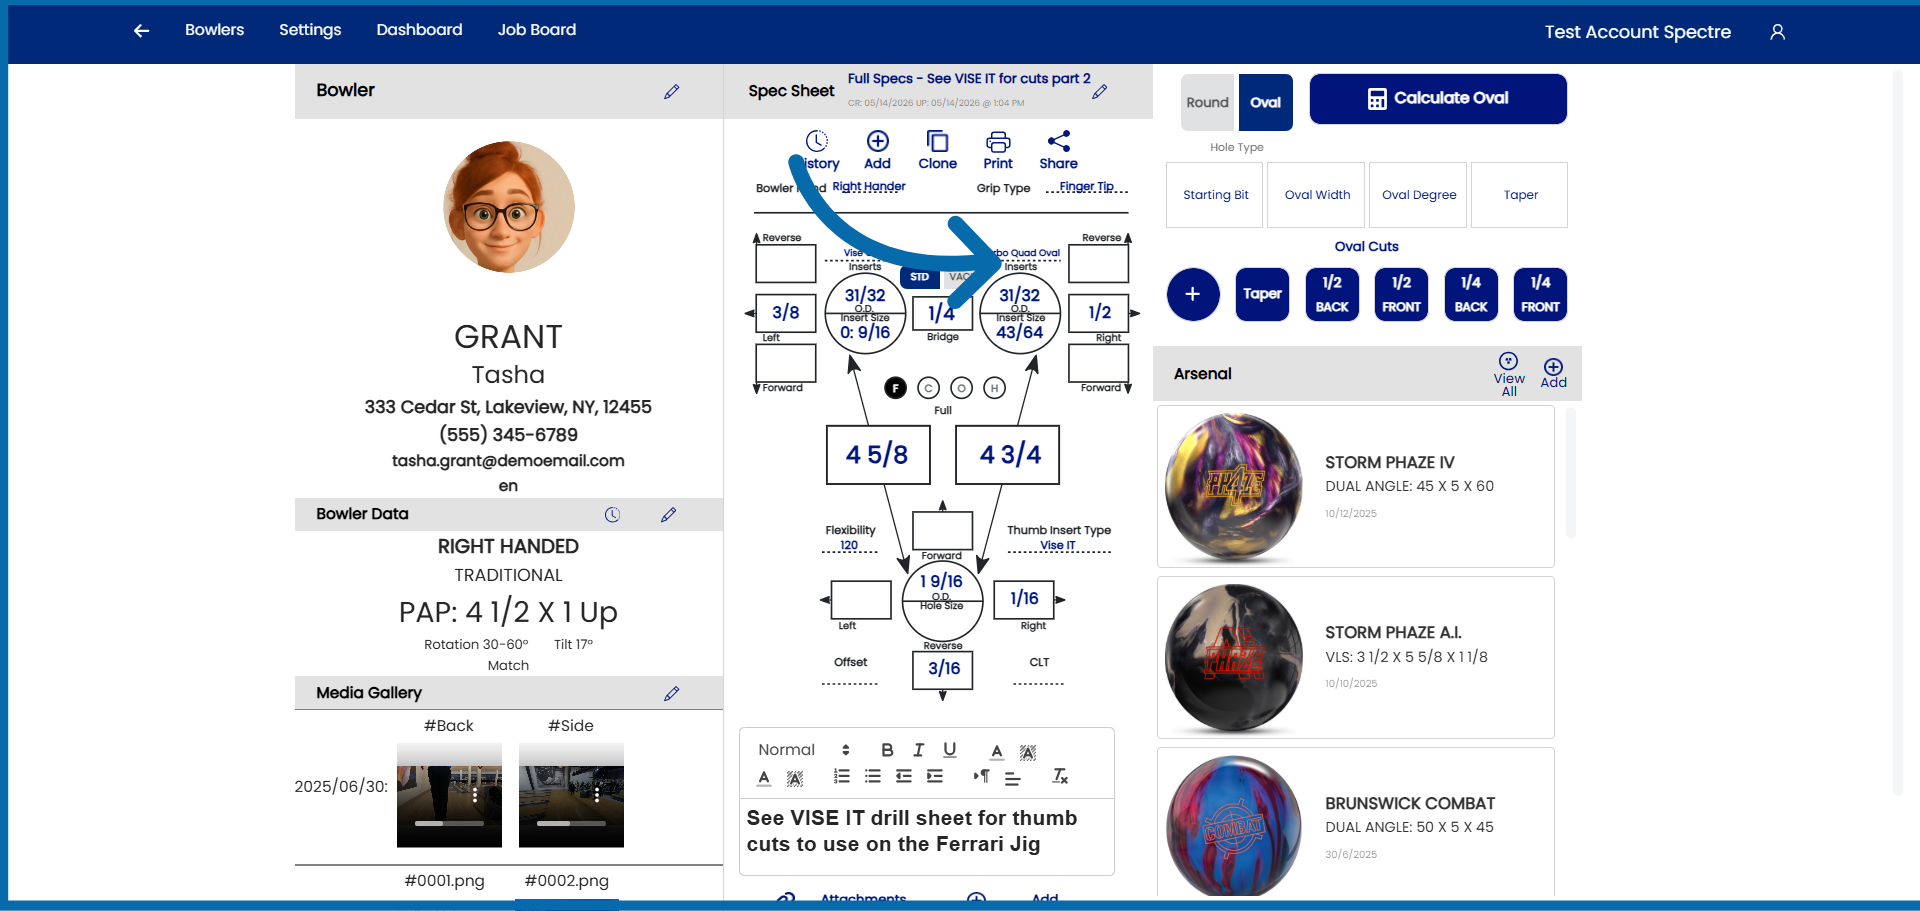
You have successfully created a clone spec sheet for an already existing bowler